The crown stitch is most likely a modern-day stitch for in thorough researching, I could find no references to it prior to the mid-1900s, and it's infrequently cited in modern-day embroidery books. Surprisingly, there seem to be no additional names for this simple stitch. The crown stitch is basically a fly stitch with the additional two straight stitches that further anchor the top-loop leg. The three tails of this stitch may vary greatly in length, giving the overall appearance of the stitch great variety. Generally, however, the center tail is longer than the two side tails.
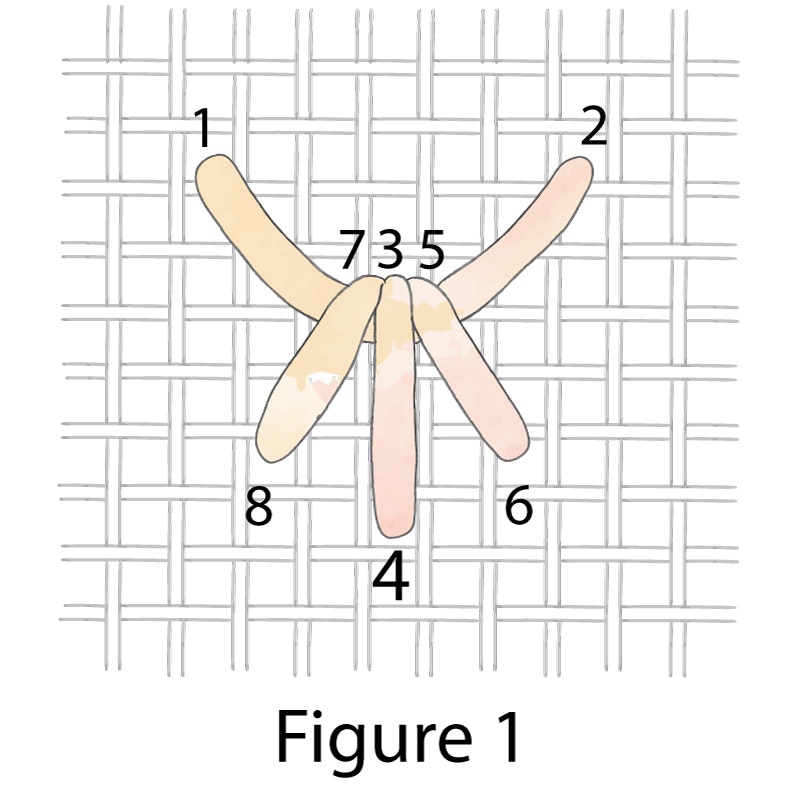
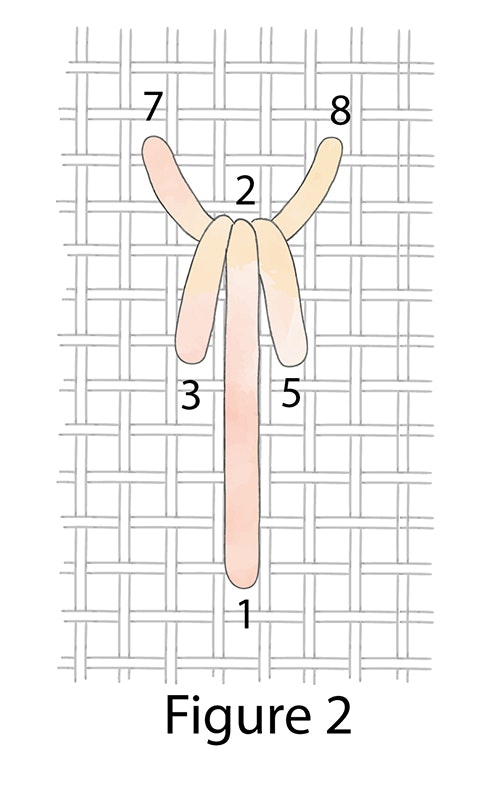
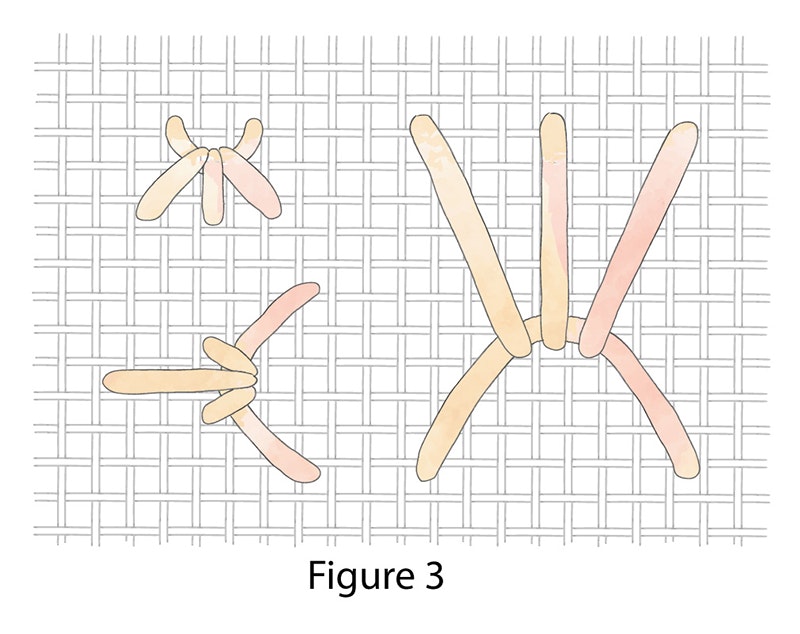
The crown stitch can be sewn, using several different stitch sequences that result in the same final appearance. For the first example, stitch a regular fly stitch and then add a single straight stitch to each side of the center tail (Figure 1). For the second example, stitch the three straight stitch tails first (in any order and length) and then finally weave the loop stitch under all three tails (Figure 2). Keep the tension somewhat loose for the upper-looping stitch leg, so that it remains in a gentle curve and not at an acute angle. Choose the sequence you find easier or the one that gives you the better final appearance. Personally, I prefer the first stitching sequence because I find it's easier and quicker and I have better control over the loop stitch. The only crown-stitch variations that I could find involved the length and angle of the tails, width of the overall stitch, and the final positioning of the completed stitches relative to each other (Figures 3, 4, 5, 6).
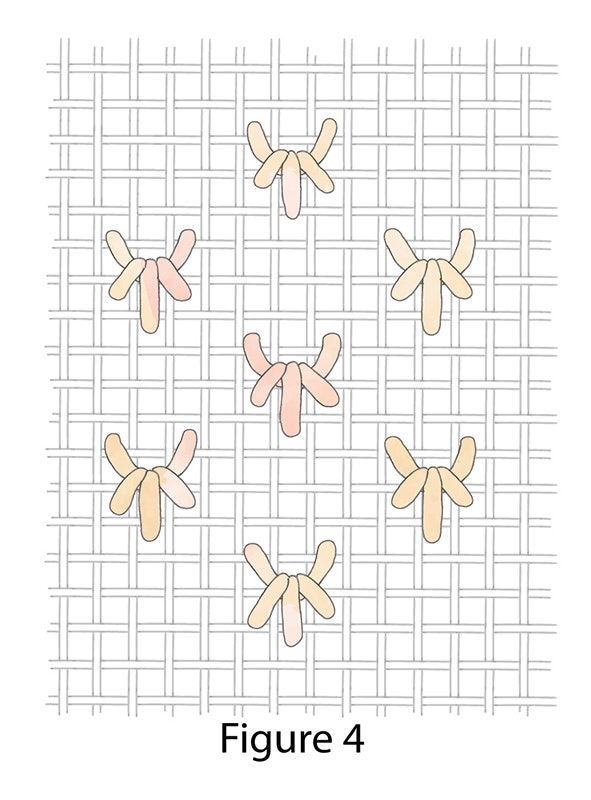
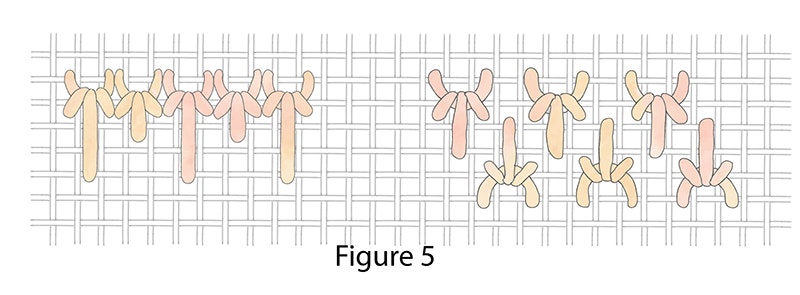
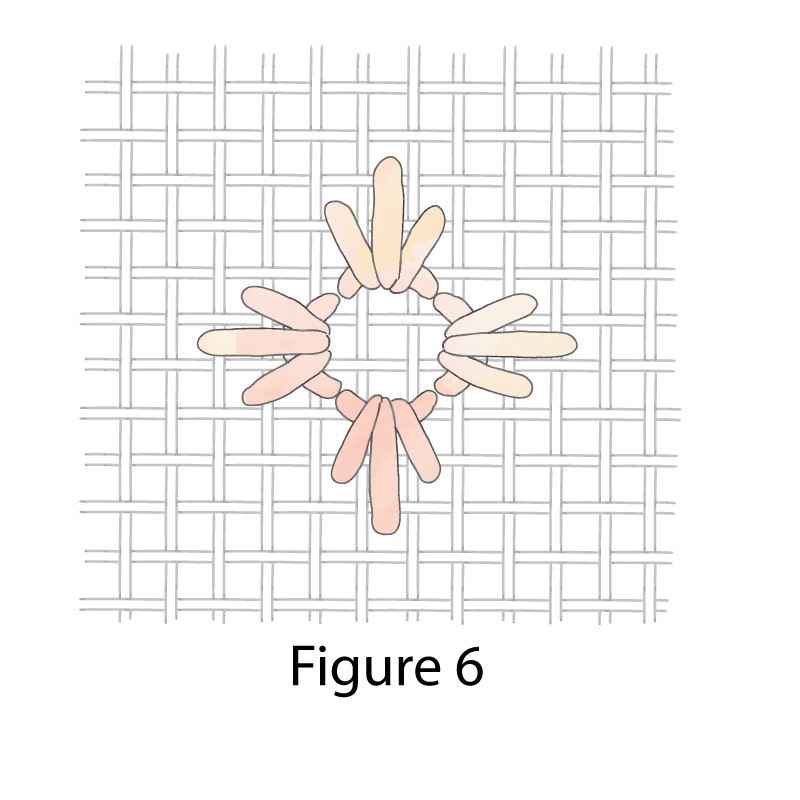
The crown stitch can be worked in a random or organized, scattered pattern, called “powdering,” and can be used to fill a motif or overall background (Figure 4). It can also be arranged in distinct horizontal or vertical rows, forming bands or borders (Figure 5). Clustered groupings can form floral-like or snowflake patterns (Figure 6). Each crown stitch can be isolated from or touching its neighbor when stitched in rows or clusters (Figures 4, 5, 6).

A lovely Adam and Eve sampler, designed by Donna Yuen and stitched by Deanna Hall West, is included in the July/August 2002 issue of PieceWork. Photo by Joe Coca.
Most types of thread or yarn—cotton or synthetic floss, wool needlepoint or crewel yarns, silk threads and ribbons, metallic threads, and various weights of pearl cotton—can be used as long as it can be stitched through the fabric or canvas background. The list is endless and continually expanding with newly released threads and yarns. The thread selection is dependent upon the size of the stitch, distinctive appearance, and thread count and weight of the background fabric desired. Almost any type of background fabric may be used: evenweave or nonevenweave, loosely or tightly woven, high or low thread count. Coordinate the needle size and type with the fiber and fabric used. The simple crown stitch can be enhanced by sewing it in multiple colors and thread types. The fly stitch portion could be sewn in one color and thread type and the two tails in another color or thread type; have fun experimenting for unusual effects.
Try the crown stitch. It's an easy and very versatile stitch that can be used for counted thread, needlepoint, or surface embroidery.
—Deanna Hall West
We are thrilled to welcome Deanna Hall West back to our A Stitch in Time blog posts. View the entire series here. Enjoy! —Editor
Deanna Hall West is PieceWork’s needlework technical editor; previously, she was the editor of The Needleworker magazine.
Featured Image: Scissors and needle case courtesy of Loene McIntyre. Photo by Joe Coca.