https://pieceworkmagazine.com/cdn-cgi/image/format=auto/https://www.datocms-assets.com/75076/1661198040-glorious-gloves-to-knit-header.jpg?auto=format&w=900
Liturgical gloves are highly colored ornamental gloves created for ceremonial use by senior churchmen in Europe, dating from later medieval times onward. A significant number of these have survived, and virtually all are finely knitted in silk. There are many examples in museums and other collections in Europe and the United States, including the Museum of Fine Arts in Boston, Massachusetts, and the Glove Collection Trust housed in the Fashion Museum in Bath, England. Each glove (or pair of gloves) is unique, but they do share common features—most are finely crafted and richly ornamented, including the use of religious symbolism, sometimes with knitted patterns and sometimes embroidered. They are often embellished with braid, lace, tassels, and fringe. Some have ornate gauntlets, which are sometimes trapezoid in shape, and many have a religious symbol on the back of the hand.
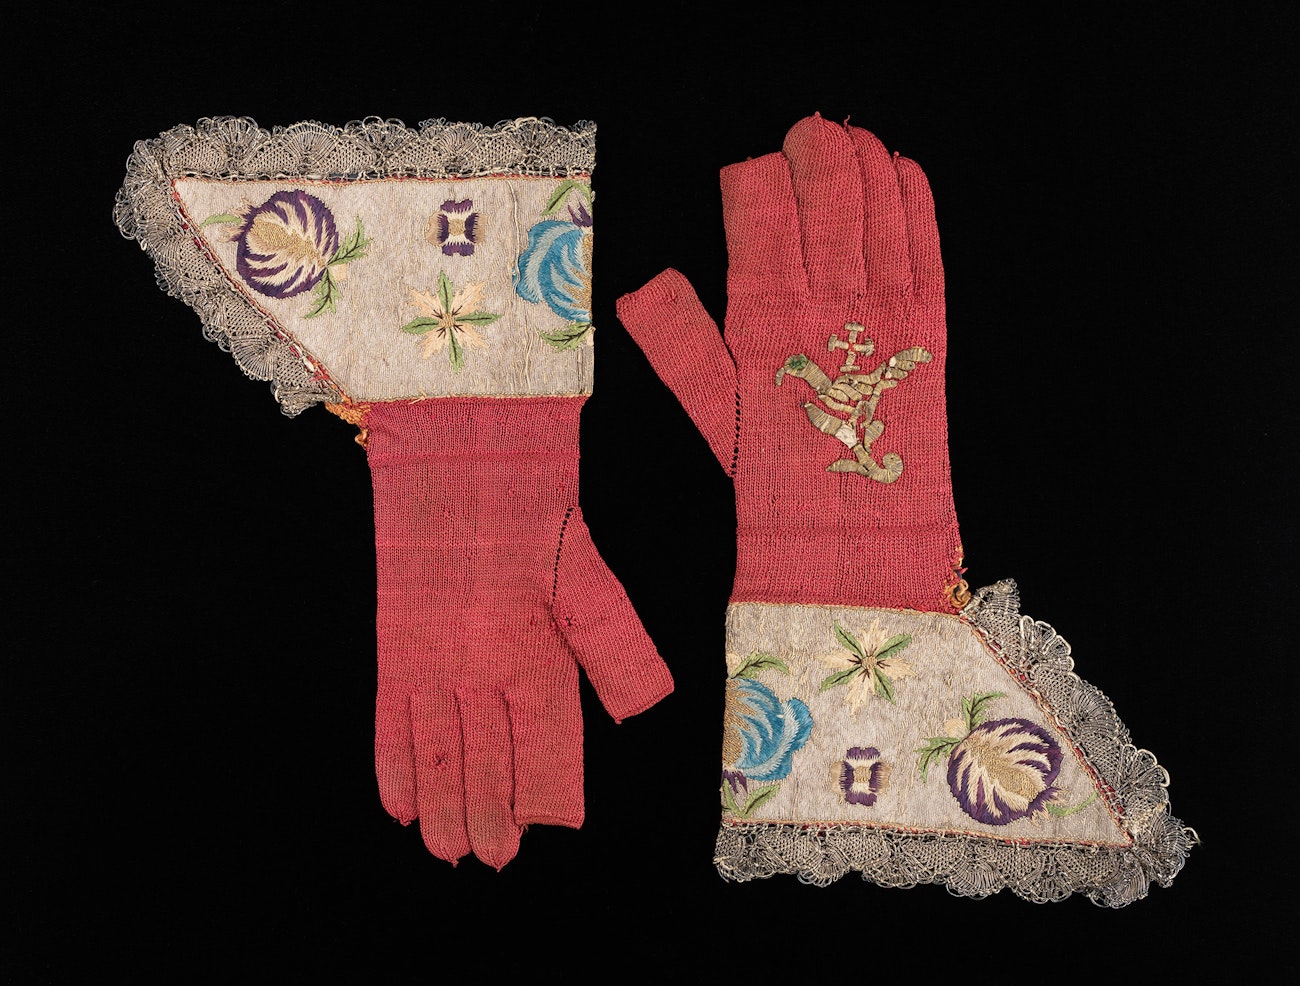 Bishop’s gloves, Spanish, first quarter of the seventeenth century (2009.300.1648a, b). Knitted in silk with gold metallic embroidery. Courtesy of the Metropolitan Museum of Art, New York
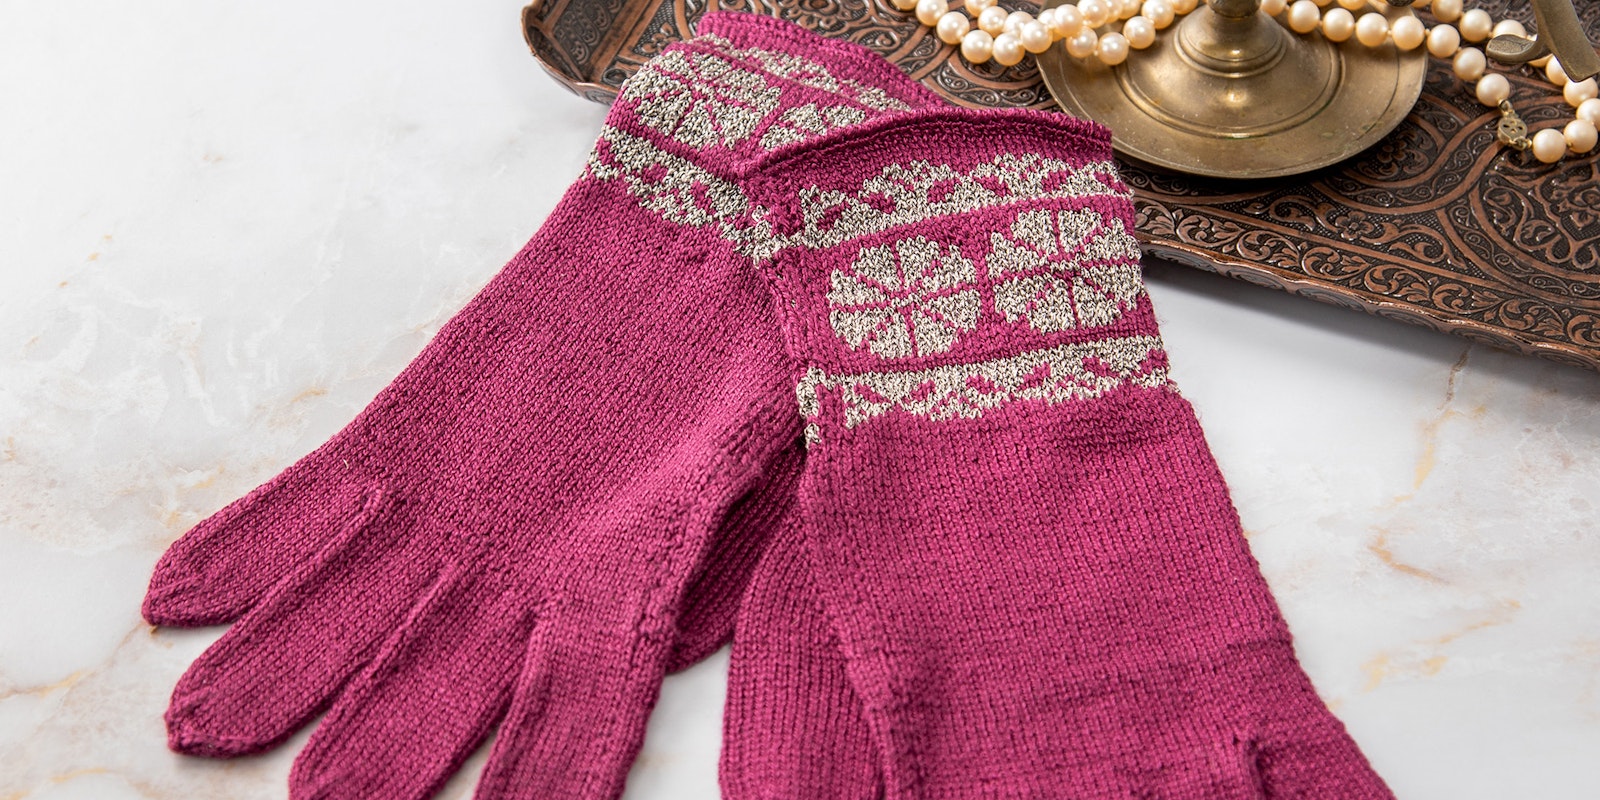
Inspired by the highly ornate liturgical gloves that remain in museum collections today, these silk and metallic gloves could be worn with formal outfits or for special occasions. While fine, the pure silk yarn used for the body of this pair of gloves is not as fine as the yarns used historically. The metallic thread is also not as fine; threads of that type are no longer produced for common consumption today. However, the yarns used here suggest the grandeur of the “glorious gloves” and have the advantage of being more easily knitted, worn, and cared for. Working with fine yarns can provide insight into the level of skill required to make the magnificent historic examples of the knitter’s craft.
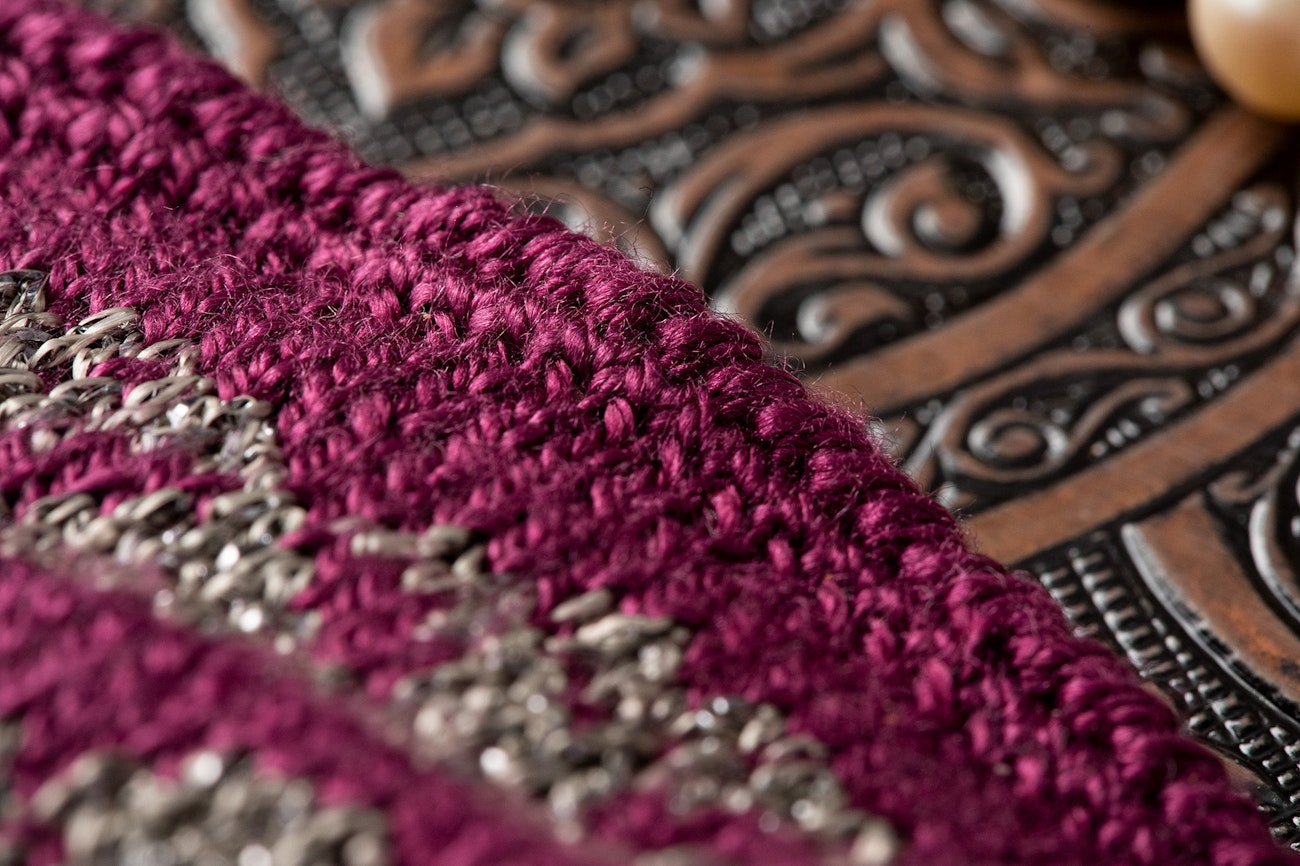 Crab stitch finishes the cuff edge to reduce rolling.
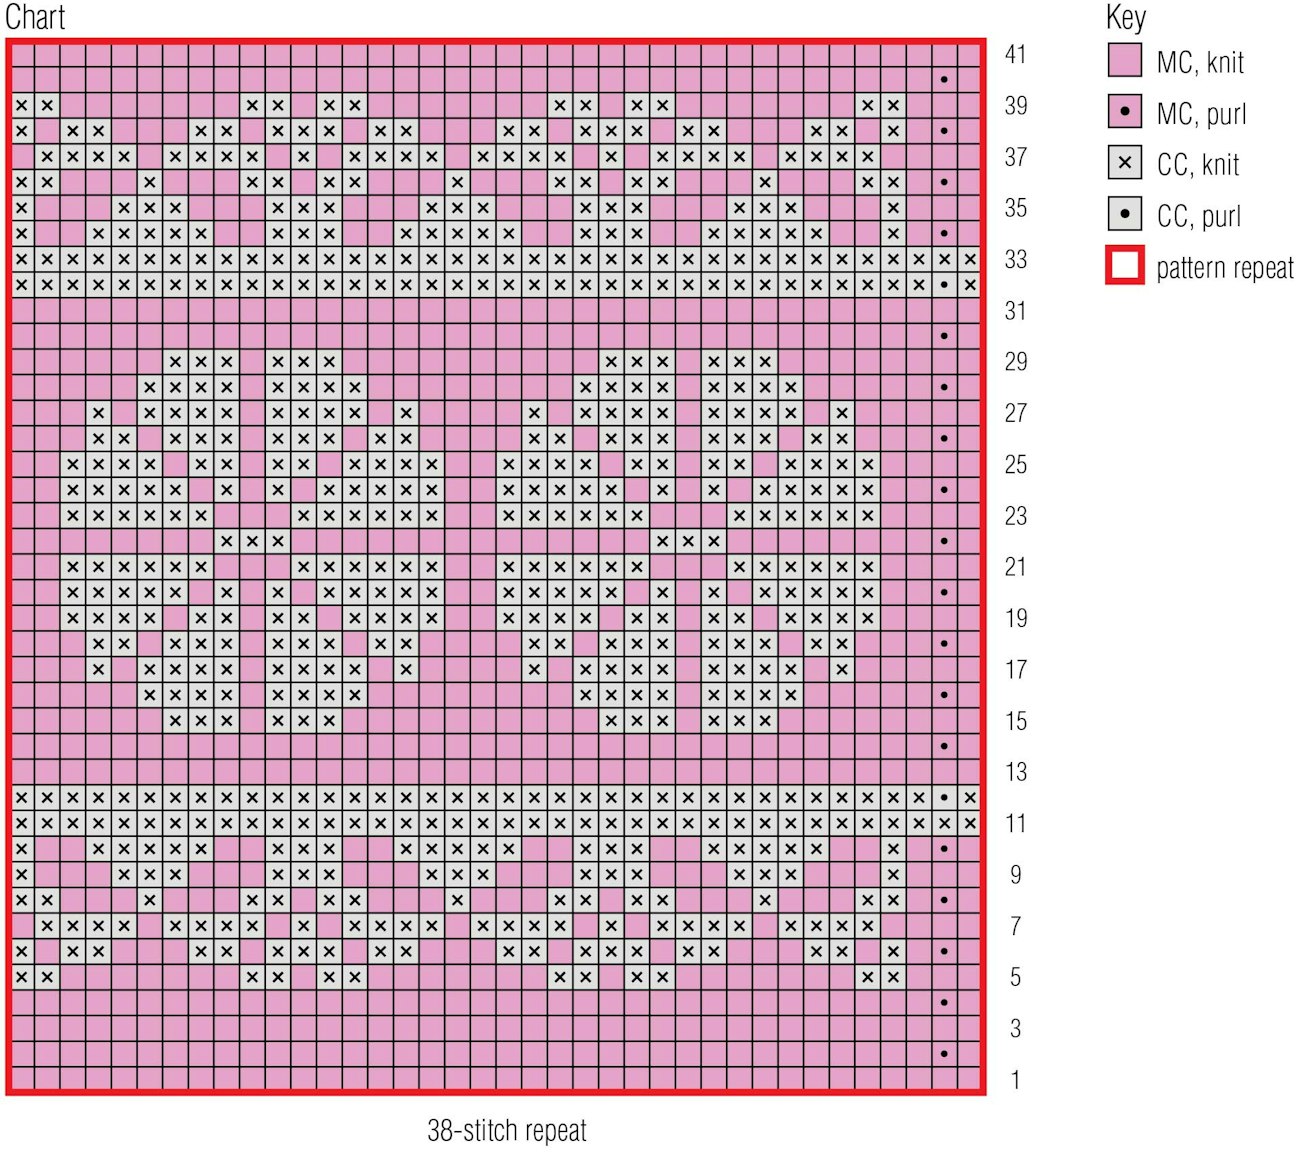
The cuff patterns were adapted from two examples of gloves in British collections; the smaller border is found on a pair of liturgical gloves in Manchester, while the larger octagons are found on the cuffs of one of three pairs that are in the Victoria and Albert Museum in London. Other patterns could be substituted.
The main color selected is Bordeaux, a rich wine red, but the yarn is available in many colors, all suitable. The metallic thread here is Gunmetal, which has luster without too much bling. It is also available in a wide range of shades. This silk yarn has very little elasticity, so the two yarns must be stranded loosely in the colorwork cuff because the fit is snug. The chart includes sections where the unused yarn will be carried across the back of the work for more than six stitches; you may prefer to trap it with the working yarn to prevent long floats.
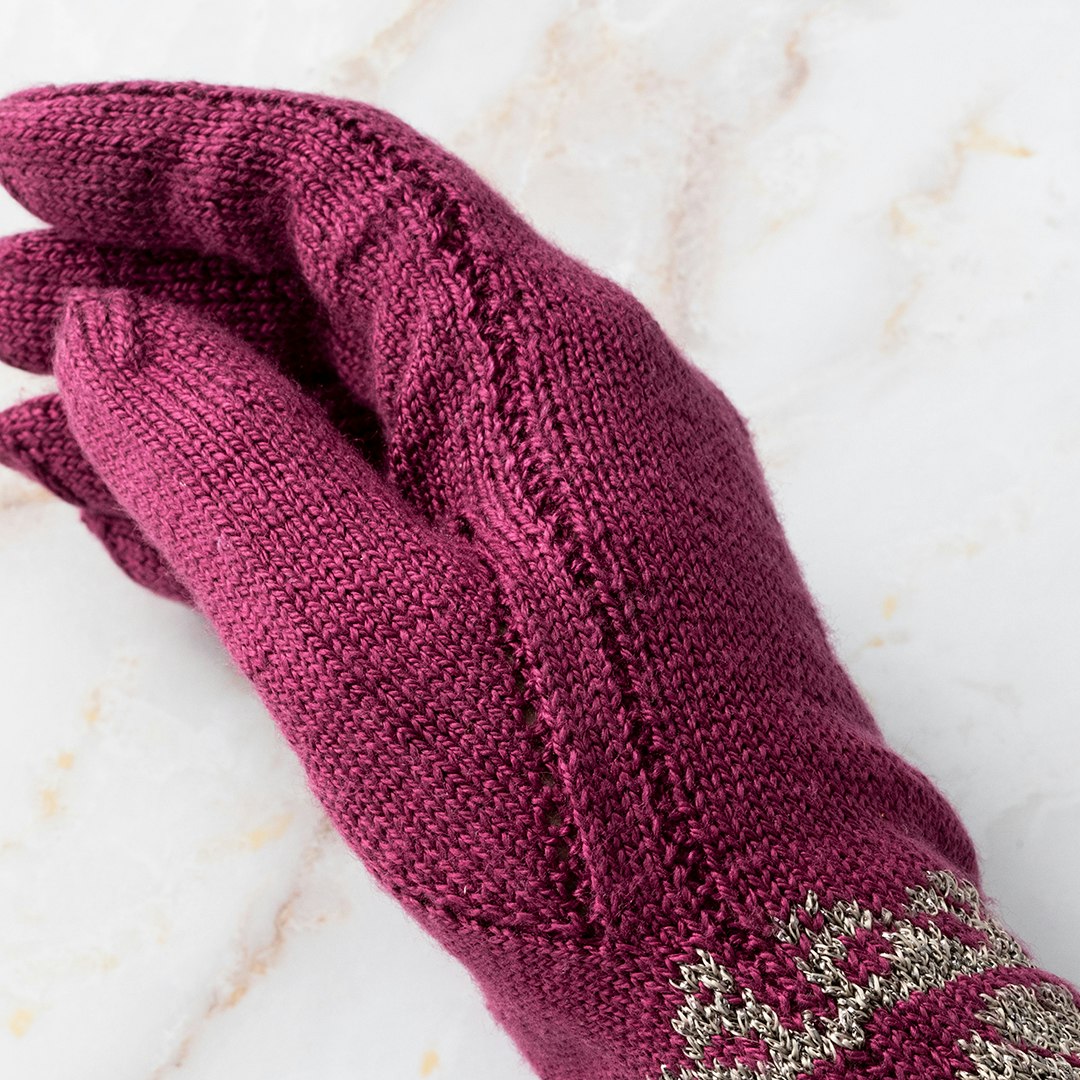 Like many extant examples, these gloves feature a “seam” of alternating knit and purl stitches on the outside edges of the hands.
As found on many liturgical gloves, a one-stitch “seam” column of alternating knit and purl stitches runs up the sides of the hands, continuing up the outside of the index and little fingers. This can be omitted if preferred.
The lower edge of the cuff is finished with a round of reverse single crochet or crab stitch, which prevents it from curling, but many of the original gloves have a curled bottom edge. As with many historical examples, the cuff edges could be trimmed with lace or braid instead.
Gloves Pattern and Notes
Materials
- BC Garn Jaipur Silk Fino, 100% silk, 328 yd (300 m)/1.75 oz (50 g) skein, 1 skein of #66 Bordeaux (MC)
- Anchor Artiste Metallic, 80% viscose, 20% polyester, 109 yd (100 m)/0.9 oz (25 g) ball, 1 ball of #338 Gunmetal (CC)
- Needles, size 0 (2 mm), two 24" (60 cm) circular needles or set of four or five double-pointed needles, or size needed to obtain gauge
- Stitch markers or lengths of thread [PAYWALL]
- Smooth, strong thread in a contrasting color for stitch holders
- Tapestry needle
- Steel crochet hook, size 1.25 mm
Finished measurements: To fit a woman’s average hand: 11" (27.9 cm) long from cuff to tip of middle finger, 7½" (19.1 cm) upper hand circumference above thumb. Cuff, finger, and thumb lengths are adjustable; for a larger hand circumference, increase needle size.
Gauge: 44 sts and 54 rnds = 4" (10.2 cm) in solid-color St st using MC. Always work a swatch when selecting needle size.
Special Stitches and Notes
The gloves can be worked using two 24" (60 cm) circular needles, a set of four or five double-pointed needles, or your preferred method for working small circumferences in the round.
This pattern uses techniques such as placing stitches on a holding thread, casting on across gaps to start fingers and thumbs, and picking up stitches from these cast-ons.
M1Lp: Lift the running thread between the stitch just worked and the next stitch from front to back, and purl into the back of this thread—1 stitch increased.
Crab Stitch: Visit pieceworkmagazine.com for a tutorial.
Visit pieceworkmagazine.com/abbreviations for terms you don’t know.
Instructions
Right Glove
Cuff
Using the long-tail method and your preferred needles, CO 76 sts with MC. Place marker (pm) and join for working in the rnd. Rnds begin at thumb side of hand, at start of palm sts.
Set-up Rnd: Work 38 sts from Rnd 1 of chart 2 times around.
Continuing in established pattern, work Rnds 2–41 of chart.
Next rnd: Using MC, *k3, M1R, k35, M1R; rep from * once more—80 sts; piece measures about 3¼" (8.3 cm) from CO.
Thumb Gusset
Note: Maintain both established “seam” stitch columns throughout.
Rnd 1: Work 6 sts in patt, place marker (pm), M1Lp, pm, work in patt to end—1 st inc’d; 1 gusset st between markers.
Rnd 2: Work in patt to m, sl m, k1, sl m, work in patt to end.
Rnd 3: Work in patt to m, sl m, M1Lp, k1, M1Lp, sl m, work in patt to end—3 gusset sts.
Rnd 4: Work in patt to m, sl m, knit to next m, sl m, work in patt to end.
Rnd 5: Work in patt to m, sl m, p1, M1L, k1, M1R, p1, sl m, work in patt to end—5 gusset sts.
Rnd 6: Work in patt to m, sl m, knit to next m, sl m, work in patt to end.
Rnd 7: Work in patt to m, sl m, p1, M1L, knit to 1 st before next m, M1R, p1, sl m, work in patt to end—2 gusset sts inc’d.
Rnds 8–27: Rep Rnds 6 and 7 ten more times—27 gusset sts with 1 gusset “seam” st at each side; 107 sts total.
Next 3 rnds: Maintaining established “seam” sts at each side of hand and at each end of marked gusset section, work 3 rnds even.
Next rnd: Work 6 sts in patt, removing gusset markers as you come to them, place 27 thumb sts on length of smooth contrasting thread, use the knitted method to CO 4 sts across thumb gap, work in patt to end—84 sts; piece measures 5½" (14 cm) from CO.
Continue Hand
Maintaining established “seam” sts at each side of hand, work even until piece measures 7¼" (18.4 cm) from CO.
Note: This is the length to the base of the little finger; for a longer or shorter hand, work more or fewer rounds.
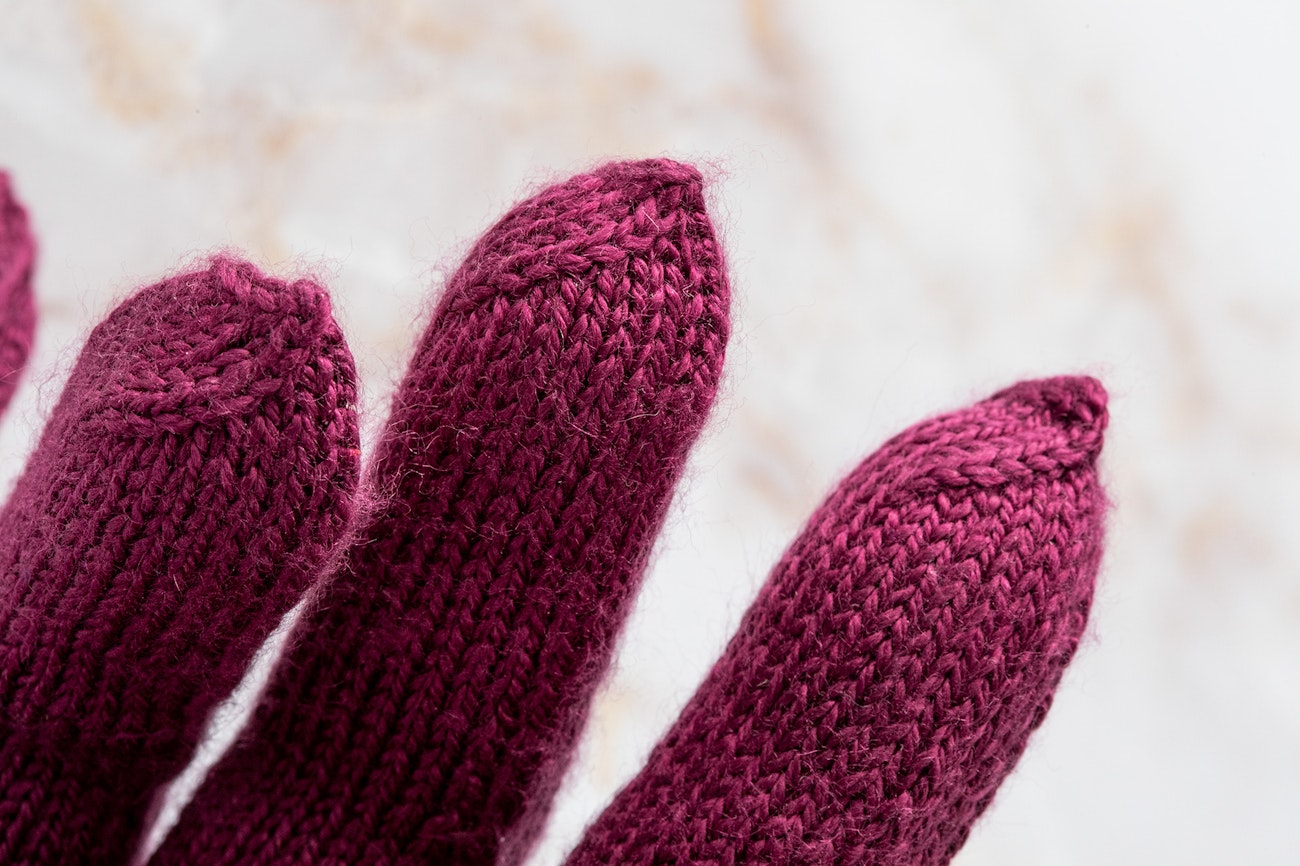 Adjusting the number of rounds knitted for each finger before shaping the tip allows you to create the best fit for your hands.
Little Finger
Set-up Rnd: K1, work 1 “seam” st, k33, and place 35 sts just worked on holder, k10, work 1 “seam” st, k10, place rem 28 sts on separate holder, CO 4 sts across gap, and join for working in the rnd—25 sts.
Maintaining “seam” st, work even until finger measures 1½" (3.8 cm), or ½" (1.3 cm) less than desired length, dec 1 st in last rnd—24 sts.
Working all sts in St st, shape fingertip as follows:
Rnd 1: *K6, k2tog; rep from * 2 more times—21 sts.
Rnd 2: *K5, k2tog; rep from * 2 more times—18 sts.
Rnd 3: *K4, k2tog; rep from * 2 more times—15 sts.
Rnd 4: *K3, k2tog; rep from * 2 more times—12 sts.
Rnd 5: *K2, k2tog; rep from * 2 more times—9 sts.
Rnd 6: *K1, k2tog; rep from * 2 more times—6 sts.
Rnd 7: K2tog 3 times—3 sts rem—finger measures about 2" (5.1 cm).
Cut yarn, leaving an 8" (20.3 cm) tail, thread tail through rem sts, pull tight to close fingertip, and fasten off on WS.
Upper Hand
Return 35 held palm sts and 28 held back-of-hand sts to needles, rejoin MC with RS facing at start of palm, pm, and join for working in the rnd.
Next rnd: K1, work 1 “seam” st, knit to end of palm, pick up and knit 4 sts from CO at base of little finger, knit to end of back-of-hand sts—67 sts.
Next 2 rnds: Work in St st, maintaining “seam” st at start of palm—piece measures 7½" (19.1 cm) from CO.
Ring Finger
Set-up Rnd: K1, work 1 “seam” st, k23, and place 25 sts just worked on holder, k25 for ring finger, place last 17 sts on separate holder, CO 2 sts across gap, and join for working in the rnd—27 sts.
Work even in St st until finger measures 2½" (6.4 cm), or ½" (1.3 cm) less than desired length.
Shape fingertip as follows:
Rnd 1: *K7, k2tog; rep from * 2 more times—24 sts.
Rnd 2: *K6, k2tog; rep from * 2 more times—21 sts.
Rnd 3: *K5, k2tog; rep from * 2 more times—18 sts.
Rnd 4: *K4, k2tog; rep from * 2 more times—15 sts.
Rnd 5: *K3, k2tog; rep from * 2 more times—12 sts.
Rnd 6: *K2, k2tog; rep from * 2 more times—9 sts.
Rnd 7: *K1, k2tog; rep from * 2 more times—6 sts.
Rnd 8: K2tog 3 times—3 sts rem—finger measures about 2" (5.1 cm).
Cut yarn, leaving an 8" (20.3 cm) tail, thread tail through rem sts, pull tight to close fingertip, and fasten off on WS.
Middle Finger
With RS facing, leave first 14 palm sts on holder, return last 11 palm sts to needle, then return first 10 held back-of-hand sts to needle leaving last 7 sts on holder, rejoin MC with RS facing at start of palm sts on needle.
Set-up Rnd: K11, pick up and knit 2 sts from CO at base of ring finger, k10, CO 4 sts across gap, and join for working in the rnd—27 sts.
Work even in St st until finger measures 2¾" (7 cm), or ½" (1.3 cm) less than desired length.
Shape fingertip and fasten off as for ring finger.
Index Finger
Return 14 held palm sts and 7 held back-of-hand sts to needles, rejoin MC with RS facing at start of palm sts.
Set-up Rnd: K1, work 1 “seam” st, k12, pick up and knit 6 sts from CO at base of middle finger, k7, and join for working in the rnd—27 sts.
Work even in St st until finger measures 2½" (6.4 cm), or ½" (1.3 cm) less than desired length.
Shape fingertip and fasten off as for ring finger.
Thumb
Return 27 held thumb sts to needles, rejoin MC with RS facing.
Set-up Rnd: K27, pick up and knit 6 sts from sts CO across top of thumb gap, pm, and join for working in the rnd—33 sts.
Next rnd: K27, k2tog, k2, k2tog—31 sts.
Work even in St st until thumb measures 1¾" (4.4 cm), or ½" (1.3 cm) less than desired length, dec 1 st in last rnd—30 sts.
Next rnd: *K8, k2tog; rep from * 2 more times—27 sts.
Finish shaping and fasten off as for ring finger.
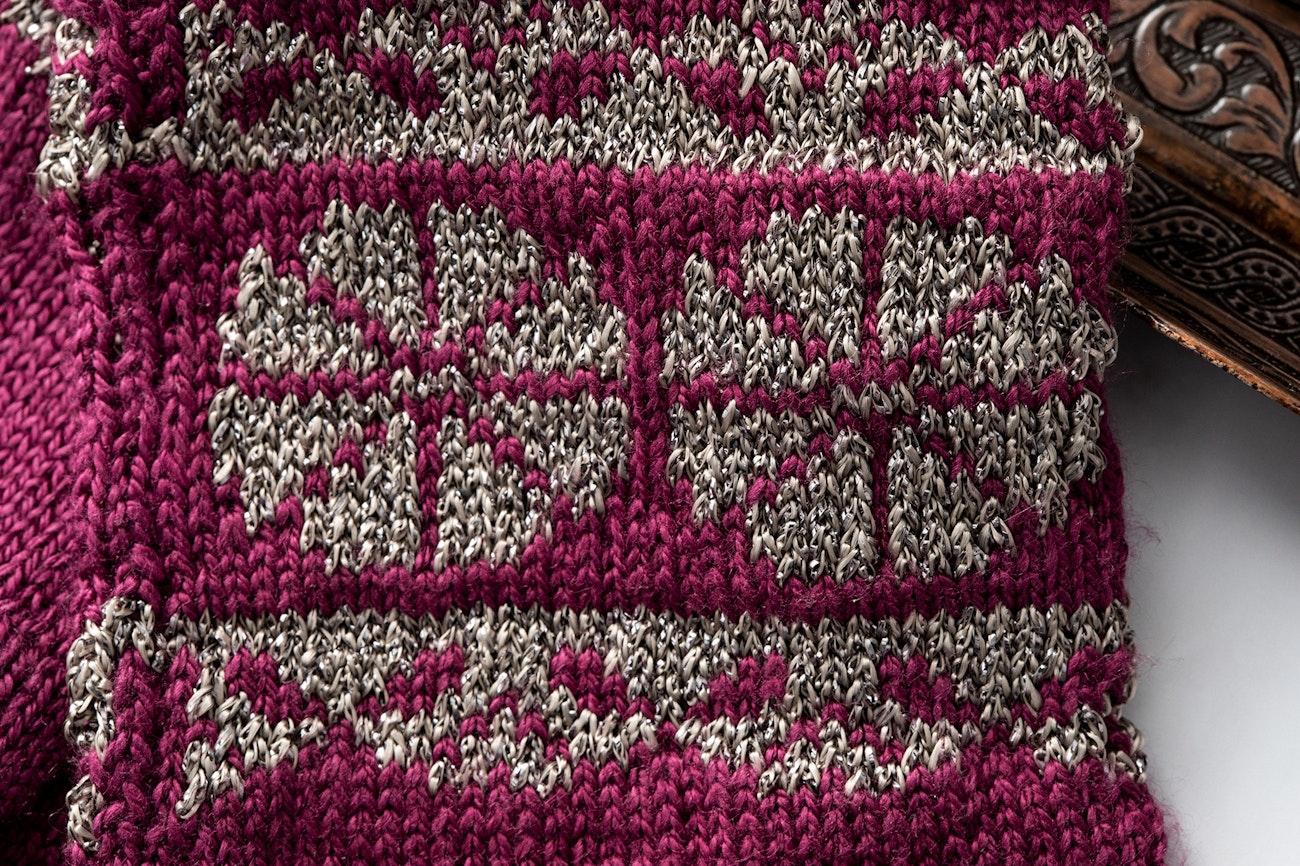 Stranding unused colors behind the work loosely will keep these stunning cuffs stretchy.
Left Glove
Cuff
Using the long-tail method and your preferred needles, CO 76 sts with MC. Pm and join for working in the rnd. Rnds begin at thumb side of hand, at start of back-of-hand sts.
Work cuff as for right glove—80 sts; piece measures about 3¼" (8.3 cm) from CO.
Thumb Gusset
Note: As for right glove, maintain both established “seam” stitch columns throughout.
Rnd 1: Using MC, work 77 sts in patt, pm, M1Lp, pm, knit to end—1 st inc’d; 1 gusset st between markers.
Rnds 2–27: Work as for right glove—27 gusset sts with 1 gusset “seam” st at each side; 107 sts total.
Next 3 rnds: Maintaining established “seam” sts at each side of hand and at each end of marked gusset section, work 3 rnds even.
Next rnd: Work in patt to m, removing gusset markers as you come to them, place 27 thumb sts on length of smooth contrasting thread, use the knitted method to CO 4 sts across thumb gap, knit to end—84 sts; piece measures 5½" (14 cm) from CO.
Continue Hand
Maintaining established “seam” sts at each side of hand, work even until piece measures 7¼" (18.4 cm) from CO.
Note: If you made any adjustments to the hand length of the right glove, work to the same measurement here.
Little Finger
Set-up Rnd: K1, work 1 “seam” st, k29, and place 31 sts just worked on holder, k10, work 1 “seam” st, k10, place rem 32 sts on separate holder, CO 4 sts across gap, and join for working in the rnd—25 sts.
Maintaining “seam” st, work even until finger measures 1½" (3.8 cm), or ½" (1.3 cm) less than desired length, dec 1 st in last rnd—24 sts.
Complete as for right glove.
Upper Hand
Return 32 held back-of-hand sts and 31 held palm sts to needles, rejoin MC with RS facing at start of palm, pm, and join for working in the rnd.
Next rnd: K1, work 1 “seam” st, knit to end of back-of-hand, pick up and knit 4 sts from CO at base of little finger, knit to end of palm sts—67 sts.
Next 2 rnds: Work in St st, maintaining “seam” st at end of back-of-hand—piece measures 7½" (19.1 cm) from CO.
Ring Finger
Set-up Rnd: K1, work 1 “seam” st, k19, and place 21 sts just worked on holder, k25 for ring finger, place last 21 sts on separate holder, CO 2 sts across gap, and join for working in the rnd—27 sts.
Complete as for right glove.
Middle Finger
With RS facing, leave first 11 back-of-hand sts on holder, return last 10 back-of-hand sts to needle, then return first 11 held palm sts to needle leaving last 10 sts on holder, rejoin MC with RS facing at start of back-of-hand sts on needle.
Set-up Rnd: K10, pick up and knit 2 sts from CO at base of ring finger, k11, CO 4 sts across gap, and join for working in the rnd—27 sts.
Complete as for right glove.
Index Finger
Return 11 held back-of-hand sts and 10 held palm sts to needles, rejoin MC with RS facing at start of back-of-hand sts.
Set-up Rnd: K1, work 1 “seam” st, k9, pick up and knit 6 sts from CO at base of middle finger, k10, and join for working in the rnd—27 sts.
Complete as for right glove.
Thumb
Work as for right glove.
Finishing
Lower edge
Note: The lower edge may be finished with sewn on lace or braid if desired.
With RS facing, join MC to CO edge of cuff yarn using crochet hook. Work 1 rnd of single crochet (sc), working 1 sc into every CO st, then join with a sl st. With RS still facing, work 1 rnd of crab stitch (reverse single crochet), working 1 crab st in each sc of previous rnd, then join with a sl st. Fasten off last st.
Weave in ends, using yarn tails as necessary to close any holes at the base of the fingers and thumbs. Steam lightly.
Interested in learning more about liturgical gloves and their history? Please see the companion article in PieceWork Spring 2022.
Also, remember that if you are an active subscriber to PieceWork magazine, you have unlimited access to previous issues, including Spring 2022. See our help center for the step-by-step process on how to access them.
Dr. Angharad Thomas is a researcher, designer, and knitter, especially of gloves, from ancient to modern. Originally a geographer, her career has included teaching, designing, and lecturing. Knitwear design has taken her to Europe, North America, Japan, Australia, and India. She is a volunteer curator at the collection of the United Kingdom’s Knitting & Crochet Guild. When not knitting or curating, she hikes, gardens, and plays the accordion. In 2020, she was awarded a grant from the Society of Antiquaries to research liturgical gloves, which was completed in 2021. Her (occasional) blog is at knittinggloves.wordpress.com. Email her at [email protected].
 Bishop’s gloves, Spanish, first quarter of the seventeenth century (2009.300.1648a, b). Knitted in silk with gold metallic embroidery. Courtesy of the Metropolitan Museum of Art, New York
 Crab stitch finishes the cuff edge to reduce rolling.
  Like many extant examples, these gloves feature a “seam” of alternating knit and purl stitches on the outside edges of the hands.

 Adjusting the number of rounds knitted for each finger before shaping the tip allows you to create the best fit for your hands.
  Stranding unused colors behind the work loosely will keep these stunning cuffs stretchy.