The Pekinese (Chinese) stitch is a composite line stitch, consisting of a row of backstitches with the addition of interlaced loops, whereas the Chinese (Peking, Pekin, or ring) knot stitch belongs to the large international knotted-stitch family of embroidery stitches.
There is confusion in the embroidery literature between these two similarly named stitches. Both have also been referred to as the Chinese, blind, or forbidden stitch. Generally, if the modern stitch name includes the word “knot,” it is referring to the Chinese knot stitch; however, if the stitch is called only the Pekinese stitch, it is usually the stitch illustrated in Figure 1. The blind and forbidden stitch appellations allude to the popular and well-known myth that they caused blindness in the young female stitchers because of their minute size and the incomprehensible number required to cover the designs of the magnificently colored and stitched historical garments, exclusively made for the Imperial court in Peking (modern-day Beijing). The court famously inhabited Peking’s Forbidden City, and the forbidden-stitch moniker may have come about due to this connection.
 Embroidered silk and metallic threads. China, eighteenth to nineteenth century. 10 × 4¾ inches (25.4 × 12.1 cm). Gift of the estate of Mrs. Lathrop Colgate Harper. 1957-180-93, 18418015. Photo courtesy of Cooper Hewitt Museum
Beginning in the Tang dynasty (618–907 CE), the lavish silk and metal-thread embroideries were reserved for the ceremonial robes of those in power. Both the Pekinese and Chinese knot stitches are two of the principal stitches used in these embroideries.
The Pekinese stitch and Chinese knot can be worked on either plain or evenweave fabrics. In the past, a soft, somewhat heavy silk thread was used, but today’s stitchers generally use pearl cotton or multi-stranded silk or cotton floss. Often on Chinese textiles, several hues of the same color family were used within a single motif, creating magnificent shading.
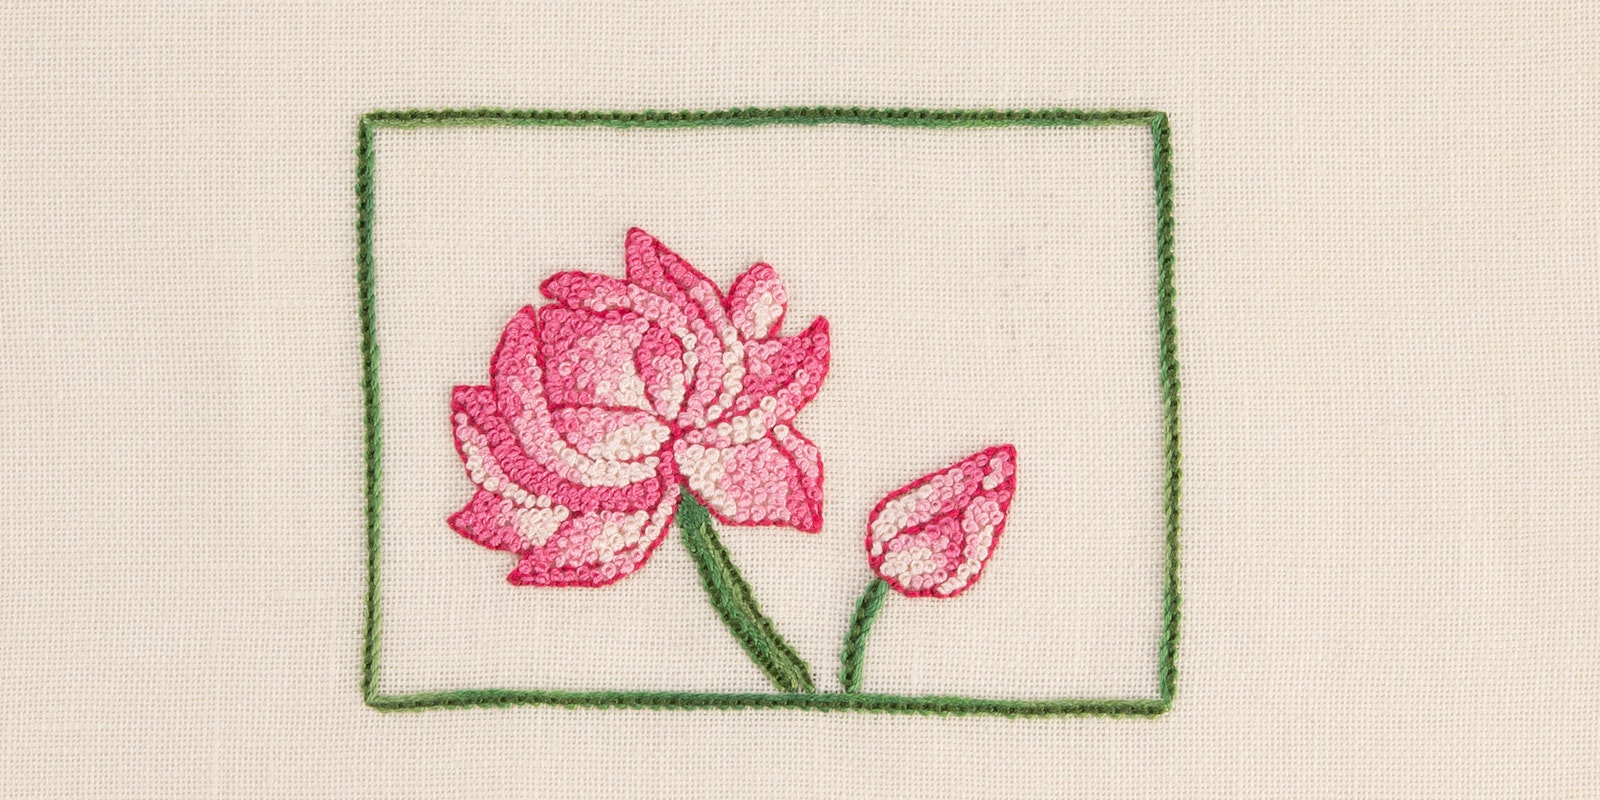
 Detail of the Lotus Blossom. The subtle shading is created by grouping multiple Chinese knot stitches together and changing colors as the petals are worked.
The Pekinese stitch is a two-journey stitch. First, a foundation row of backstitches is made, and then, same-sized loops are interlaced through this line on the surface of the ground fabric (Figures 1 and 2). This looped row can begin and end in the same hole as the backstitch row, as I did in my Lotus Blossom design, or the loops can begin a few threads above or below the backstitch line, as shown in the Figures 1 and 2. The backstitches and the loops can be stitched with silk or cotton floss, pearl cotton, crochet cotton, and even wool and metallic threads. The same thread type can be used for both journeys, but usually they are of different colors, weights, and even types of threads. This results in numerous variations and added visual interest. Either a sharp or tapestry needle can be used for the backstitches, depending upon what ground fabric is selected. However, a tapestry needle should always be used for creating the loops to keep from splitting the backstitch line’s thread. A sharp needle should be used at the beginning and ending of each loop row where the thread penetrates the plain-weave fabrics.
Usually, the Pekinese stitch is shown with the loops originating from the lower side of the backstitch (Figure 1); however, the loops can also be formed on the upper side (Figure 2). To keep the working thread for the loops from twisting (sometimes lifting off the ground fabric), let the needle and thread frequently dangle free. The Pekinese stitch can be used in straight or scrolling lines, borders, and also for fillings.
 Figure 1. Work a row of backstitches from right to left. Work interlaced loops from left to right, with the loops originating from the lower side of the backstitch.
 Figure 2. Work interlaced loops from left to right, with the loops originating from the upper side of the backstitch.
The Chinese knot stitch (Figure 3) is an easy, isolated stitch, arranged in rows upon rows of tiny knots on historical Chinese stitcheries. I suggest wrapping the working thread around the index finger of the nonstitching hand and then flipping the finger over; this creates the fastest, easiest, and most correctly formed loop. The individual knots and the rows touch each other with no background fabric seen, but the knots themselves are generally not distorted by this closeness. The knots can vary in size depending on how tightly the thread is gathered around the needle but not within the same motif. Personally, I find this to be the hardest part about this stitch. The Chinese knot resembles both the French and colonial knots in appearance, but the Chinese knot is flatter, usually less tight, and constructed differently. The Chinese knot can be used as a solitary stitch, which is an unusual occurrence until recently, or arranged in straight or scrolling lines, borders, and fillings.
 Figure 3. Bring the embroidery thread up over the index finger of the nonstitching hand and turn the finger over, creating a loop, and then remove the finger. Insert the needle into the loop one thread above where you brought the needle up and pull the thread to tighten the knot while holding down the loop with your thumb. Continue to tighten the thread around the needle. Pull the needle all of the way through and tighten the knot.
Because the thread penetrates the ground fabric, a sharp needle is used, except with evenweave fabrics when a blunt needle may be preferred. A needle with a large barrel is also useful to help form the characteristic small, round, central opening of this stitch. The needle should be inserted perpendicularly to the fabric surface for the best results. Both the Chinese knot and Pekinese stitches should always be sewn upon taut fabric in a needlework frame or hoop, and this unit should be further secured in a standing, table, or lap frame because the stitcher needs both hands to correctly and consistently stitch Chinese knots.
 Detail of the Pekinese stitch in the border and stems. Interlaced loops through the backstitches, using two colors of floss, increase the dimensionality of the stitching.
Materials
- Wichelt linen, 32-count, Ivory, 1 piece 11" × 11" (27.9 × 27.9 cm) or size to fit personal project
- DMC embroidery floss, 6-strand, 100% cotton thread, 8.7 yards (8 m)/skein, 1 skein each of #601 Dark Cranberry, #603 Cranberry, #605 Very Lt. Cranberry, #819 Lt. Baby Pink, and #3345 Dark Hunter Green
- DMC Color Variations floss, 6-strand, 100% cotton, 8.7 yard (8 m)/skein, #4045 Evergreen Forest, 1 skein
- Needles, embroidery/crewel sizes 2 and 6, tapestry size 26
- Interfacing, iron-on, lightweight, 4" × 3" (10.2 × 7.6 cm), 1 piece
- Sewing thread, White, 1 spool
- Embroidery scissors
- Needlework stitching frame, 8" × 8" (20.3 × 20.3 cm), plastic snap-on
- Needlework floor, table, or lap stand
- Magnification (optional)
Finished size: Design size, 4¼" × 31/8" (10.8 × 7.9 cm)

Lotus Blossom. Use the colors as indicated in the instructions.
Instructions
Hand overcast or machine zigzag the raw edges of the linen. Center the linen within the plastic frame and place this unit in the needlework stand. Center and stitch the Pekinese stitch borders, using the tapestry needle and following the chart. Using 3 strands of #3345, work the backstitches right to left over 3 ground fabric threads. Working left to right, create the interlaced loops, following Figure 1 and using 3 strands of #4045. Note: Start in the first and end in the last hole of each backstitch line. Keep the loops as close to the same size as possible. Complete all four borders.
Remove the design fabric from the frame. Using a light source, pencil, and stitched borders as a guide, trace the lotus and bud designs and stem placements on the linen. Trim the interfacing to cover only the area inside the stitched borders. Using the sewing thread, securely baste the interfacing to the back of the linen, placing the interfacing’s glue-dot side directly against the back of the design fabric. Do not adhere the interfacing at this time.
Work the Pekinese stitch for the stems, using the same number of floss strands and colors as for the borders. The flower stem has two rows of Pekinese stitches, facing each other.
Using 3 strands of #601 and the size 2 crewel needle, backstitch around every petal of the bud and flower. Change to the size 6 crewel needle and stitch the Chinese knots (Figure 3), using 3 strands and #603, #605, and #819. Start at the tip of each petal and fill in each, shading from the darkest to lightest pink. Follow the chart for the actual shading sequence for the individual petals. Uniformly snug the floss around the barrel of the needle and place each knot adjacent to the previous one but don’t overcrowd them. All of these knots take patience and persistence, but carry on, for the final result is worth the time and effort.
Remove all basting threads. Trim the interfacing as close as possible to the outer petal and stem outlines. Place the front side of the linen on a terry-cloth towel and adhere the interfacing to the design back, following manufacturer’s instructions.
The dashed box in the chart is reserved for initials, date, or even a single short word of your choosing. Many alphabet styles and sizes would be appropriate.
The completed Lotus Blossom design can be framed, inserted into a box top, used as a mini bowl-filler pillow, a central motif in a patchwork pillow, or even appliquéd onto a garment.
Deanna Hall West is a former needlework technical editor for PieceWork and former editor of The Needleworker magazine.
Originally published May 12, 2021; updated November 25, 2022.