The marking stitch is yet another member in the large cross-stitch family. It's a reversible stitch that forms cross-stitches (Figures 1 and 3) on the front of the fabric and neat open squares of straight stitches or four-sided stitches (Figure 2) on the back. In the past, this stitch was mainly used for alphabets, signatures, monograms, numbers, bands, and borders on samplers and, as its name implies, for marking household linens and clothing. Because of its reversibility, it was also used when the ground fabric would be viewed from both sides.

This stitch's other names include the marking cross and sampler stitch. Sometimes, However, it has mistakenly been called the brave bred stitch, true marking, or double-sided cross-stitch, but this particular stitch forms cross-stitches on both sides of the fabric. It is interesting to note that on old samplers the signatures and dates often used the marking stitch, and sometimes, it was with the four-sided stitches showing on the front of the fabric and the cross-stitches on the back.

The marking stitch can be worked on both plain and evenweave fabrics of linen, cotton, or blends and even transparent or sheer fabrics, such as voile or organdy. Of course, on evenweave fabrics the stitching is much easier and neater because of the regular spacing of the threads and holes. Various fine threads may be used, such as silk, cotton floss, or pearl cotton. One must adjust the thread size to the thread count of the fabric. Use one strand of thread to avoid a noticeable and unsightly buildup of threads on the stitched legs where multiple strands are stitched. To help with this problem, one can pull slightly tighter on the last strand sewn or weave this last strand tightly underneath the first strand, but try not to pile up more than two strands per leg.

There are several stitching sequences for the marking stitch. When stitching lettering and numbers, one has to stitch over one or two of the legs already stitched to avoid any diagonal stitches on the back and to accomplish the reversibility of this stitch. Personal hint: refer to the back of the work frequently to make sure that no diagonal lines inadvertently occur and only the four-sided stitches are present. The marking stitch is time-consuming to rip out as there are multiple legs per stitch. To keep the appearance of the stitches neat, the beginning and ending of the thread must be covered by stitches already worked, so it's better and easier to hide them under the cross-stitches on the front of the fabric. Use an away-waste knot to start stitching and then cut the knot, re-thread the needle, and bury the thread end later after some of the stitches have been worked. Whenever possible, work left to right (Figure 1) and top to bottom (Figure 2). When stitching letters, numbers, and other such motifs, one can also carry the working thread under the cross-stitches on the front when traveling from stitch to stitch. This procedure also avoids additional buildup of the crossed legs. None of the literature that I have read mentions keeping all of the top crossed legs slanting in the same direction, and in most of this literature, only an extremely short horizontal or vertical line of diagrammed stitches is illustrated.

Notice how tidy and neat the back of the stitching looks. Photo by Elizabeth Prose.
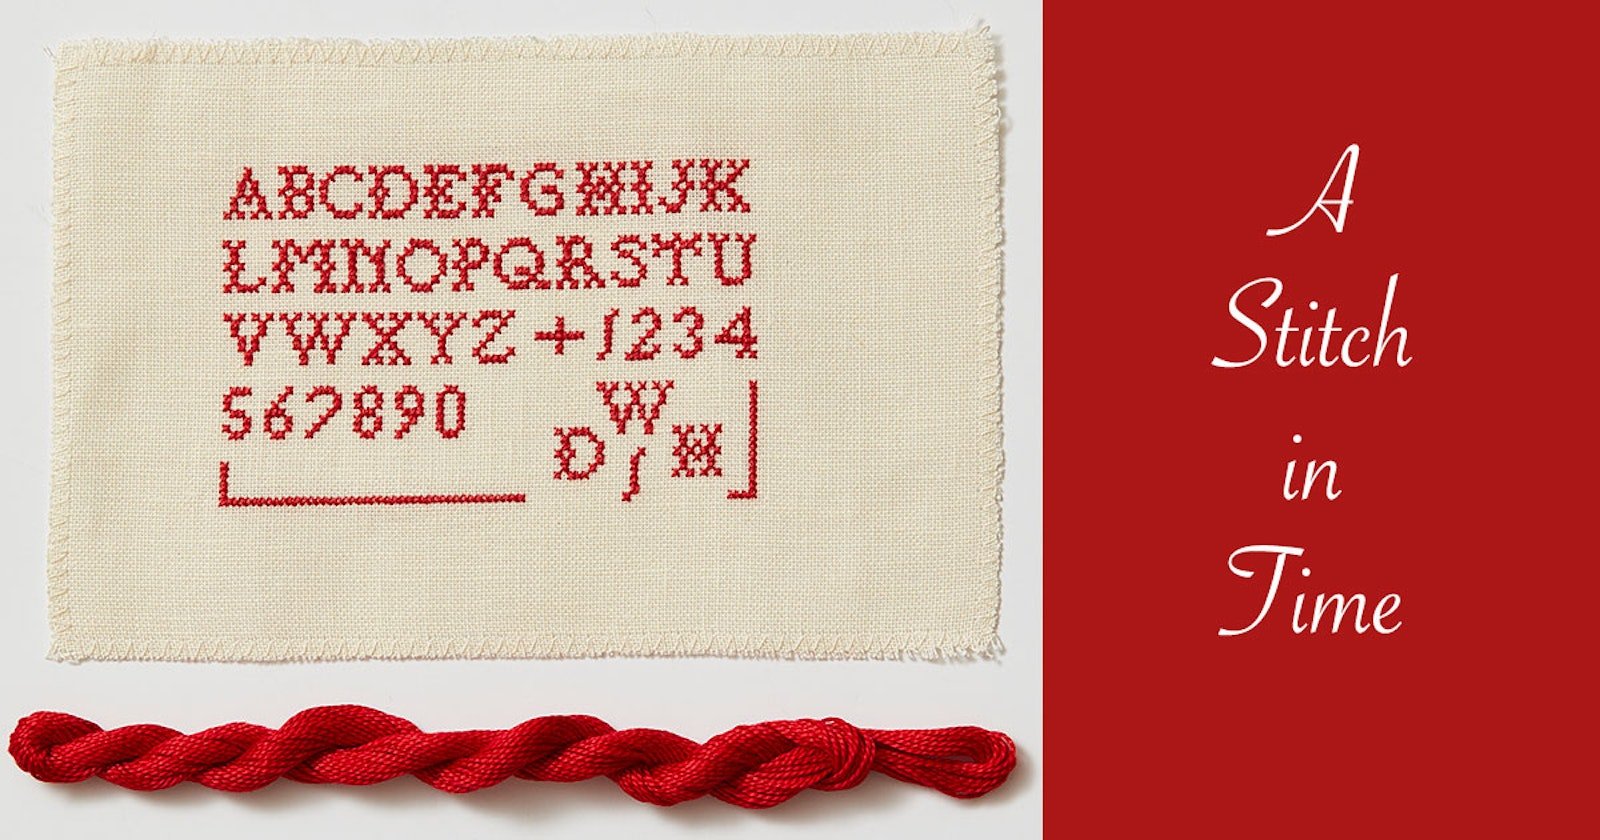
Commonly, a marking thread or marking cotton was used for this type of embroidery. It was manufactured in the early 19th century, but unfortunately, is no longer in production. It was a fine, ingrain cotton thread, usually a Turkey red or less commonly a medium dark blue, specifically used for marking clothing and household linens in fine cross-stitches or one of its reversible variations, such as the marking stitch. When household items and undergarments were made in the dozens and linen production was so arduous, it was imperative to mark these items with the name or initials (two or three) of the owner, laundry rotation number, and sometimes even the date. In the lower right corner of the Marking Stitch Sampler Chart below, a typical marking configuration is illustrated. Today garment identification is easier and more quickly accomplished with printed or hand-written name tapes that are especially useful for summer camps, birthday sleepovers, and other such events.

Making Stitch Sampler Chart.
The marking stitch seems to be an easy stitch to accomplish; however, it takes a little time and persistence to master this stitch's travel pathways.
—Deanna Hall West
Deanna Hall West is PieceWork’s needlework technical editor; she previously was the editor of The Needleworker magazine. Stay tuned for more stitch tutorials from Deanna in the months ahead!
Featured Image: This marking stitch sampler was designed and stitched by Deanna Hall West. Design size: 4⅞ by 2⅞ inches (12.4 x 7.3 cm). Materials: Wichelt Linen, 32-count, Ivory; DMC cotton floss, #347; John James Needles, tapestry size 28. Photo by George Boe. Illustrations by Ann Swanson.