Subscriber Exclusive
A Vintage Picot Snowflake Pattern
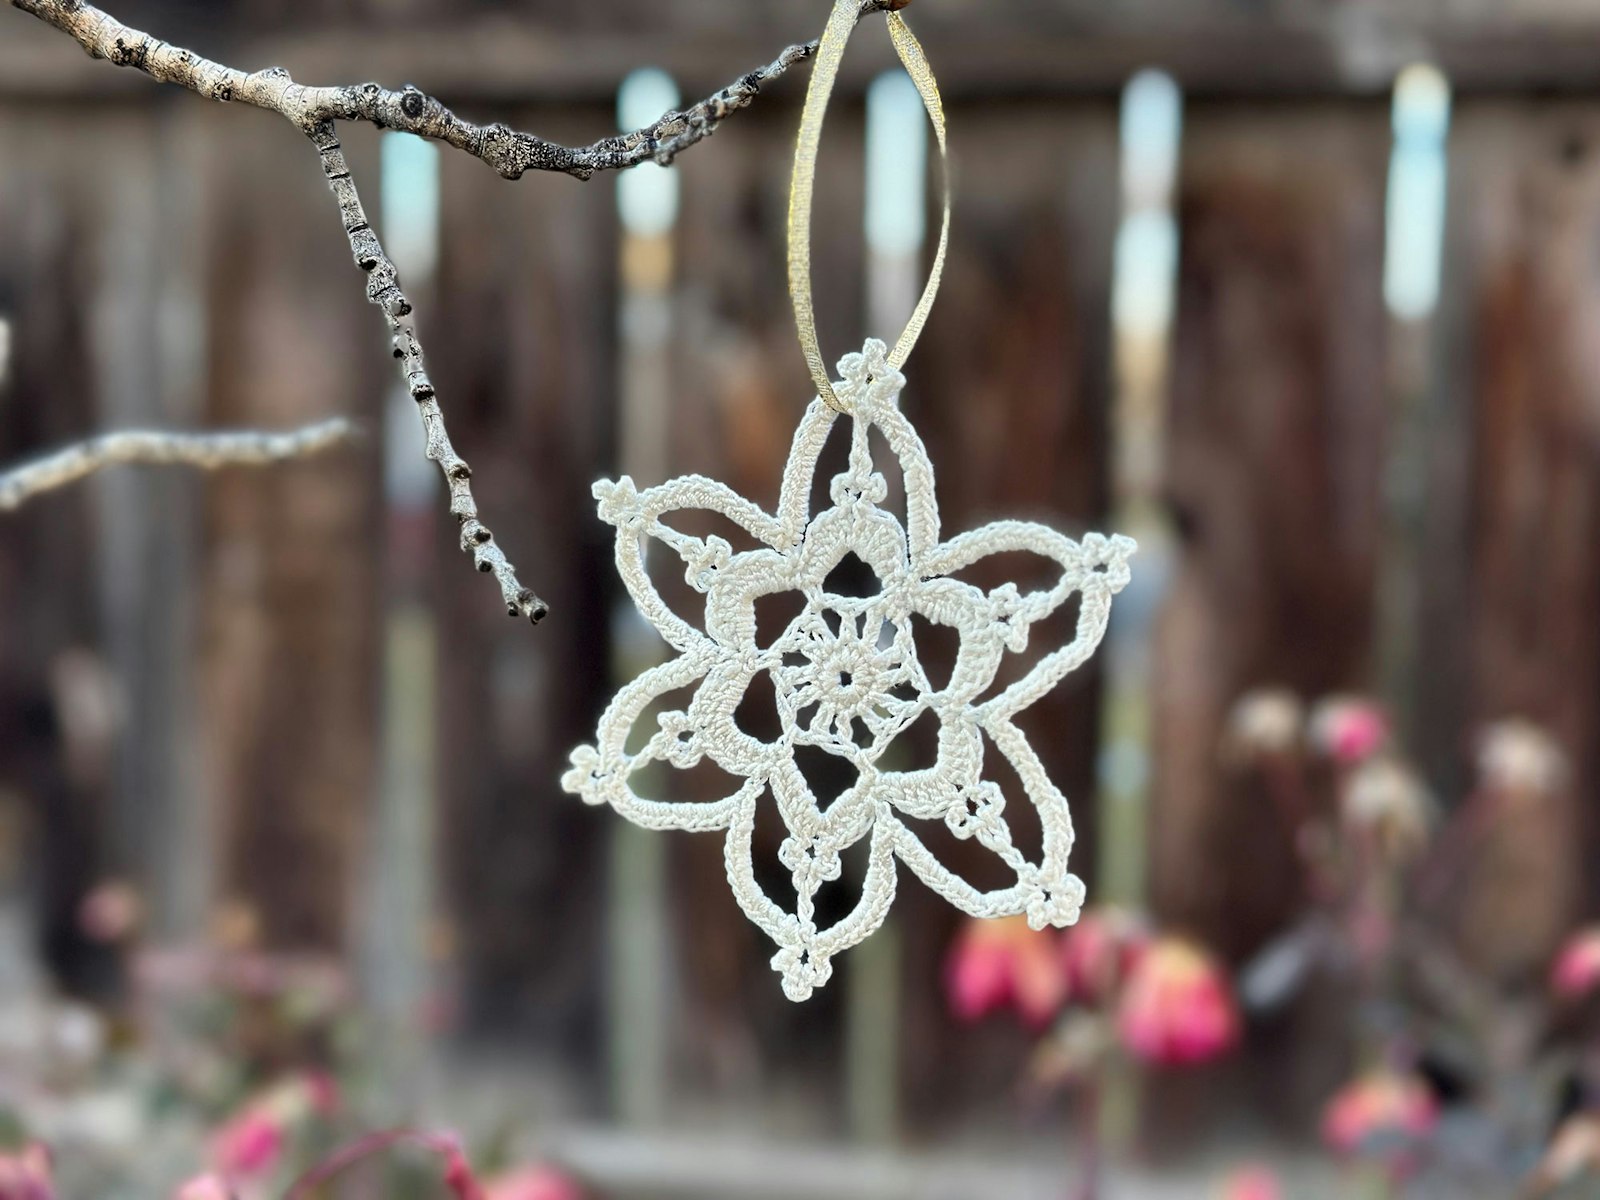
If you have a few hours, you have enough time to crochet a darling little snowflake ornament.
If you have a few hours, you have enough time to crochet a darling little snowflake ornament. <a href="https://pieceworkmagazine.com/vintage-picot-snowflake-pattern/">Continue reading.</a>
https://pieceworkmagazine.com/cdn-cgi/image/format=auto/https://www.datocms-assets.com/75076/1669590932-final-snowflake-styled-outside-sized.jpg?auto=format&w=900
Whether you cross-stitch, tat, knit, or enjoy some other form of needlework, you can look forward to a mini ornament pattern every month starting this month. Current subscribers to PieceWork magazine can log in below to access the instructions for this Picot Snowflake, or see PieceWork Nov/Dec 1996 for the instructions. Whether you use the pattern as is or adapt it, we hope you have fun with it!
~ Tiffany
As you flip through the Nov/Dec 1996 issue of PieceWork, you’ll come across a section called “Trimmings,” starting on page 12. This section contains a collection of patterns, charts, and instructions gleaned from old magazines and books that are generally no longer available. Many of these patterns are still worded as they appeared in their original publications from the 1930s and earlier. That’s where we found this sweet little snowflake pattern.
Though a vintage pattern, the Picot Snowflake is written using modern terms, making it a straightforward pattern to follow. With only six rounds, you can easily finish this pattern in a few hours, using materials you may already have in your stash.
The snowflake in the magazine used size 12 pearl cotton, but I opted to use the size 10 cotton and size 6 (1.6 mm) steel crochet hook. Make this pattern your own by changing the yarn and gauge. Or you can stop a row or two short and make a slightly different snowflake each time!
Picot Snowflake Pattern
The snowflake shown in the magazine was crocheted using a size 12 pearl cotton. The crochet hook size wasn’t indicated, but you should use a size appropriate to the yarn and gauge of your choosing.
SUBSCRIBER EXCLUSIVE
Whether you cross-stitch, tat, knit, or enjoy some other form of needlework, you can look forward to a mini ornament pattern every month starting this month. Current subscribers to PieceWork magazine can log in below to access the instructions for this Picot Snowflake, or see PieceWork Nov/Dec 1996 for the instructions. Whether you use the pattern as is or adapt it, we hope you have fun with it!
~ Tiffany
As you flip through the Nov/Dec 1996 issue of PieceWork, you’ll come across a section called “Trimmings,” starting on page 12. This section contains a collection of patterns, charts, and instructions gleaned from old magazines and books that are generally no longer available. Many of these patterns are still worded as they appeared in their original publications from the 1930s and earlier. That’s where we found this sweet little snowflake pattern.
Though a vintage pattern, the Picot Snowflake is written using modern terms, making it a straightforward pattern to follow. With only six rounds, you can easily finish this pattern in a few hours, using materials you may already have in your stash.
The snowflake in the magazine used size 12 pearl cotton, but I opted to use the size 10 cotton and size 6 (1.6 mm) steel crochet hook. Make this pattern your own by changing the yarn and gauge. Or you can stop a row or two short and make a slightly different snowflake each time!
Picot Snowflake Pattern
The snowflake shown in the magazine was crocheted using a size 12 pearl cotton. The crochet hook size wasn’t indicated, but you should use a size appropriate to the yarn and gauge of your choosing. [PAYWALL]
Although the pattern didn’t specifically say, I finished each round by joining with a slip stitch. Also, when you get to the fifth round, keep an eye on the consistency of your chains. Making one side of the chains tighter can be easy to do, which may cause lopsided petals. It’s not the end of the world, but it was something I paid extra attention to on that row.
Materials
- Aunt Lydia’s Cotton Crochet Thread, size 10, 350 yd (320 m) per ball, 1 ball of Antique White
- Steel crochet hook, US size 6 (1.6 mm)
- Stitch markers (optional, if you like to use them to mark the beginning of rounds)
Special Stitches and Notes
3p Cluster: 4 ch, sl st into first ch, (3 ch, sl st into same ch as first sl st) twice.
Visit pieceworkmagazine.com/abbreviations for terms you don’t know.
Pattern
Ch 4, join into a ring with a slip stitch.
First round: 12 sc into ring.
Second round: Ch 3, 1 dc into next sc, * ch 2, dc in to next 2 sc; repeat from * 4 times, ch 2, join to top of ch 3.
Third round: Ch 8, * sc into next ch-2 space, ch 7; repeat from * around, sl st into first ch of ch 8.
Fourth round: (Sc, hdc, 4 dc, 3p cluster, 4 dc, hdc, sc) into each ch-7 loop.
Fifth round: 9 ch, * dc into middle picot of 3p cluster, ch 8, sc between petals, ch 8; repeat from * 4 times, ch 8, sl st into first ch of 9 ch.
Sixth round: * 13 sc into ch-8 loop, 3p cluster, 13 sc into ch-8 loop; repeat from * around.
Fasten off last st and weave in ends. Wash gently in warm water and block. When dry, you can add fabric stiffener as desired.
 I opt for a lot of pins when blocking, especially to get those picots to pop.
Tiffany Warble oversees content and digital strategy for Long Thread Media and is a life-long creative with a continuing love for all fiber arts.


 I opt for a lot of pins when blocking, especially to get those picots to pop.