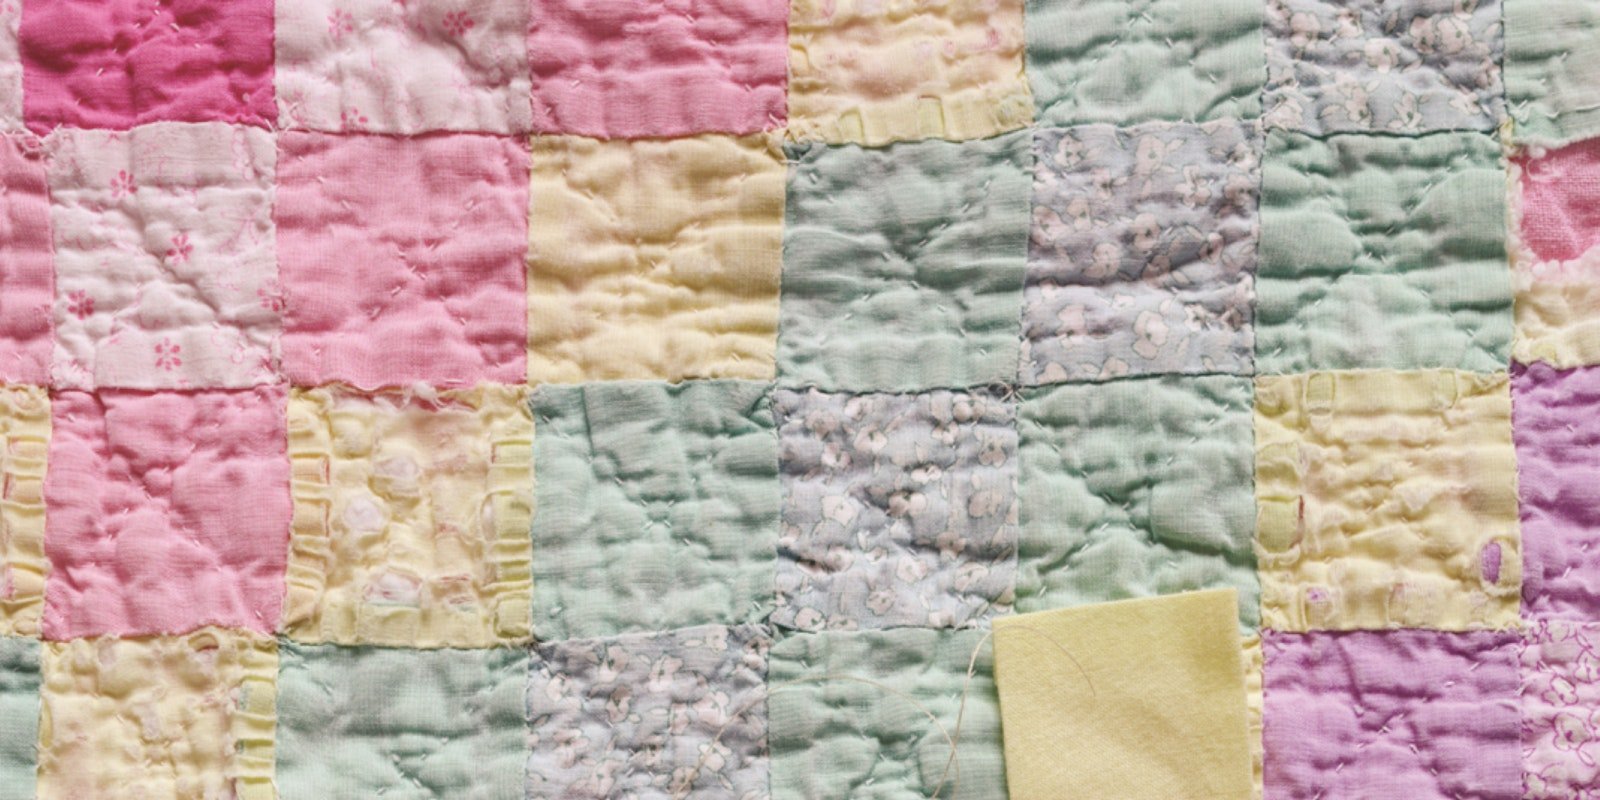
Overused or improperly stored antique quilts often are reduced to threadbare patches of fabric. With new fabric and a few simple slip and running stitches, the damaged pieces can be covered (not replaced; the quilt’s original pieces are part of its history and should not be removed) to prevent additional damage and stabilize the fragile under layers.
When searching for fabrics to repair a quilt, use colors in the same value range as the original. If you find a contemporary printed fabric too bold to match the aged original piece you wish to cover, consider using the back of the new fabric as the right side—the pattern will be more subtle and appear aged. Other options include dyeing fabrics with tea or fading the color with bleach for a more antique look. Many quilt stores also carry reproduction fabrics—you may be able to find new fabric with the same vintage patterns that appear on your damaged quilt.
To get started, you will need quilting thread that matches the original quilting stitches, fabrics that blend in with the original quilt’s damaged pieces, and a size 10 quilting needle. Prewash all fabrics. Measure the damaged pieces to be covered; add ¼ inch (6 mm) to all sides to accommodate for the seam allowances; cut the fabrics to this dimension. The area(s) to be covered will determine how many pieces need to be sewn together, which colors and prints will be used, and the layout of the pieces. Using a ¼-inch (6-mm) seam allowance and a short double running stitch, join the first two pieces with right sides facing. Press the seam allowances to one side (Figure 1).
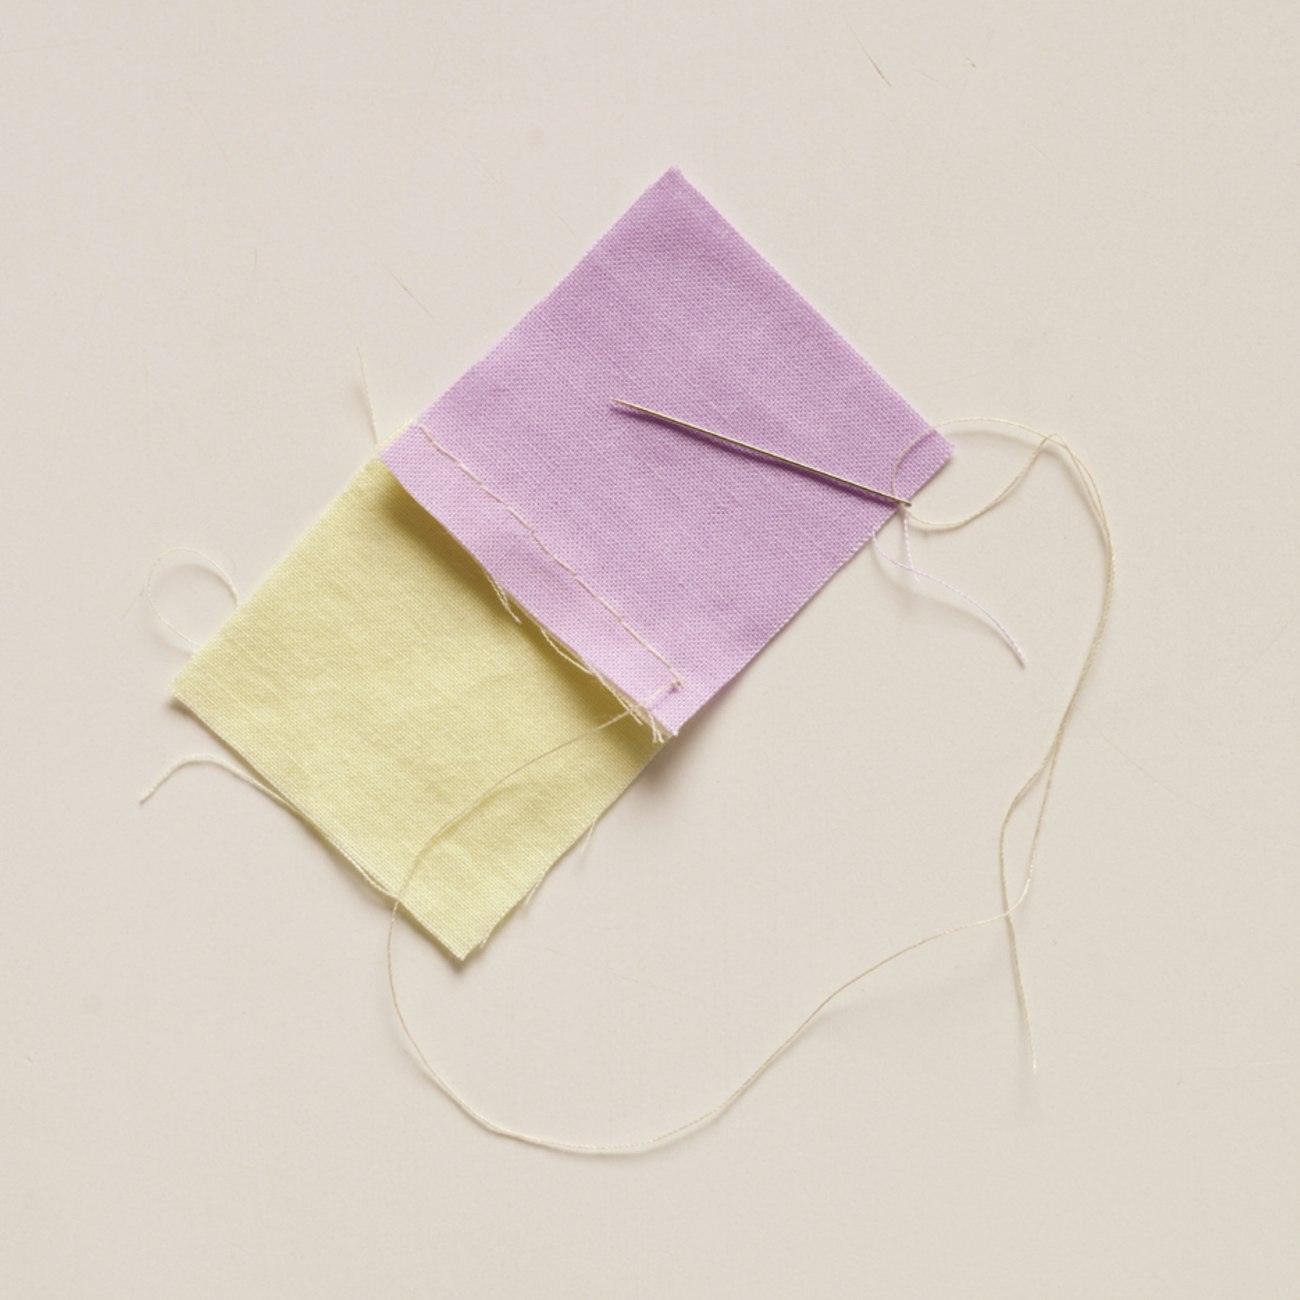
Figure 1
Continuing to refer to the fabric colors in the section to be repaired and the layout of the damaged pieces, join pieces in the same manner. Press all raw edges to the back ¼ inch (6 mm) (Figure 2).

Figure 2
Pin the new pieces on top of the area to be covered and, hiding the thread tail in the layers of the quilt, slip-stitch the outside folded edges to the quilt along the seam lines of the damaged pieces. Following the quilting pattern established by the quilt itself, quilt over the new pieces and through all layers of the quilt with running stitches of the same size (Figure 3).
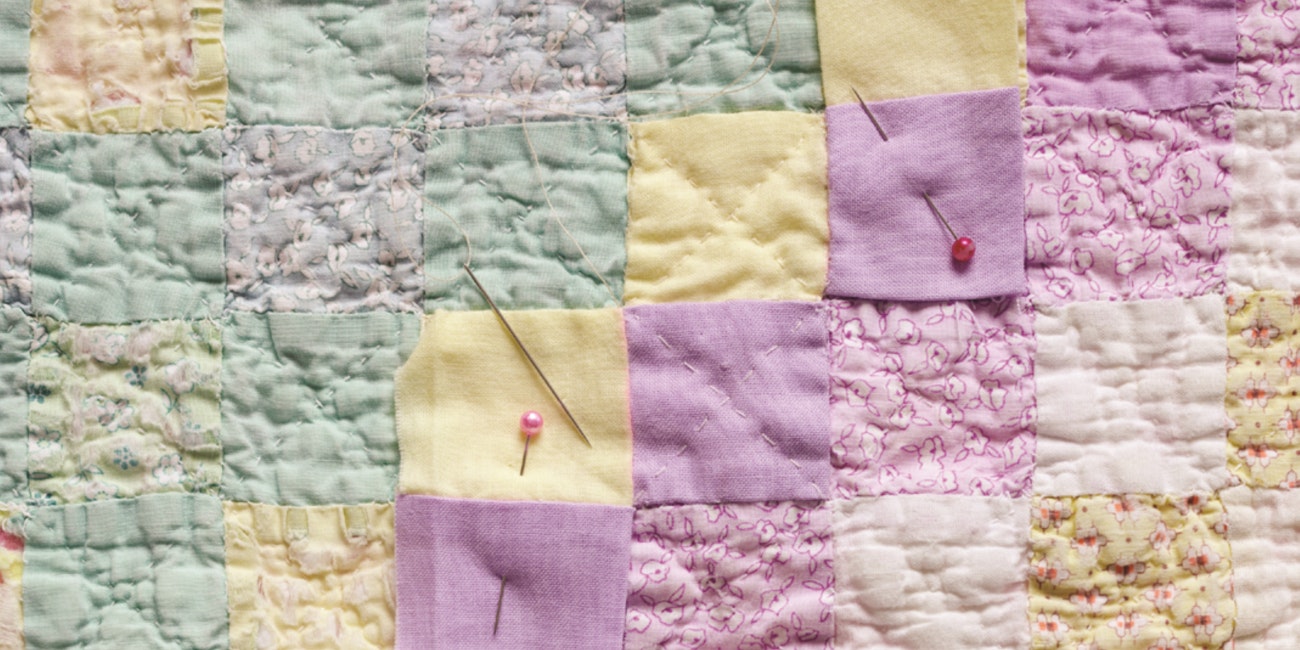
Figure 3
Interested in learning more about quilting? This article and others can be found in the September/October 2006 issue of PieceWork.
Also, remember that if you are an active subscriber to PieceWork magazine, you have unlimited access to previous issues, including September/October 2006. See our help center for the step-by-step process on how to access them.
Melinda A. Barta is a former PieceWork project editor.
Originally published July 8, 2020; updated February 24, 2025.