After I moved halfway across the country to Galveston, Texas, a few years ago, my life took a new direction in more than a geographical sense. For a country person at heart who had spent at least half a century in cold northern cities, the warm southern rural environment into which I now was immersed set long dormant creative juices flowing once again. I took up wildlife photography and joined the local birding club.
There I met Maureen Myers, a retired schoolteacher from the Houston school system. Maureen and I found that we had more in common than birds, including needlework. I had spent many years designing and editing crochet patterns, and she had learned to crochet and embroider at an early age under the supervision of “Mama,” her maternal grandmother. “A jovial and happy Cajun” who enjoyed the company of others, especially her family, Mama was a legendary cook. She could be strict but always made allowances for her vivacious and spoiled granddaughter. Mama never sat down without a piece of needlework in her hands.
Maureen has a great many doilies, dresser sets, and other pieces that Mama crocheted, not all of them in good condition. She asked if I could repair some damaged doilies. I did, and she was pleased with the results. She then asked me if I would take on the repair of a favorite tablecloth under which she remembered playing hide-and-seek as a child.
Mama’s Tablecloth
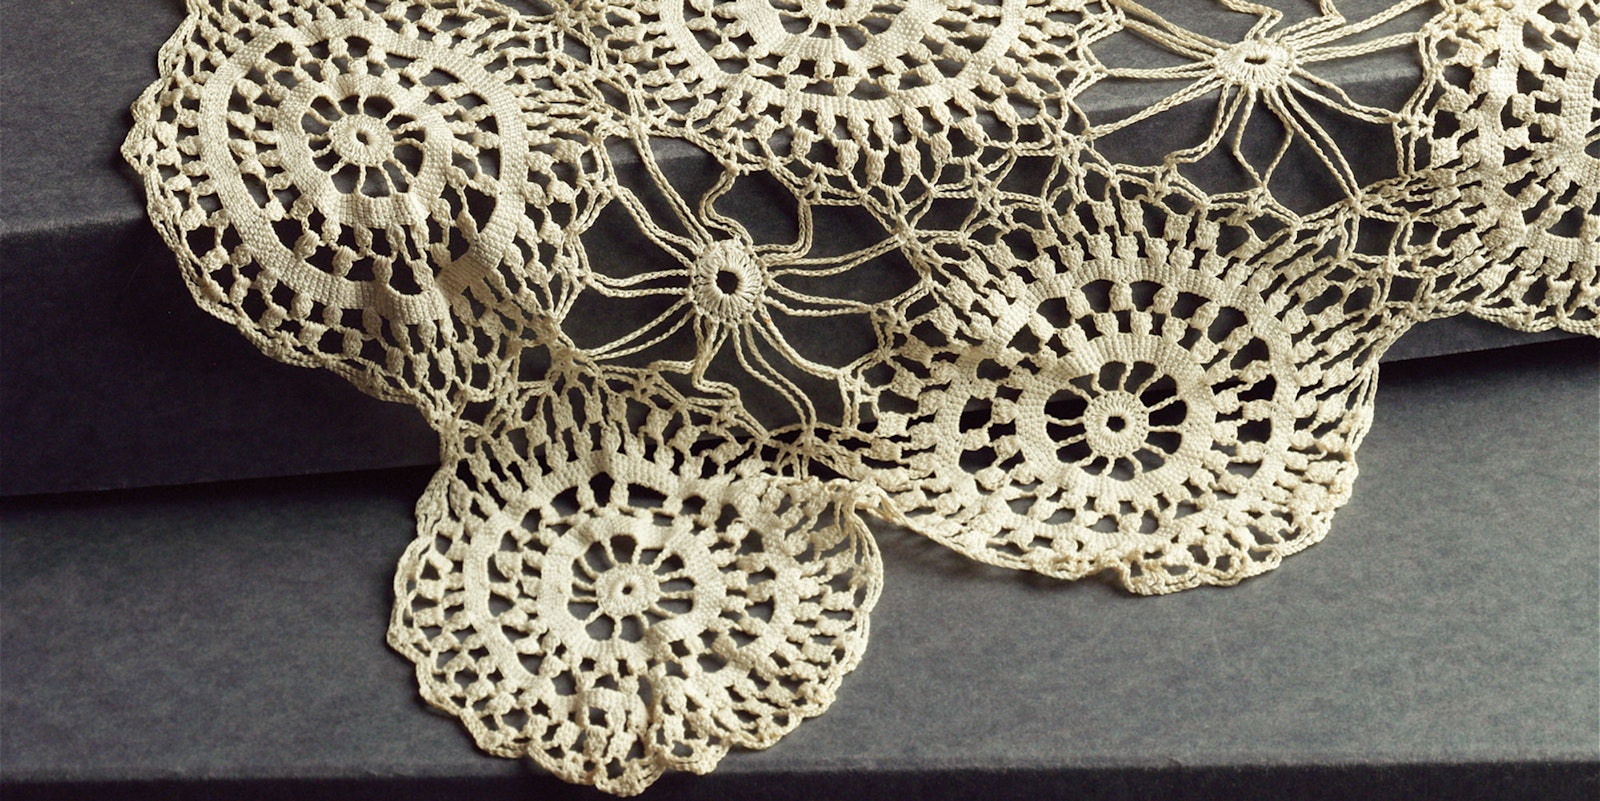
The tablecloth is composed of 143 wheel motifs, a popular pattern for crocheted tablecloths and bedspreads in the 1930s and 1940s but unlike any printed wheel-motif pattern from that era in my extensive collection. I suspect that this was Mama’s own version of this motif. Further evidence that the pattern was not by a professional designer is an apparent fudge factor in each motif: The third from last round contains an uneven number of repeats, but in the next round, an extra stitch has been inserted to achieve an even number of repeats on the last round, making it possible to join the motifs properly.
Another inconsistency in the pattern is that some motifs consist of rounds of four double-crochet clusters, whereas others have rounds consisting simply of groups of four double-crochet stitches. (The double-crochet clusters are four double crochet in a row that are joined at the top as opposed to the group of four double-crochet stitches, which are simply four double-crochet stitches in a row that stand independently of each other.) This difference led me to believe that the tablecloth was worked over a long period, each motif was made separately, and then all of the motifs were joined at once. Whoever designed it and however long it took to make, the tablecloth nonetheless is beautiful and lovingly worked.
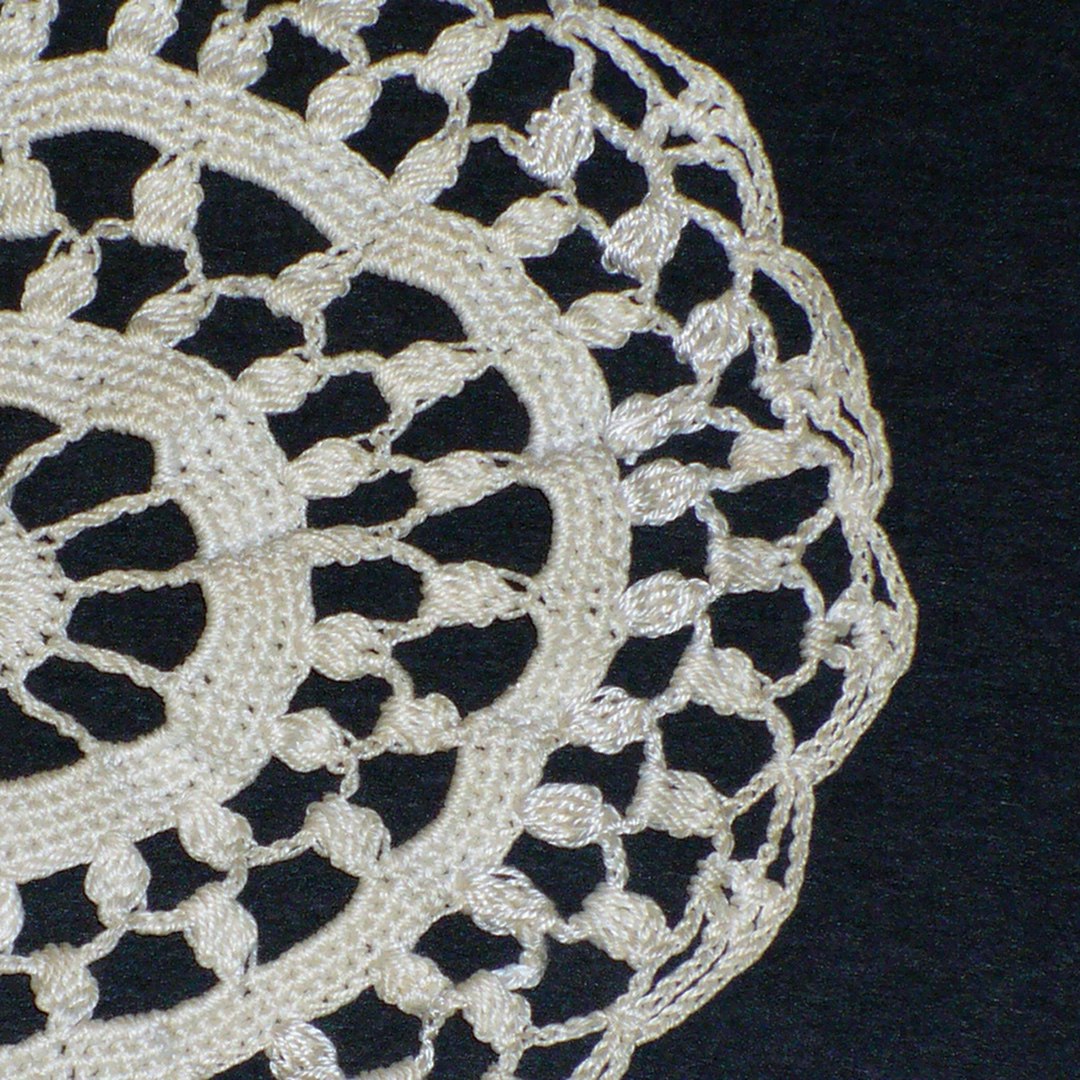
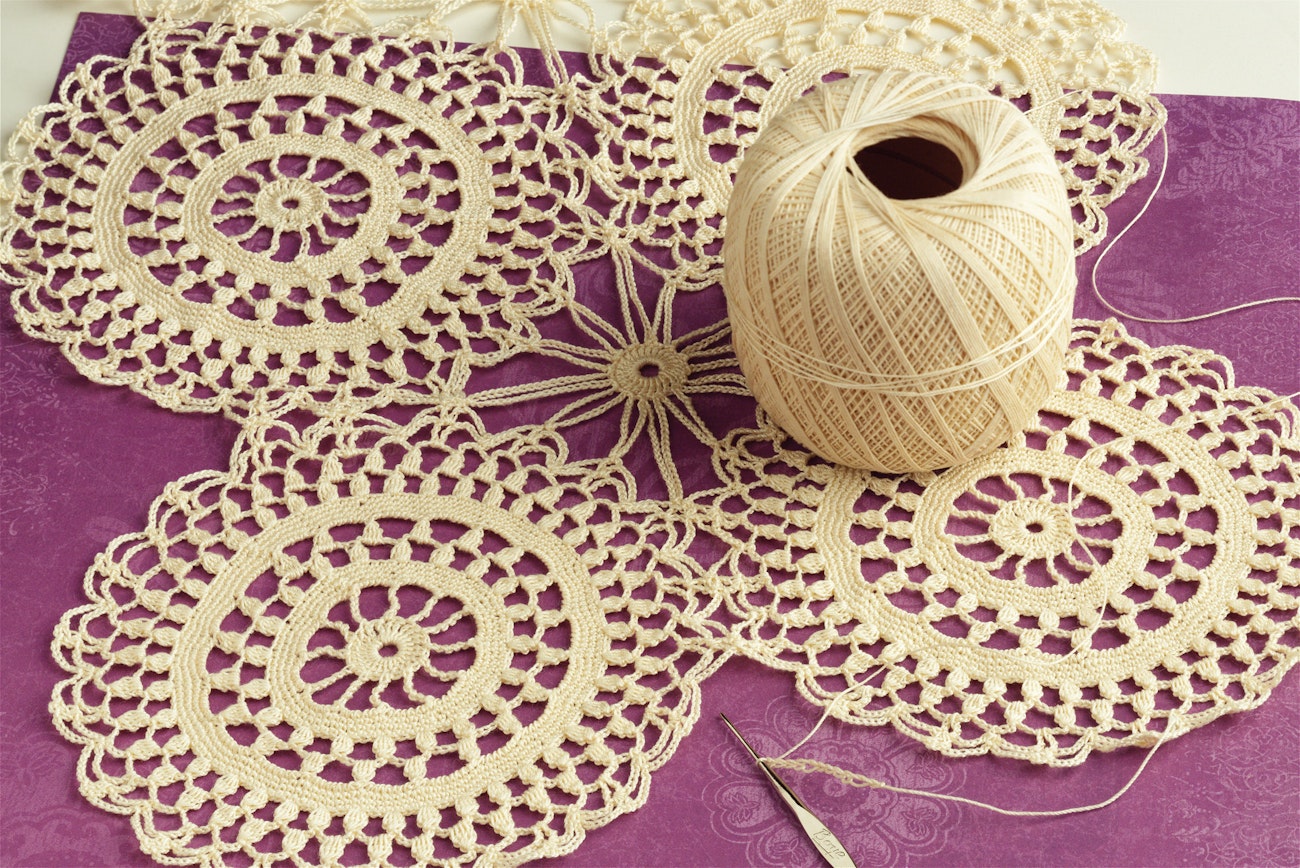 Maggie created a dresser scarf using Mama’s wheel motif. Photo by Joe Coca
The repairs turned out to be far more daunting than I had anticipated. Nearly every motif needed at least one repair; some of them were quite complex. Most of the repairs involved clusters, V-stitches, double crochets, and single crochets in the upper rounds that rested on chains in the lower rounds. The steps for repairing double-crochet stitches are shown below.
How to Make a Crochet Repair
Tips and Techniques
Before attempting a repair for the first time, make a swatch in worsted-weight yarn duplicating the area that will need repair and then cut the yarn to correspond to the damaged places in the piece itself. Study the composition of the stitches and how they fit together, and practice your repair on the swatch until you can do it to your satisfaction.
Finding an exact color match for the thread in a piece of older needlework may be difficult. I found nothing in my huge stash of old threads that was close in color to the tablecloth, but the readily available Coats Opera Crochet Thread Size 30 in Ecru (#503) turned out to be a very close match, so that’s what I used.
An area in need of repair usually first should be enlarged until an original thread end on each side of the hole is long enough to weave into the back of the piece.
Before beginning the repair, it is important to weave in the original thread ends (which may be brittle) to keep them out of the way both during the repair and afterward; if they should break then, you would have to rip out the repair and further enlarge the opening again to provide ends long enough to weave into the back.
To deal with stitches in the row/round above the row/round that needs repair, first pick up the bottoms of those stitches and place them on a safety pin (recommended in the case of just a few stitches, particularly double crochet) or contrasting thread (recommended for single crochet or a large number of stitches).
Making the Repair
Try to match the original thread as closely as possible.
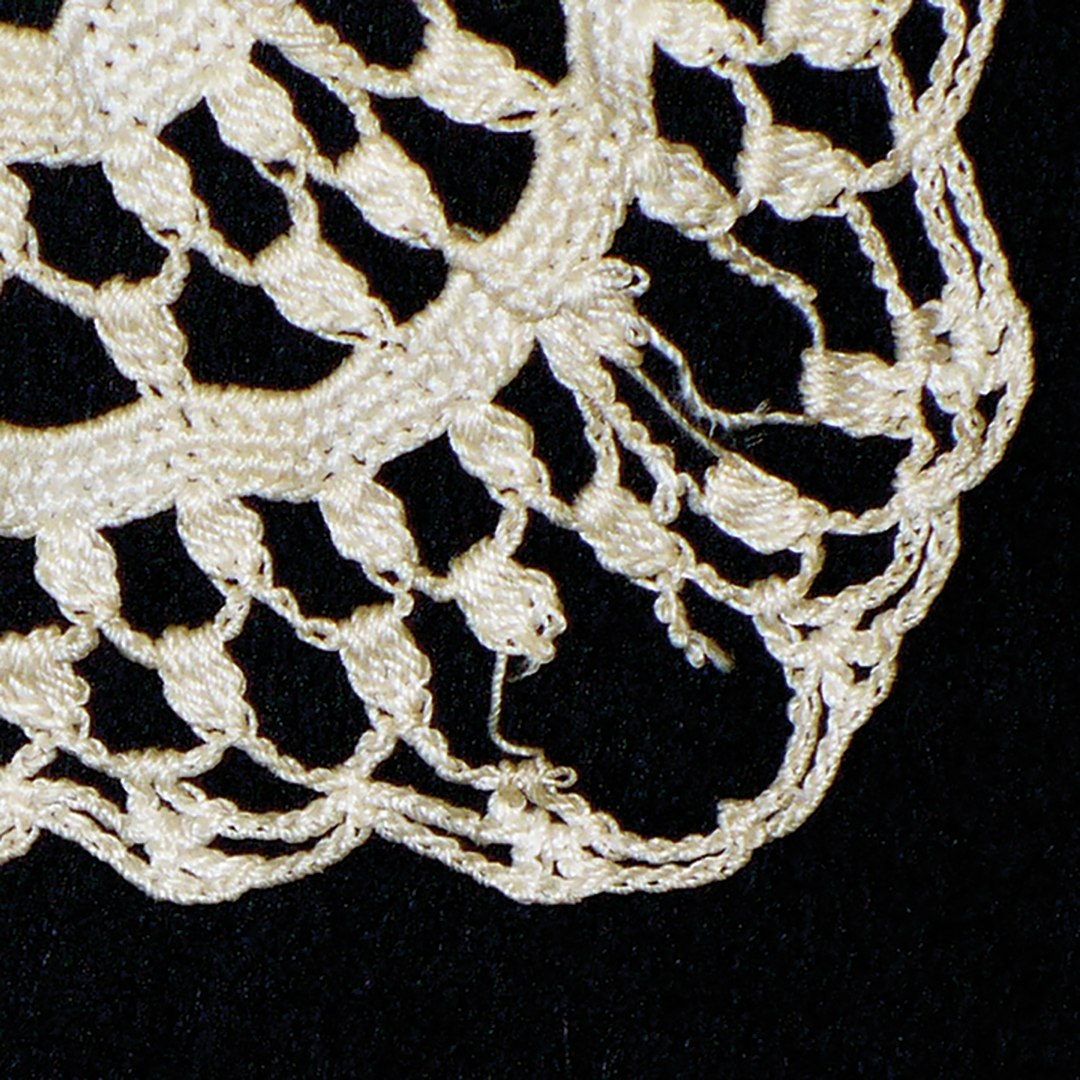 The area to be repaired, showing the raveled and/or disintegrated thread. Photos by the author
 Remove the damaged threads slowly and gently, placing the newly released bottom loops of the stitches and any loops that were already unattached onto a safety pin. Be sure that the loops remain twisted and that you have picked up every loop. Ravel enough of the undamaged original thread on each side of the hole to leave an end long enough to weave into the back. For stitches that are worked directly into the tops of the stitches of the row/round below and not over a chain, rip as far as the point at which the last loop of the last stitch extends out of the bottom of the stitch in the row/round above; place that loop on a safety pin.
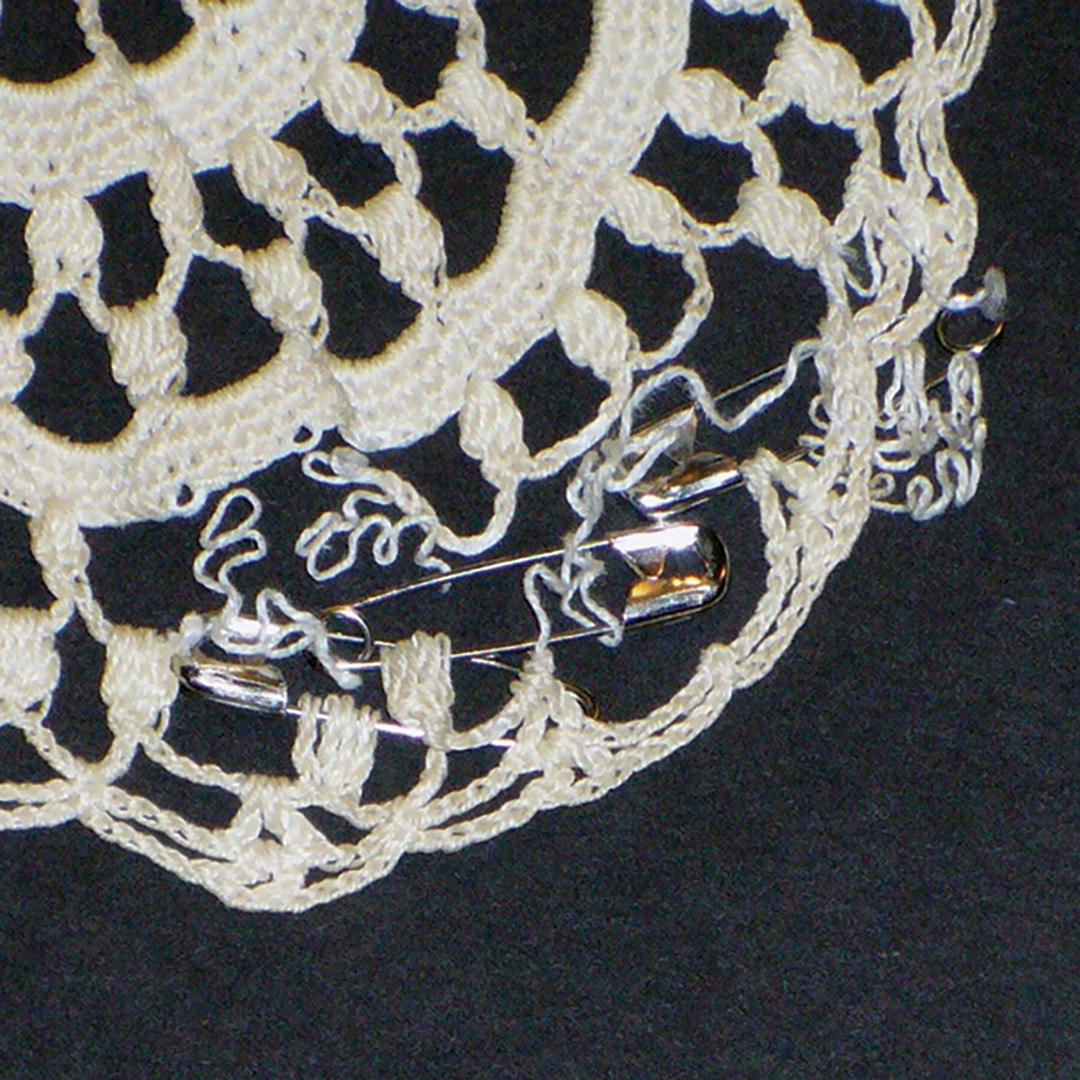 The ends have been raveled to provide strands long enough to weave into the wrong side; the bottoms of the stitches in the upper rounds have been picked up and put on safety pins.
 Weave in all ends from the original thread.
To integrate the stitches on the upper row onto the new stitches worked on the lower row/round when those stitches have been worked over a chain, crochet a chain base for the upper stitches and remove the hook from the last loop. Estimate how much thread will be required for the stitches to be worked after the chain is in place and cut the thread with a tail of that length. Carefully remove the bottoms of the stitches to be joined onto the new stitches from the safety pin, insert the hook into the opposite end of the stitches coming out at the end of the first stitch, pick up the dropped loop, pull the loop through the bottoms of the stitches, and carefully slide the stitches onto the new chain. Pull the loop until the length of thread left to complete the work also may be pulled through the chain and is in position to continue working.
 The area repaired, showing the new stitches that were worked and set onto new chains in the previous round.
 To work new stitches directly into the stitches of the row/round below (instead of slipping them over a chain), remove the safety pin from the loop of the last stitch, insert the hook into the loop, and with new thread work the first stitch into the first unworked stitch on the row/round below. *Remove the hook from the loop, insert the hook into the bottom loops of the next stitch on the row/round above, pick up the dropped loop and draw through the stitch on the hook*, work the next stitch on the row/round below, if necessary, and repeat from * to * until all the stitches ripped out have been replaced.
Fasten off and weave ends carefully into the wrong side of the work.
Would you like to try Mama’s wheel motif? See the companion project in PieceWork November/December 2007.
Also, remember that if you are an active subscriber to PieceWork magazine, you have unlimited access to previous issues, including November/December 2007. See our help center for the step-by-step process on how to access them.
Maggie Petsch is a wildlife photojournalist who likes to translate her wildlife photographs into counted cross-stitch. She still finds time to indulge her love for crochet.
Originally published June 10, 2020; updated August 10, 2022.