The original instructions for this “Maltese Edging” appear in Eléonore Riego de la Branchardière’s Crochet Book, Eighteenth Series, for Cluny, Guipure d’Art and Maltese Laces, which was published in England in 1865. British crochet terms differ from American, and in the nineteenth century, many designers offered their own variations. For example, the single stitch in Crochet Book, Eighteenth Series, for Cluny, Guipure d’Art and Maltese Laces is a single crochet in many other English publications of the period. Both translate to a slip stitch for American crocheters. Bart Elwell has modified the original instructions to reflect these differences as well as substituted materials that are readily available today for the ones specified in the original, which were Walter Evans & Co.s Boar’s-head Crochet Cotton Nos. 24 or 30 and Walker’s Uncotopic Needle No. 4½.

Engraving of Maltese Edging from Eléonore Riego de la Branchardière’s Crochet Book, Eighteenth Series, for Cluny, Guipure d’Art and Maltese Laces (London,1865).
MATERIALS
- Gutermann Silk Sewing Thread, available in more than 120 colors
- Crochet hook, steel, size 0.68 mm (about a size 13)
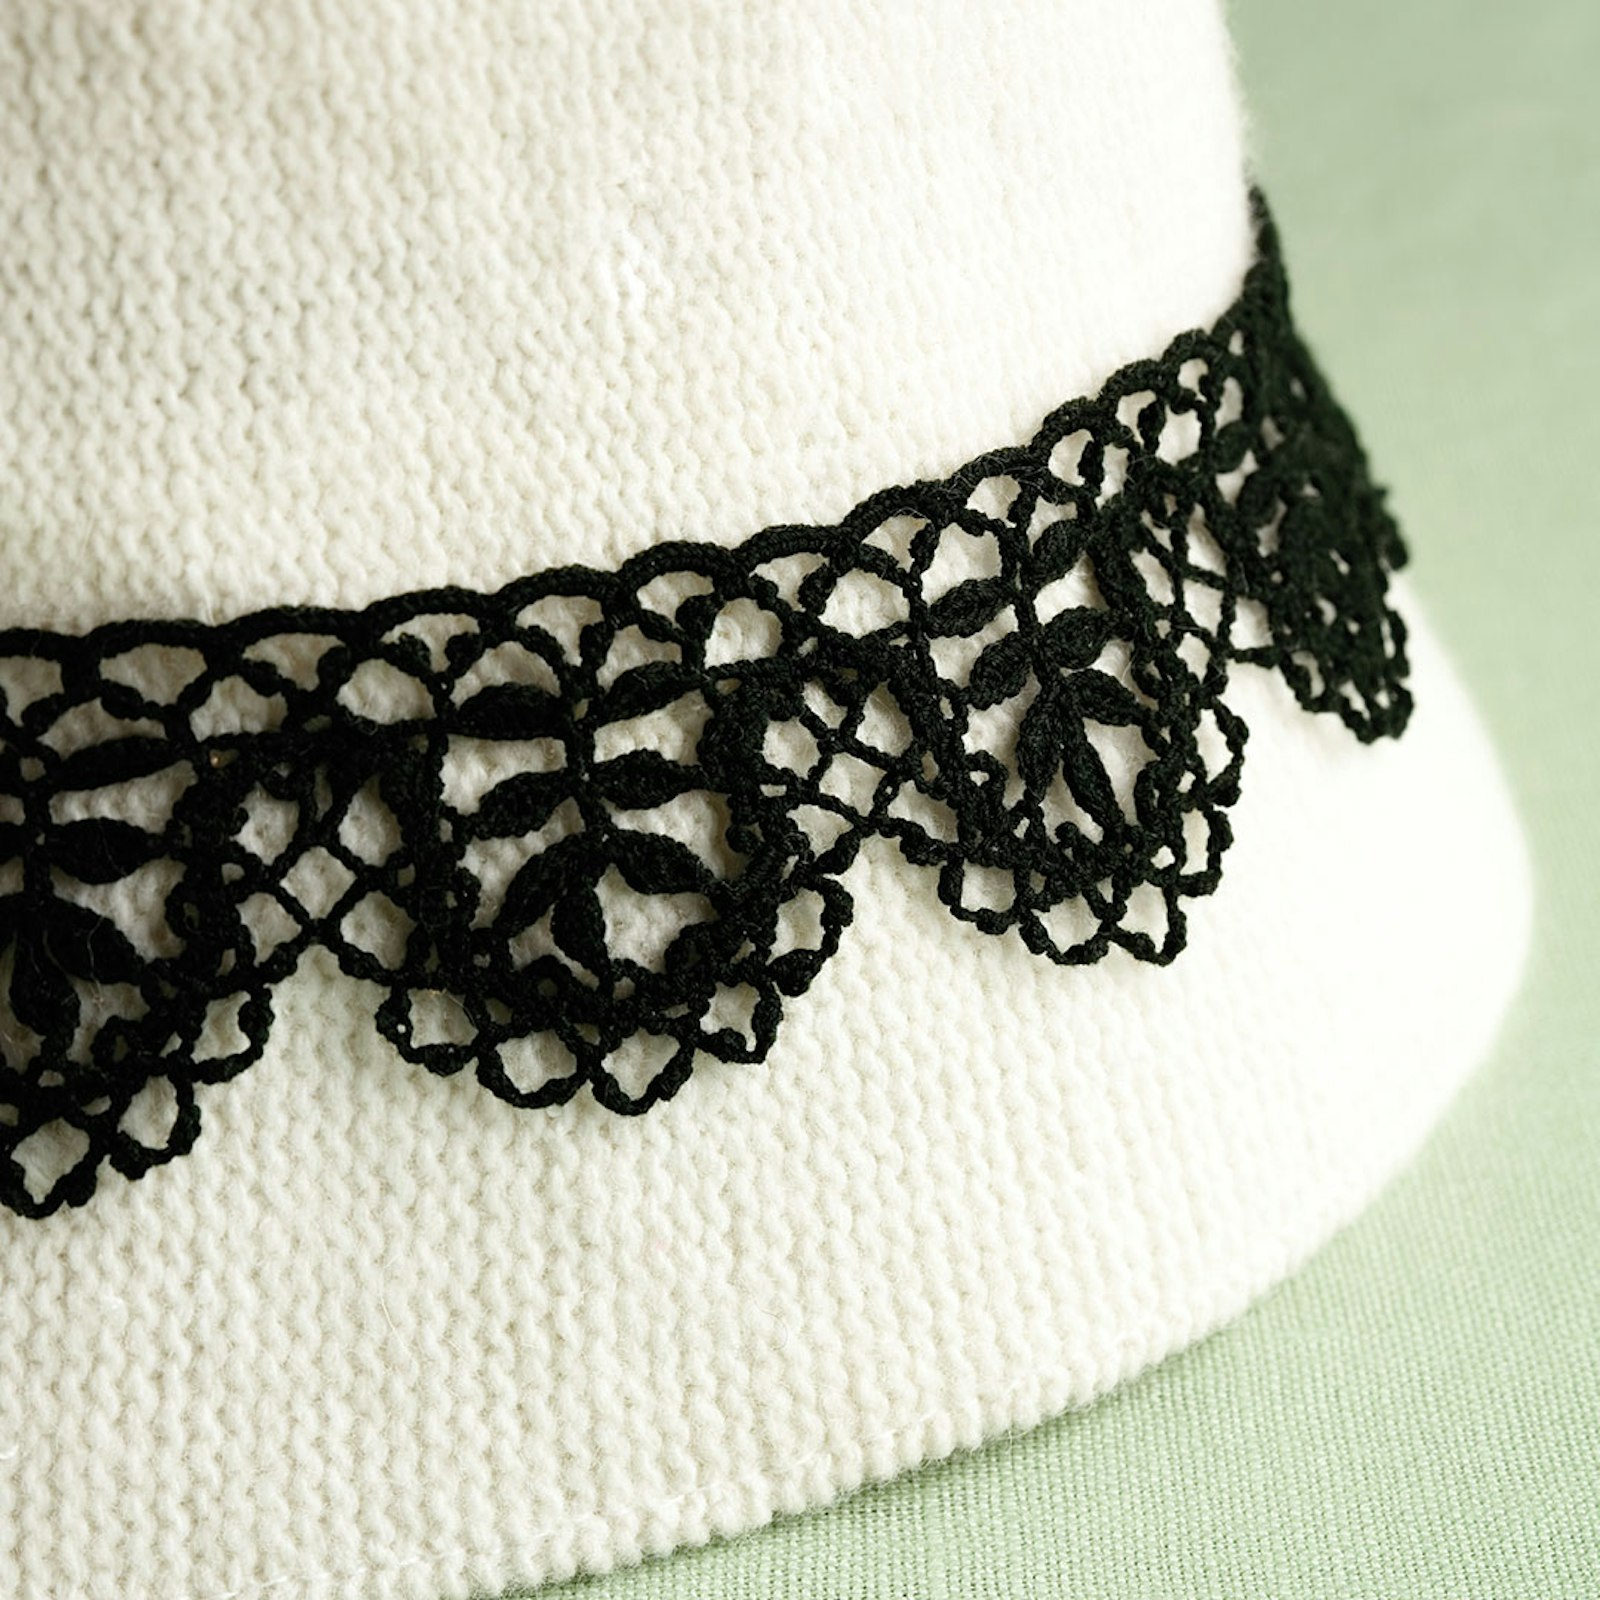
Finished size: Based on actual use of edging; these instructions will create a crocheted-lace edging 1½ inches (3.8 cm) deep with each scallop 1½ inches (3.8 cm) wide
INSTRUCTIONS
Notes: Use 2 strands of the sewing thread as 1. The lace is worked in four main steps; each step is shown in color on the accompanying illustrations. The first is a length of foundation braid, which has chain-stitch loops along its edge; the second is the filling of the scallops with stems of leaves and the inner row of heading loops, which have picots; the third is a secondary heading row made up of chain stitches and single crochets; the fourth is an outer edging, which has chain-stitch loops with picots around the outer curves of the scallops and structural connections in the recesses between them. I recommend that you make a sample using thread and hook sizes of your choosing to determine the completed size and scale of your lace. This will help in calculating the amount of foundation braid you will need for your project.
Braid
Ch 6, 2 dc in sixth ch from hook. * Ch 5, turn, sk the ch sts, make 2 dc in the next dc of prev row. Rep from * for the desired length.
Note: The loops along the edges of the braid are joining points. Every scallop of lace requires 12 loops on each side of the braid.
Filling
Turn work. Sl st in next dc and in each of the next 3 ch sts to the center of the ch-5 lp. ** Ch 19, turn. Keeping the length of the braid to the right for right-hand crocheters or to the left for left-hand crocheters (abbreviated R for right hand and L for left hand below), join with sl st to the center of the next lp to the R or L. Always make the joins on the same side of the lace each time. In 8 ch sts of the ch 19, make the foll sts, which will form a leaf (1 sl st, 1 sc, 1 dc, 2 tr, 1 dc, 1 sc, 1 sl st). All subsequent leaves will be made with the same sts. This sequence of sts is to be repeated each time you find the term “make leaf.”
Note: You have just completed the second leaf of the cluster. The remaining chain stitches of the 19 will be used to make the first leaf of the cluster after the other leaves are made within the scallop.
Ch 11, sk the next lp, sl st in the center of the next lp to the R or L, make leaf in 8 ch sts of the ch 11.
Ch 10, sk the next lp, sl st in the center of the next lp to the R or L, make leaf in 8 ch sts of the ch 10. This completes the leaf at the end of the scallop. Make 1 sl st in each of the next 3 sts.
Ch 8, sk the next lp, sl st in the center of the next lp to the R or L, make leaf in the 8 ch sts. Make 1 sl st in the base of the opposite leaf and in each of the next 4 ch sts along the stem.
Ch 8, sk the next lp, sl st in the center of the next lp to the R or L, make leaf in the 8 ch sts. Make 1 sl st in the base of the opposite leaf and in each of the next 3 ch sts along the stem.
Ch 8, sl st in the center of the next lp to the R or L, make leaf in the 8 ch sts. Ch 5, make leaf on the next 8 ch sts which are the remaining ch sts in the starting ch of 19.
Work the foll section in parenthesis for the first lp of the inner heading row on the first scallop only: (Turn work. Make the first lp of the inner heading row thus—ch 8, p, ch 6, p, ch 1, sk to * ).
Make 1 sl st in each of the 3 ch sts of the 4. Turn work. Ch 5, p, ch 6, p, ch 1, * 2 sc in the center of the ch-5 lp between the two leaves. Ch 5, p, ch 6, p, ch 1, work 1 dc in the sl st where the leaf joins the lp of the braid. Ch 5, p, ch 6, p, ch 1, 2 sc in the center of the next lp of the braid. Ch 5, p, ch 6, p, ch 4, join with sl st to the center of the next lp. Turn work. Rep from ** . Cont to make scallop fillings and inner heading row until the desired length of lace is achieved. Cut thread and finish end.
Heading
Row 1: With WS facing, attach thread to the center of first lp between the two picots of the inner heading row. Make 1 sc in the same space. * Ch 6, 2 sc in the center of the next lp between the two picots. Rep from * to the end of the row.
Row 2: Turn work, sl st in the next sc. Work 9 sc in each of the ch-6 lps to the end of row. Cut thread and finish
end.
Edging
With RS facing, attach thread in the center of the third lp on the outer edge of the braid. Make a picoted lp thus—* ch 5, p, ch 5, p, ch 1. Sc in the center of the next lp of the braid. Make 4 more picoted lps the same way.
When 5 picoted lps have been made, ch 5, p, ch 6, sc in the center of the next lp. Ch 3, sk the next lp and make 1 tr in the next lp. Then another tr in the next lp. Ch 3, sk 1 lp, sc in the next lp. Ch 3, sc in the ch-6 lp after the last p. Ch 5, p, ch 1, sc in the next lp of braid. Rep from * , cut thread, and finish end.
Steps
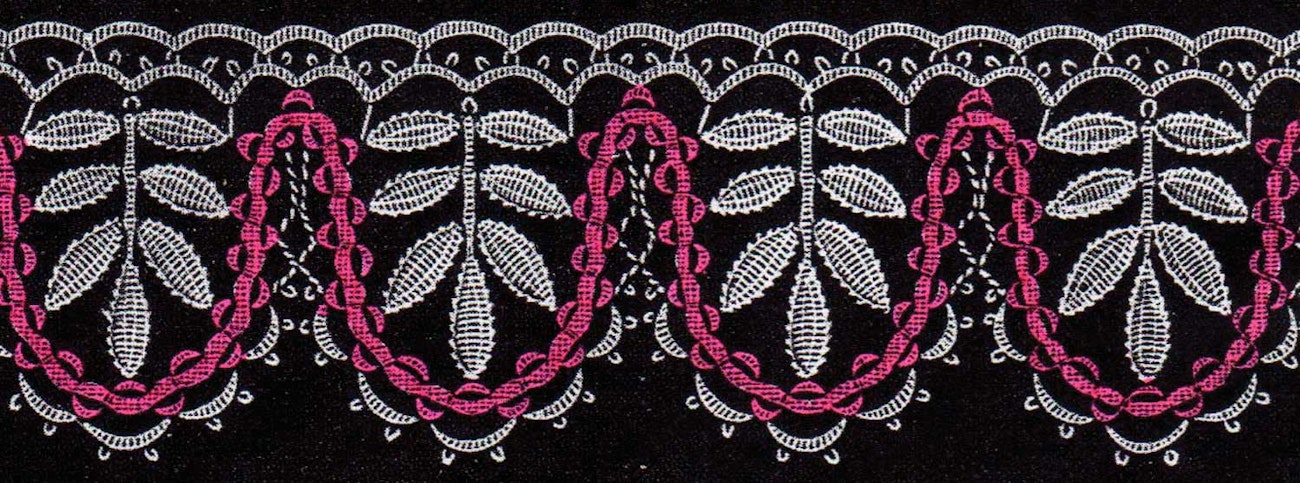
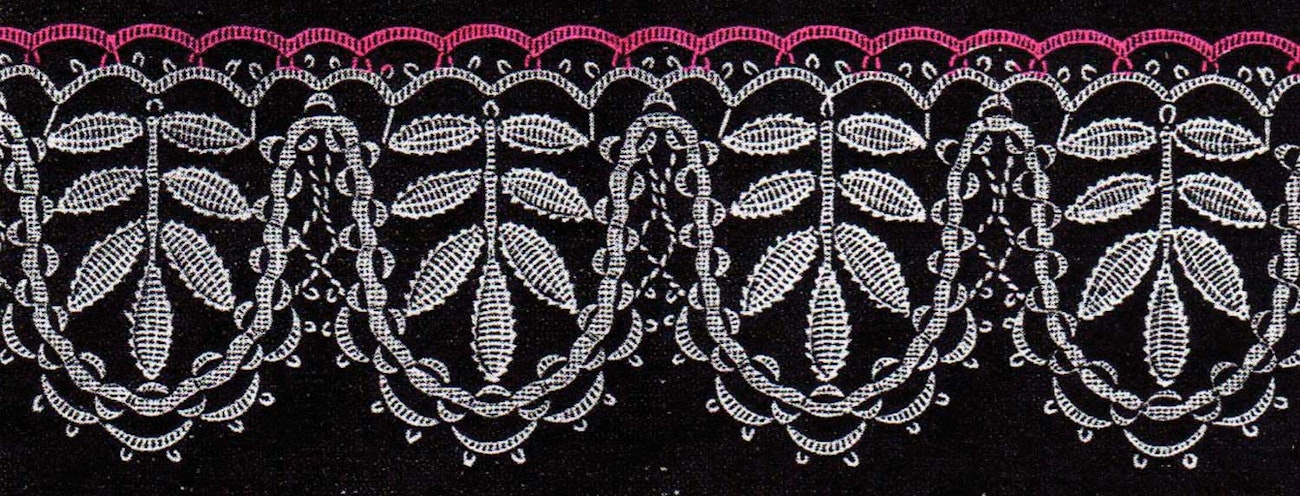
Step 1—Braid
The first step in the process of making the Maltese Edging: the foundation braid, which has chain-stitch loops along its edge.
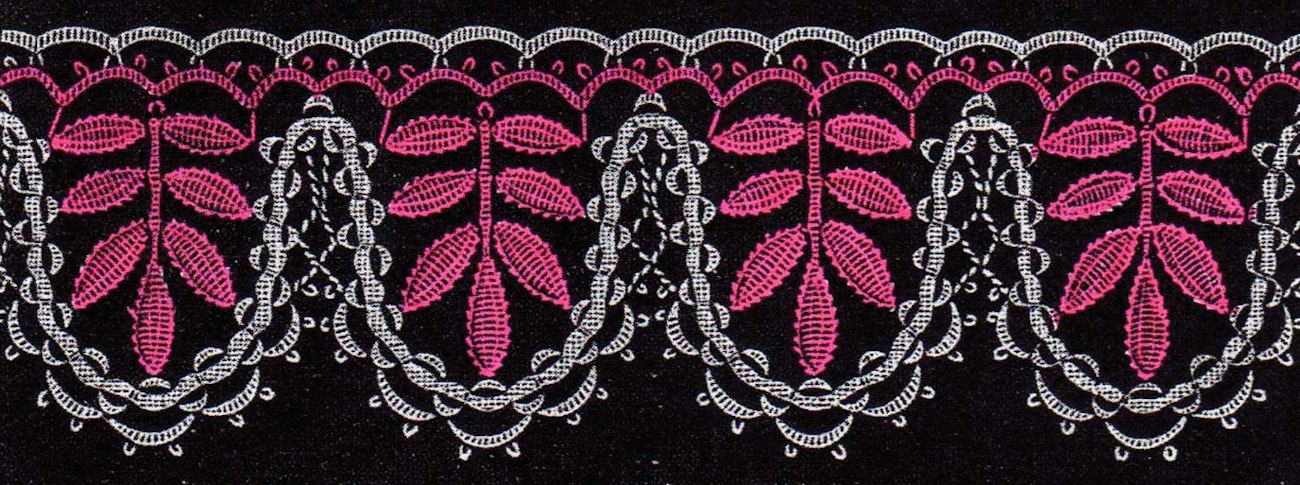
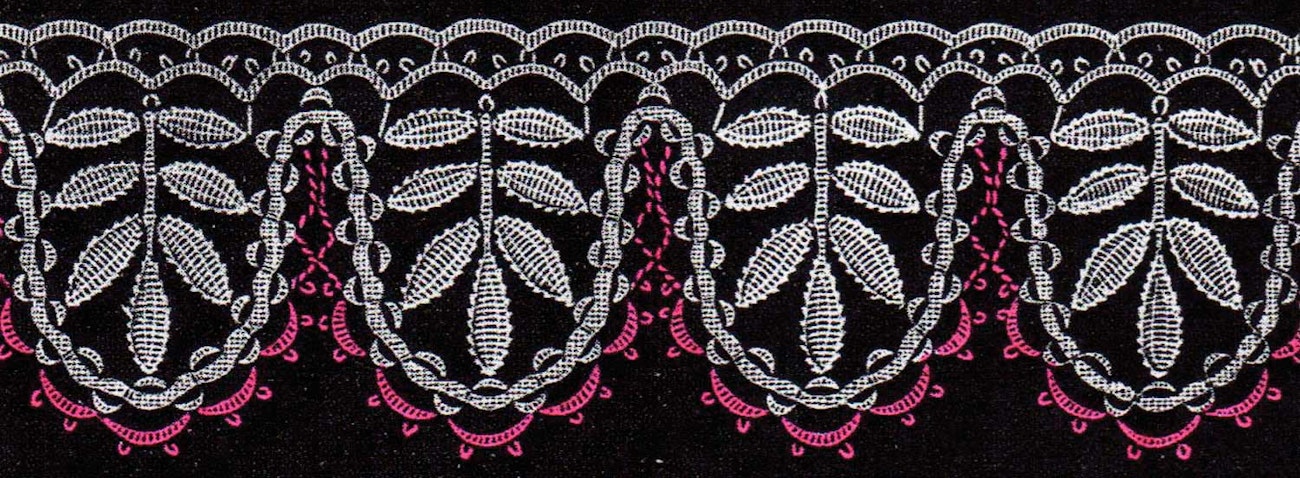
Step 2—Filling
The second step in the process of making the Maltese Edging: the filling of the scallops with stems of leaves and the inner row of heading loops, which have picots.
Step 3—Heading
The third step in the process of making the Maltese Edging: a secondary heading row made up of chain stitches and single crochets.
Step 4—Edging
The fourth step in the process of making the Maltese Edging: an outer edging, which has chain-stitch loops with picots around the outer curves of the scallops and structural connections in the recesses between them.
Bart Elwell (1962–2015) was a self-taught crocheter who was fascinated with the technical challenges of needlework. He was a member of the International Organization of Lace, Inc. (IOLI). Designing and teaching classes on lacemaking techniques were his favorite parts of the needle arts. Bart was a frequent and beloved PieceWork contributor.