The following tutorial will acquaint you with some of the basics of Margaretenspitze (Margaret’s lace), a hand-knotted lace technique. The tools and materials needed to make this form of micro-macramé are relatively inexpensive and easily found in most craft stores.
Materials
- Styrofoam, polyethylene foam, or sturdy corkboard, 1 piece 12 x 12 inches (30.5 x 30.5 cm)
- Cotton fabric, dark color, to place on top of the square to provide a smooth working surface (a small square or round lacemaker’s pillow may be used if it is firmly packed)
- Crochet thread, 100% cotton, size 5 or 10, in a light color of choice
- Glass-headed pins, large and medium
- Needles, chenille and tapestry, size 22 or 24
Tutorial
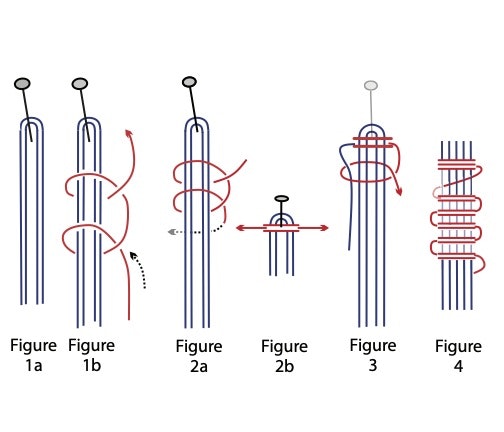
Cover the foam or corkboard square with the fabric. Cut two 18-inch (45.7-cm) threads and 1 worker thread about 1½ yards (1.4 m) long. Place a large pin in the middle of the working surface. Fold the 2 shorter threads in half and place them around the pin in a horseshoe shape. Press the pin down into the pillow to firmly anchor the work. Th ere are now 4 hanging bundle threads. See Figure 1a.
Start: Gather all of the short threads plus the 1st 9 inches (22.9 cm) of the worker (longer) thread in the left hand and grasp all 5 threads firmly in place between the thumb and index finger. The worker thread hangs to the right.
The starting knot: With the worker thread, make a double loop to the right while holding the bundle threads taut. (The worker, in red, goes over the bundle, then back under, and up through the loop.) Repeat for the 2nd loop. See Figure 1b.
Move the bottom end of the worker thread to the left underneath the bundle and close the starting knot by gently pulling the opposing threads. Carefully slide this knot up to meet the anchor pin at the top and tension firmly. See Figures 2a and 2b.
The shorter end of the worker thread (on the left) drops down to become a part of the bundle. Gather all 5 bundle threads by adding a single righthand loop and tension once more. See Figure 3.
The rib-knot (Rk): The worker thread goes underneath the hanging bundle threads and a double-loop (Rk) is made to the left, while keeping the bundle threads taut (tension well after each loop). The worker then goes back under the bundle, to the right, to make the next rib-knot. See Figure 4.
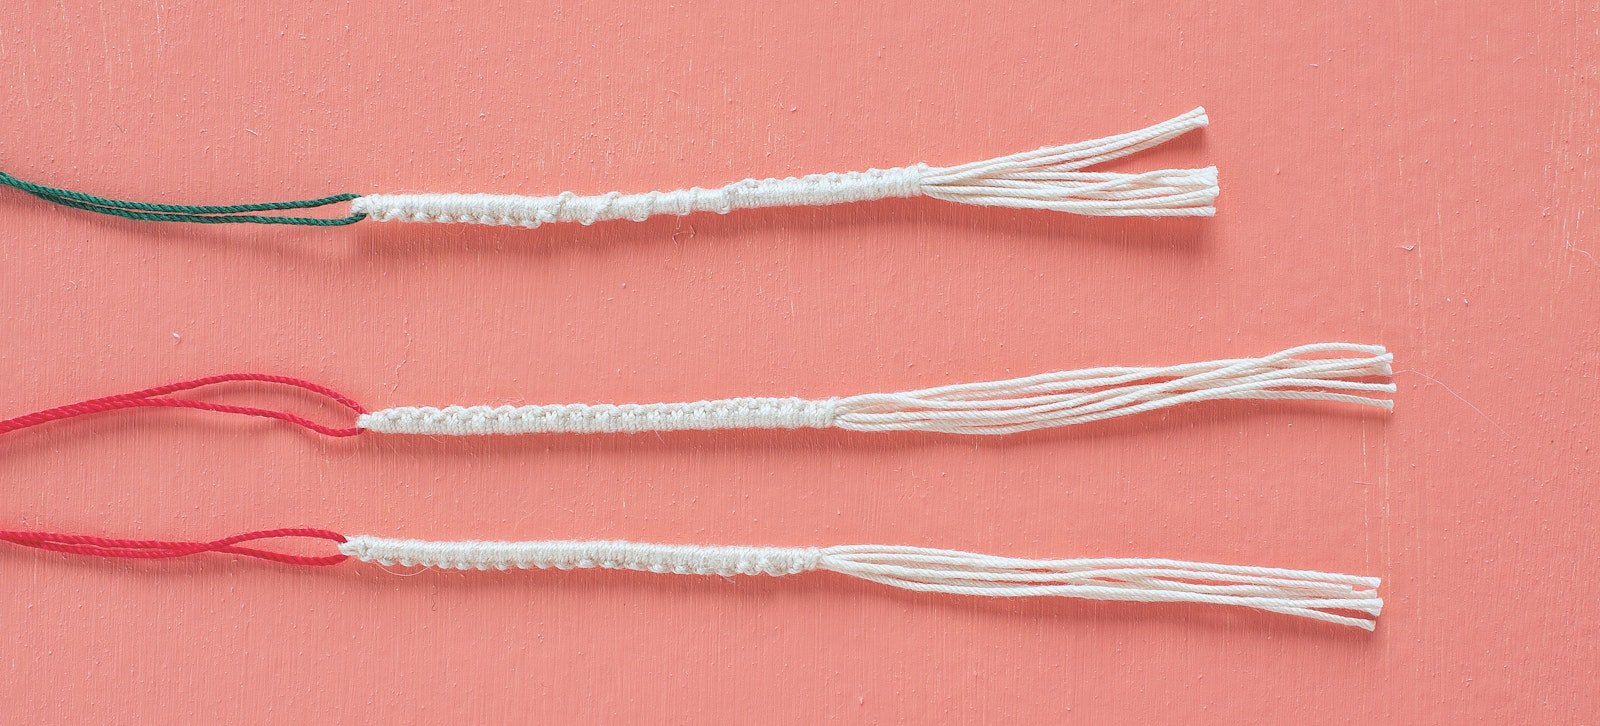
Using firm tension for each alternating Rk, continue until the worker thread becomes short. The bundle is finished. Secure the end with 3 loops and trim the ends. Look at the underside of the sample: The rib-knots have made a lovely pattern of zigzag knots.
Notes
The diagrams show exaggerated thread positions. In the actual working process, after tensioning, the thread should lie snugly against the previous loop. Don’t allow it to ride up over the previous loop or the bundle will look lumpy.
Practice this tutorial until you have mastered the rib-knot and your tension is both firm and even before venturing into the flower project [available in the May/June 2012 issue of PieceWork].
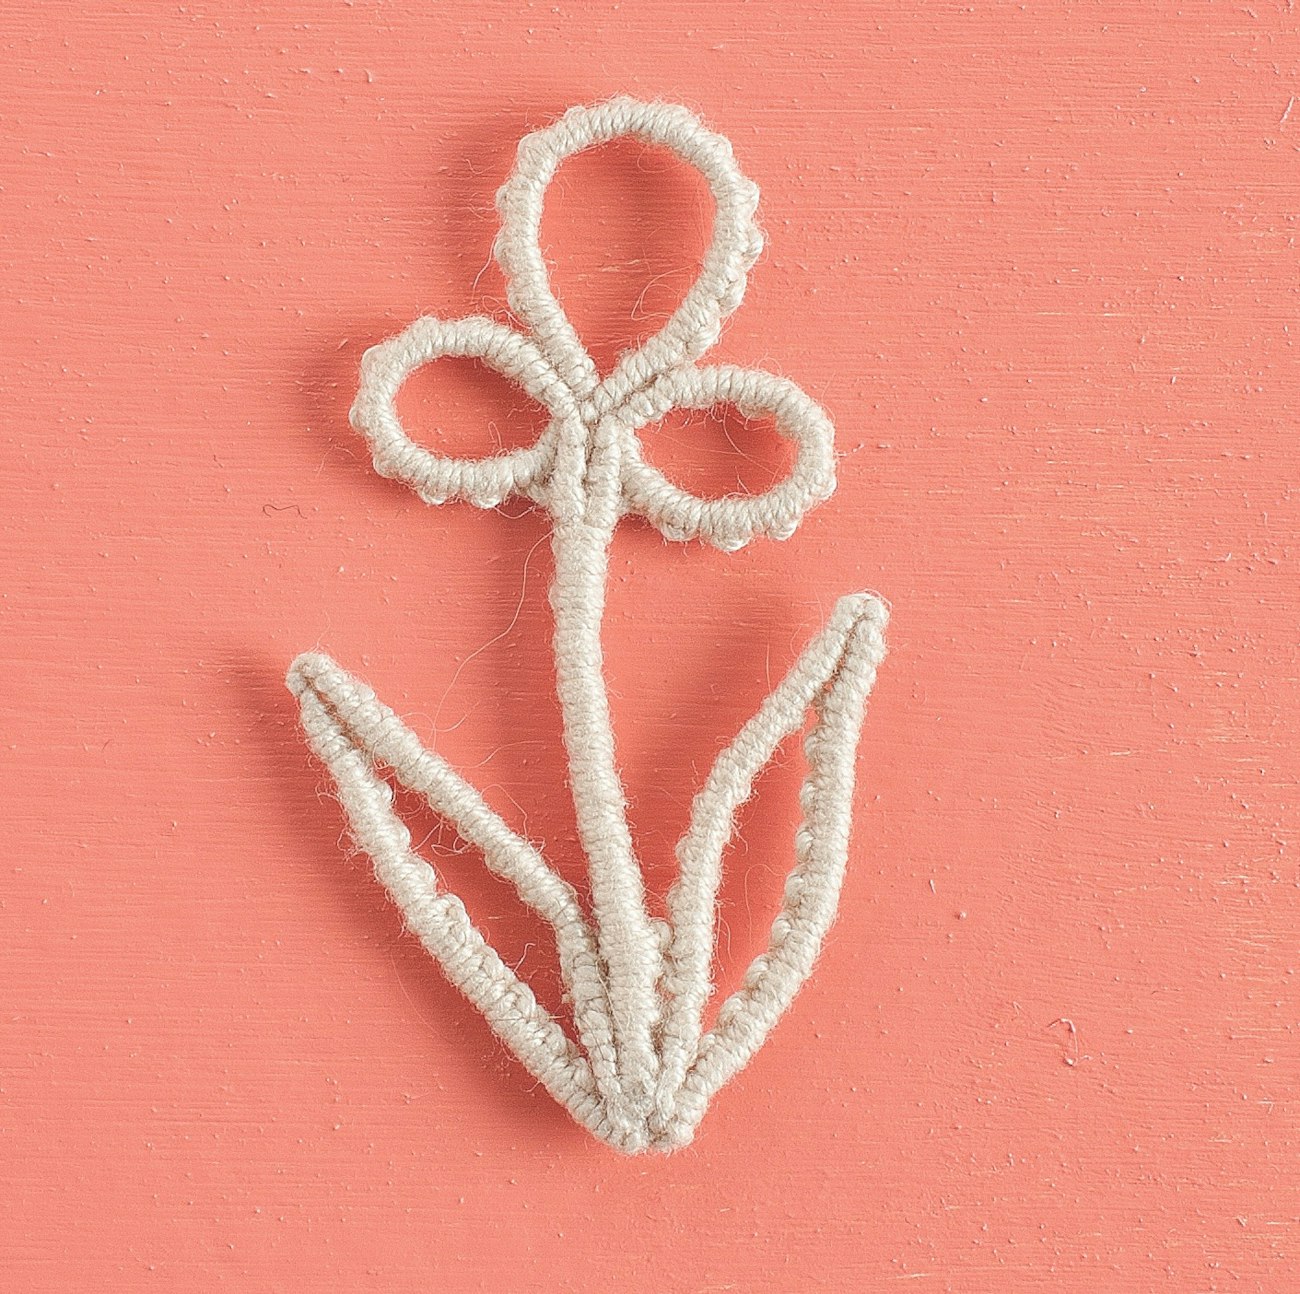
The Small Flower worked in Margaretenspitze (Margarete’s lace). Find this project in the May/June 2012 issue of PieceWork.
Variations
Once you have become accustomed to the basic techniques, try adding 1 or 2 more bundle threads to make the sampler more substantial looking or consider another variation by using a series of spiral knots. The spiral knot is accomplished by using 7 (single) loops to the left over all bundle threads, then the worker goes under all threads, and after tensioning continues the next series of 7 single loops to the left. The finished tutorial sampler may be easily adapted for use as a scissors or key-chain fob by simply adding 1 or 2 more bundle threads.
Experiment!
Marji Suhm began making bobbin lace in 1980. She is a former president of International Old Lacers Inc. (IOLI) and a former vice president of L’Organisation Internationale de la Dentelle au Fuseau et à l’Aiguille (OIDFA). In 2008, she discovered Margaretenspitze through Lotte Heinemann’s book. She enjoys making as well as teaching this unusual lace.
This tutorial is excerpted from the May/June 2012 issue of PieceWork.