The technique of shading embroidery stitches plays an integral role in various forms of needlework. For example, the Sisters of the Order of Saint Benedict expertly used it in creating ecclesiastical vestments and accessories (see "The Art Needlework of the Sisters of the Order of Saint Benedict," PieceWork May/June 2006). Shading also is a hallmark of Japanese embroidery.
To get started, you will need: a pencil, three values of the same color of Japanese flat silk embroidery thread, tracing paper, silk couching thread, size 7 and size 8 Japanese needles, and Japanese size 1 imitation gold thread. I worked on a Japanese frame with an obi silk ground fabric center and a cotton fabric border.
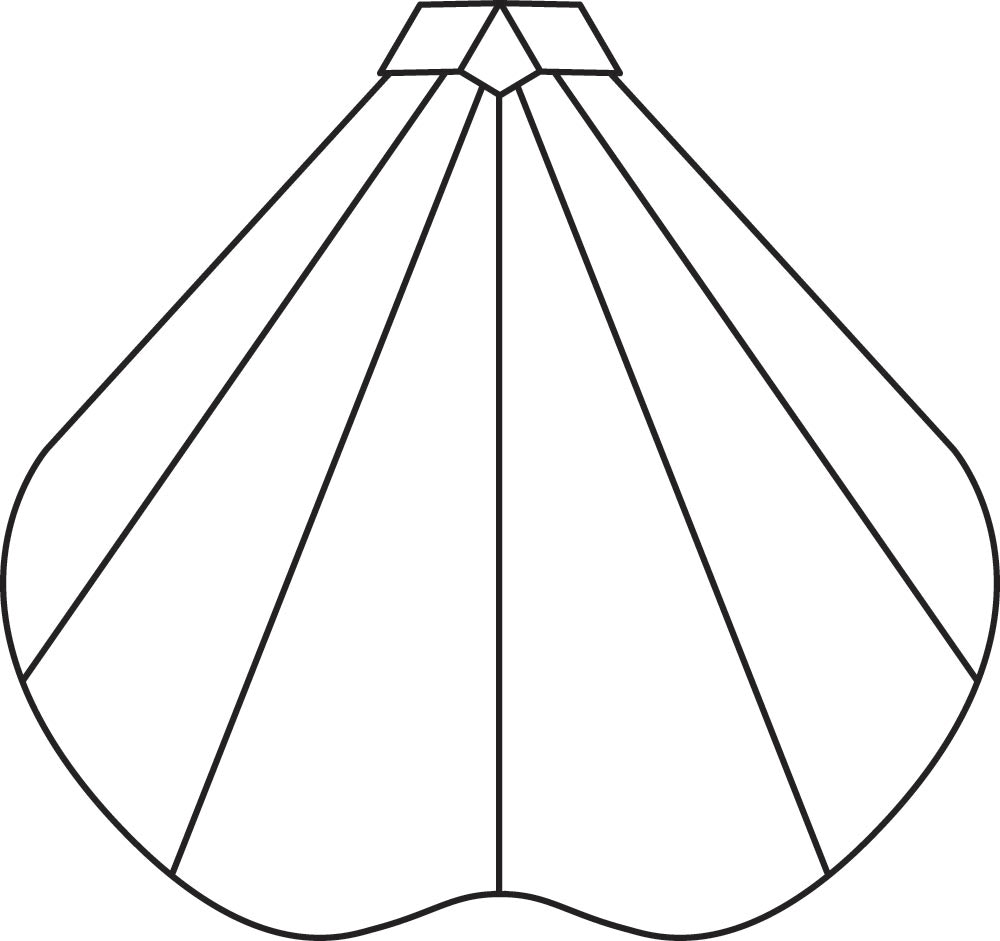
Mount the ground fabric in the frame. Trace the outline of the petal on the tracing paper, baste the tracing paper to the center of the fabric, and using one strand of couching thread, backstitch the design outline, stitching through the tracing paper and the fabric. Gently tear off the tracing paper. Lightly draw the interior stitching guidelines of the pattern on the fabric. Begin all stitches with a knot on the back and one pinhead stitch and end all threads with two pinhead stitches. (A pinhead stitch is a 1⁄16-inch [1.5-mm] long straight stitch placed vertically in the area you intend to cover with stitches; this small tacking stitch puts the correct tension on the starting and ending threads.)
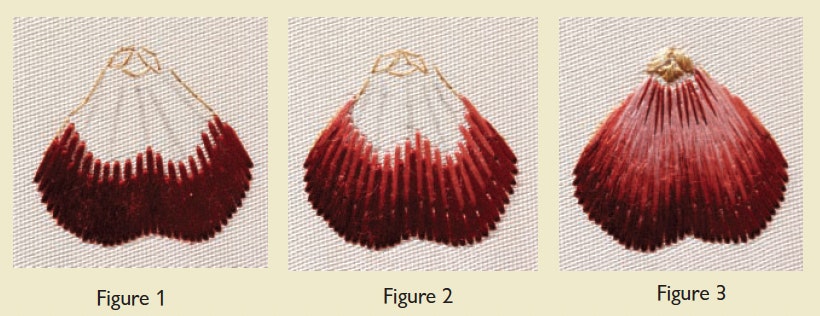
Row 1
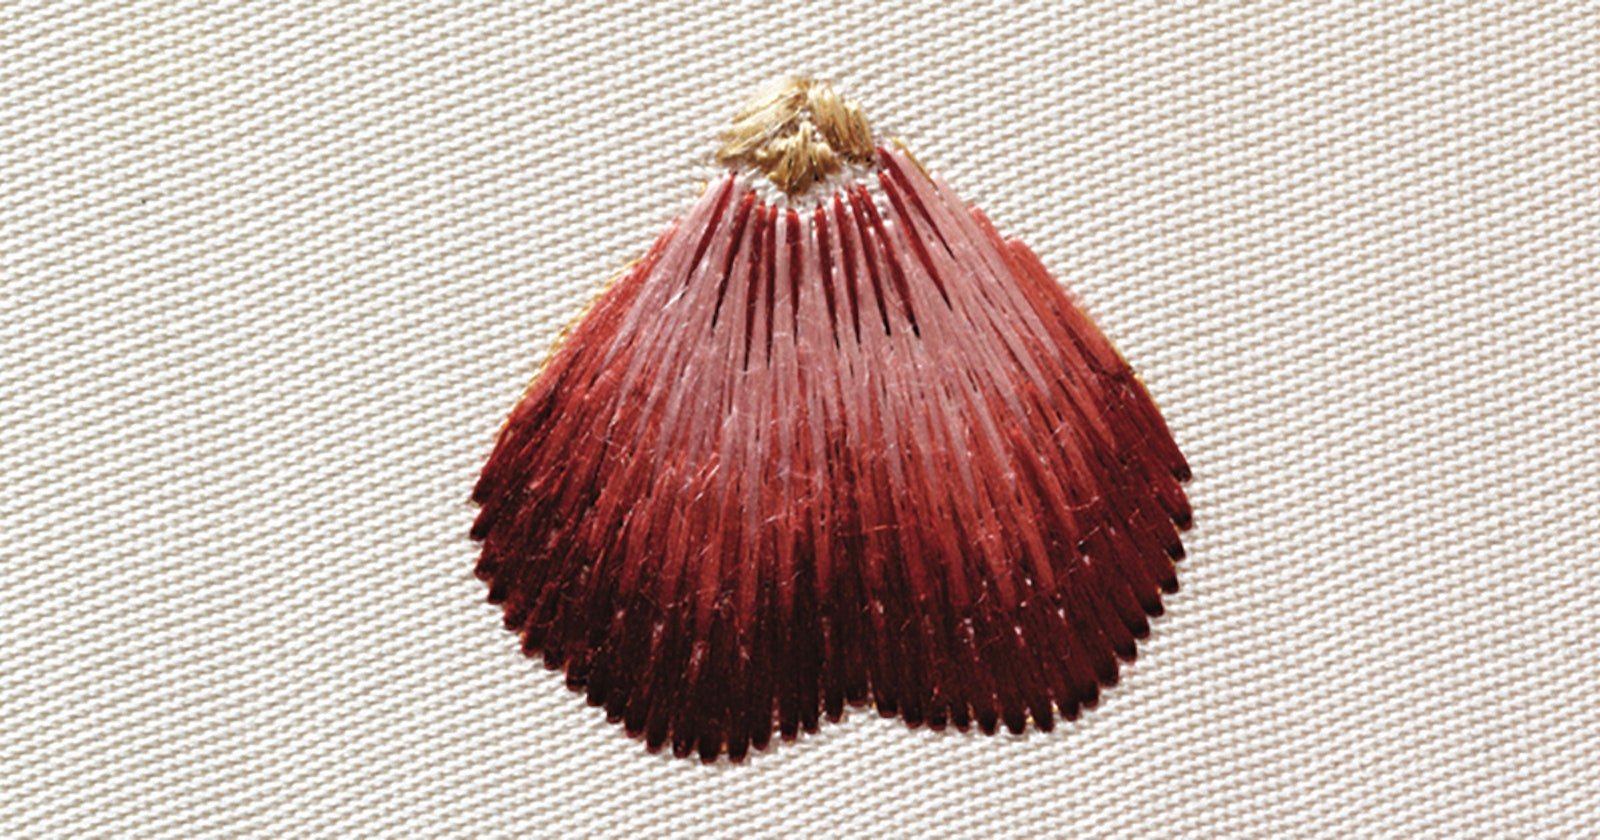
Work the first row, alternating long and short stitches, from the design’s center guideline to each side, using 2 strands of the darkest shade of flat silk in the size 8 needle. The first long stitch is about 3⁄8 inch (1 cm) long: bring the needle up on the guideline in the center of the petal and take the needle down along the outer edge at the bottom of the petal. The next stitch is short, to the right of the first stitch, and about 1⁄4 inch (7 mm) long: bring the needle near the center guideline and take the needle down along the outer edge at the bottom of the petal. The bottom of the stitches should be slightly further apart along the outer edge. Leave enough space between the stitches to accommodate the stitches of the second row. Continue making stitches to the right, alternating long and short stitches, and placing stitches parallel to the guidelines, until the right side of the petal is reached. Return to the left of the center guideline and continue to stitch, alternating long and short stitches until the left side of the petal is reached. (Figure 1.)
Row 2
The stitches in the second row are about 5⁄16 inch (8 mm) long. Use 11⁄2 strands of flat silk in the medium shade in the size 8 needle and stitch parallel to the guidelines. Bring the needle up just right of the center guideline and about 1⁄8 inch (3 mm) below the bottom of the first stitch of Row 1. Take the needle down through the middle of the short stitch of Row 1. Stitch from the center guideline to the right edge of the petal, continuing to pierce only the short stitches of Row 1. Return to the center and stitch to the left edge of the petal. (Figure 2.)
Note: For Rows 3–6, stitch from the center of the petal to the right and then to the left. Use stitches that are about 5⁄16 inch (7–8 mm) long and parallel to the guidelines and 1 strand of flat silk in the size 7 needle; decrease the thickness of the flat silk to 1⁄2 strand for Rows 5 and 6.
Row 3
With the medium shade of flat silk, start at the center guideline and pierce the middle of the long stitches of Row 1.
Row 4
With the lightest shade of flat silk, start at the center guideline and pierce the middle of the long stitches of Row 2.
Row 5
With the lightest shade of flat silk, start at the center guideline and pierce the middle of the long stitches of Row 3.
Row 6
With the darkest shade of flat silk, start at the center guideline and pierce the middle of the long stitches of Row 4.
Base of Petal
Using 1 strand each of the flat silk and size 1 imitation gold in the needle together, work the base of the petal in diagonal satin stitch. (Figure 3.)
Pattern may be photocopied for personal use.
Diane Horschak studied with Shuji Tamura, with Master Saito at Kurenai Kai in Japan by invitation, at the Japanese Embroidery Center in Atlanta, and with Shay Pendray. She was PieceWork’s Needleworker of the Year for 2003.
This was published in the May/June 2006 issue of PieceWork.