Subscriber Exclusive
Kumihimo-to-go!
Learn this Japanese technique for making cords.
The Japanese name for the craft of braiding—Kumihimo—means “a gathering of threads.” These fancy braids have myriad uses. I have braids functioning as key holder, sunglass cord, basket handle, wrist strap on a hiking stick, jewelry, and components of artwork, to name just a few. Colorful braids make great accents to enhance your other handmade items—think purse handles, drawstrings, frog closures, and decorative trim.
Kumihimo involves exchanging threads, usually 8 or more, in a sequence of movements that can range from very simple to very complex. The sequence of movements determines the shape of the finished cord, which can be round, square, flat, or other shapes. Color placement works with the movements to create patterns.
I often use a marudai (braiding stand) and tama (weighted bobbins). It takes a little effort to prepare the bobbins and some time to learn the sequence of movements, but once it’s going, it’s a wonderful, meditative craft. Fortunately, you can get started without the fancy equipment—all you need is some yarn and a braiding disk for a very portable project!
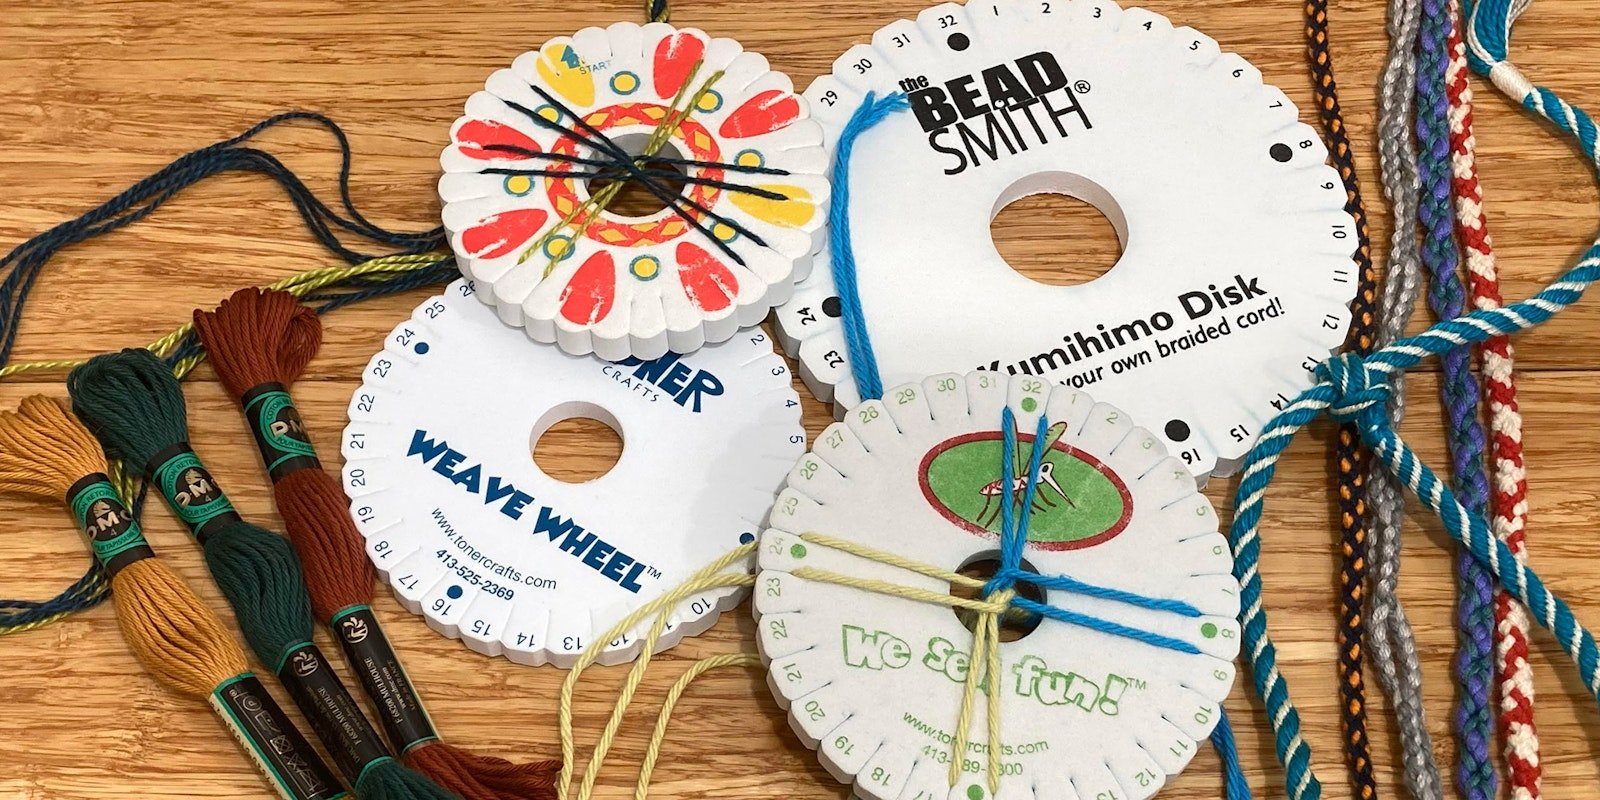
A foam braiding disk has notches around the perimeter to hold the individual threads and a hole in the center to accommodate the developing braid. You can find kumihimo disks at bead suppliers or craft stores, where they are often among kids’ craft supplies as friendship bracelet makers. I have both kinds; the kid craft versions are smaller and are made of softer foam, but otherwise, they are the same tool. I usually grab one of the kid-sized disks, since I find the softer foam easier to use.
Here’s a key fob to make as a first project. The braid is a simple sequence of moves that creates a smooth spiral.
[PAYWALL]
Materials
- DMC Soft Cotton 4 (100% cotton), 10 m/skein: 1 skein each of two colors. Shown in #2497 Prune and #2482 Koala
- Braiding disk
- Ruler or tape measure
- Scissors
- Key ring
Finished size: 3/16" diameter x 18" long braid
Braid
Setup:
Cut 4 strands of each color 30" long. Hold the bundle of 8 yarns (4 of each color) together. Tie an overhand knot close to one end (not tight; you’ll untie it later). Feed the knotted end down through the hole in the center of the braiding disk. Separate the strands. Place two strands of the same color in the slots on either side of the north mark, then place the other two strands of the same color in slots on either side of the south mark. Place two strands of the other color on either side of the east and west marks. You have 4 pairs of threads evenly spaced around the disk. Let the loose ends hang down around the outside of the disk. Center the knot in the hole.
Braiding:
Hold the bundle of threads under the disk in one hand. Keep a light tension on the braid as you work. Orient the disk with the strands up and down (north and south) and side-to-side (east and west).
- Move the strand on the right of the north pair down to a slot on the right of the south pair, then move the strand on the left of the south pair up to a slot on the left of the north pair.
- Move the top strand of the west pair to a slot above the east pair, then move the bottom strand of the east pair to a slot below the west pair.
After Steps 1 and 2, the 4 pairs will be equally spaced around the disk again. There is no need to reposition the threads in this pattern; just rotate the disk clockwise as you work. Repeat Steps 1 and 2 for the length of the braid. A spiral pattern of the two colors will develop.
Holding the disk with braid in progress.
Tips:
- Keep a little tension on the braid so the crossings are lower than the surface of the disk. If the threads appear to be knotting up in the center, pull down on the braid a little more.
- The strands do not need to be tight in the slots, just enough to be tidy.
- Keep consistent tension as you work to make an even braid. It takes practice to find the right tension.
- As you braid, long tails may tangle into an anti-braid under the disk. Draw the tails out as you move the strands to detangle them.
- The colors will stay in the original arrangement. All four strands of a single color will be in the north-south pairs and the other color will be east-west.
When you cannot braid any further, pull the tails out of the slots and set the disk aside. Using one of the yarn colors, whip each end of the braid above the loose tails and above the starting knot. Untie the knot. Comb out the ends and trim the fringe into a 1" tassel.
Whipping steps to finish your braid.
Fold the braid in half and loop it around the key ring in a lark’s head knot. Tie the ends together. I tied one end in an overhand knot around the second end, then tied the second end in an overhand knot around the first.
Finished key fob.
Variations
This braid structure has some easy variations made by changing the number of threads, starting colors, or movements.
Spiral
Emphasize one of the colors by putting more threads in the north-south groups. The movements are very similar, always moving the edge thread of each group.
Notes:
- For this braid, the east-west yarns will take up much faster than the north-south threads. Cut the east-west strands 50%–80% longer than the north-south strands (shown in #2012 Dried Moss and #2500 Ivy).
- 50" strands can be unwieldy. Plastic bobbins help with managing long yarn tails.
- Pulling tighter on the east-west strands than the north-south strands will cause this braid to have a ridged spiral.
Wide spiral braid in progress with 12 north-south strands and plastic bobbins on the long east-west strands.
Color variation
More variations in a braid can be made by changing the starting positions of the colors. For example, putting one color in the north and east positions and the other color in the west and south positions, then working the same movements, creates a round braid with a different surface design.
Four variations: original 8-strand braid, 12-strand braid (8 dark, 4 light), 16-strand braid (12 dark, 4 light), 8-strand braid with alternate color placement.
Square braid
Changes in the sequence of movement change the shape of the braid. This version uses the same movement as the round/spiral braid for Step 1 and a reverse movement for Step 2.
Cut 4 strands 30" long in each of 2 colors (shown in #2783 Old Gold and #2237 Rose Brown). Set up the disk using 1 dark strand and 1 light strand in each pair, as shown.
- Move the strand on the right of the north pair down to a slot on the right of the south pair, then move the strand on the left of the south pair up to a slot on the left of the north pair (same as Step 1 of the round/spiral braid).
- Move the top strand of the east pair to a slot above the west pair, then move the bottom strand of the west pair to a slot below the east pair (opposite of Step 2 of the round/spiral braid).
After Steps 1 and 2, the north and west pairs and the south and east pairs will be closer together. Reposition the strands to be equally spaced around the disk. Repeat Steps 1 and 2 and reposition the strands for the length of the braid. The braid will have a square shape and a chevron color pattern. Whip the ends of the finished braid and tie the fob as described above.
Finished fob in a square braid with a chevron pattern
Experiment with threads and color placement and see what patterns appear. Happy braiding!
Angela K. Schneider is the project editor for Long Thread Media and is a fan of all the forms of interlacing yarns.