The Winter 2024 issue of PieceWork is filled with many diminutive delights, and Susan Strawn’s article about vintage miniature mittens inspired me to pick up my needles immediately. I had to figure out how to knit a pair of those delightful tiny mittens. I started out using four double-pointed needles—three to hold the stitches, and the fourth to knit with. I switched after the ribbing to three double-pointed needles—two to hold the stitches, and one to knit with for the rest of the mitten and the thumb. I really like Scandinavian knitted snowflake designs, so I incorporated a snowflake into the back of the hand portion. To add visual interest, I added stripes to the palm area.
My miniature mittens were enjoyable to make—and I fear that knitting such tiny treasures might be addictive. I can see them as ornaments, a brooch, handwarmers for a beloved doll or stuffed toy, a decoration for a card or present, or just a conversation piece. Creating them is so much fun that you might find it hard to stop at just one or two.
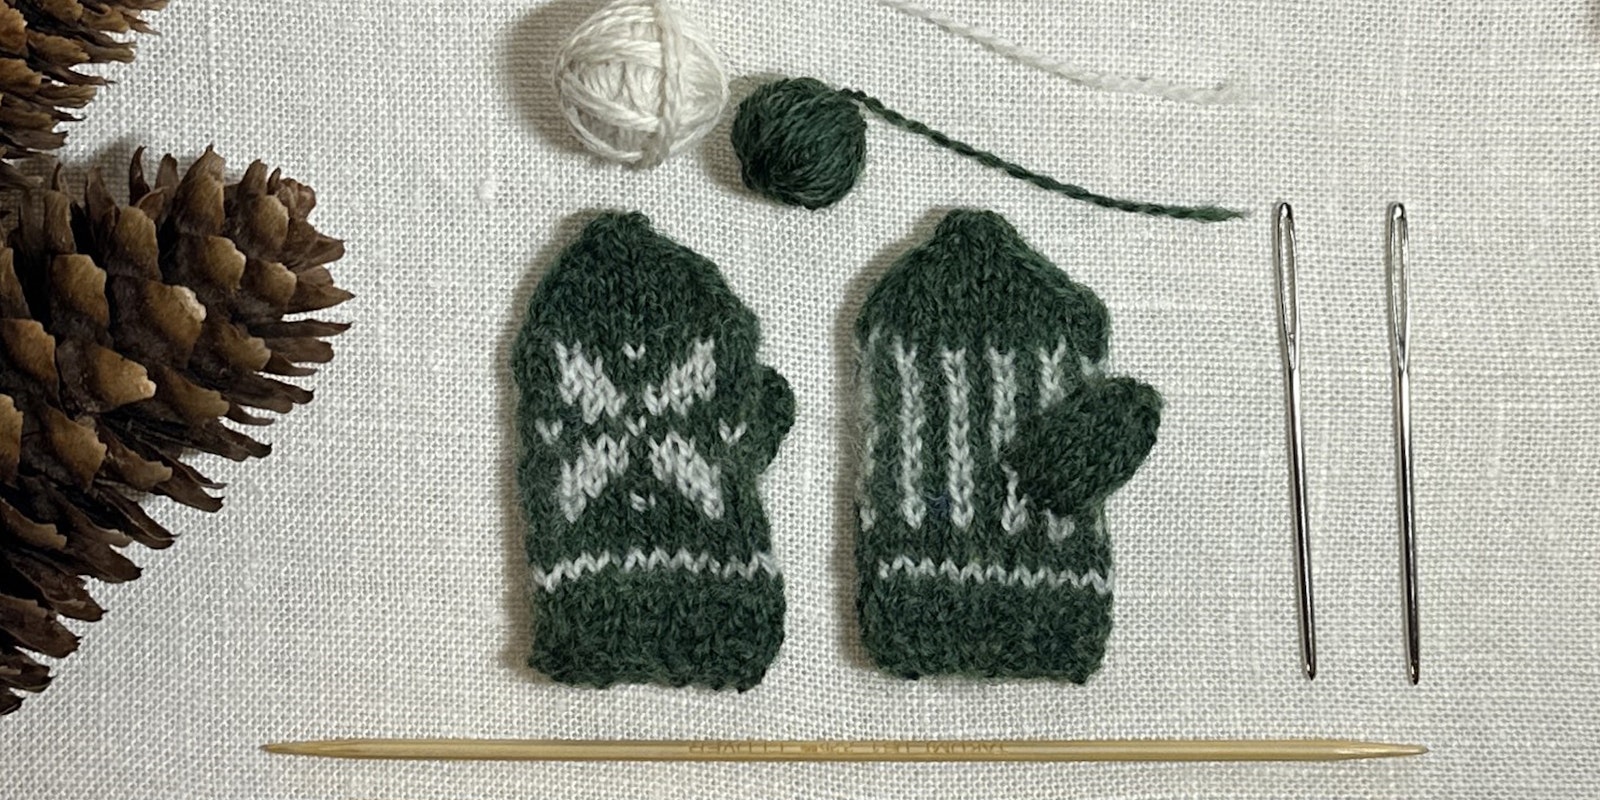
 View of the back of a pair of mittens.
Forest Snowflake Mini Mittens
Materials
- DMC Eco Vita (100% organic wool), 17½ yd (16 m) skein: 1 skein each of main color (MC) #708 green and contrasting color (CC) #001 white
- Smooth waste yarn or thread in a contrasting color and a similar weight
- Needles, set of 5-inch (12.7 cm) double-pointed (dpns) in size 1 (2.25 mm)
- Stitch marker
- Tapestry needle
Gauge: 22 sts and 12½ rows = 1" (2.5 cm)—please note that exact gauge is not important for this pattern.
Finished size: 2" (5 cm) long and 1" (2.5 cm) wide.
Visit pieceworkmagazine.com/abbreviations for terms you don’t know.
Instructions
Using MC, cast on 22 sts. Divide sts evenly among needles, pm, and join to work in the rnd, being careful not to twist sts.
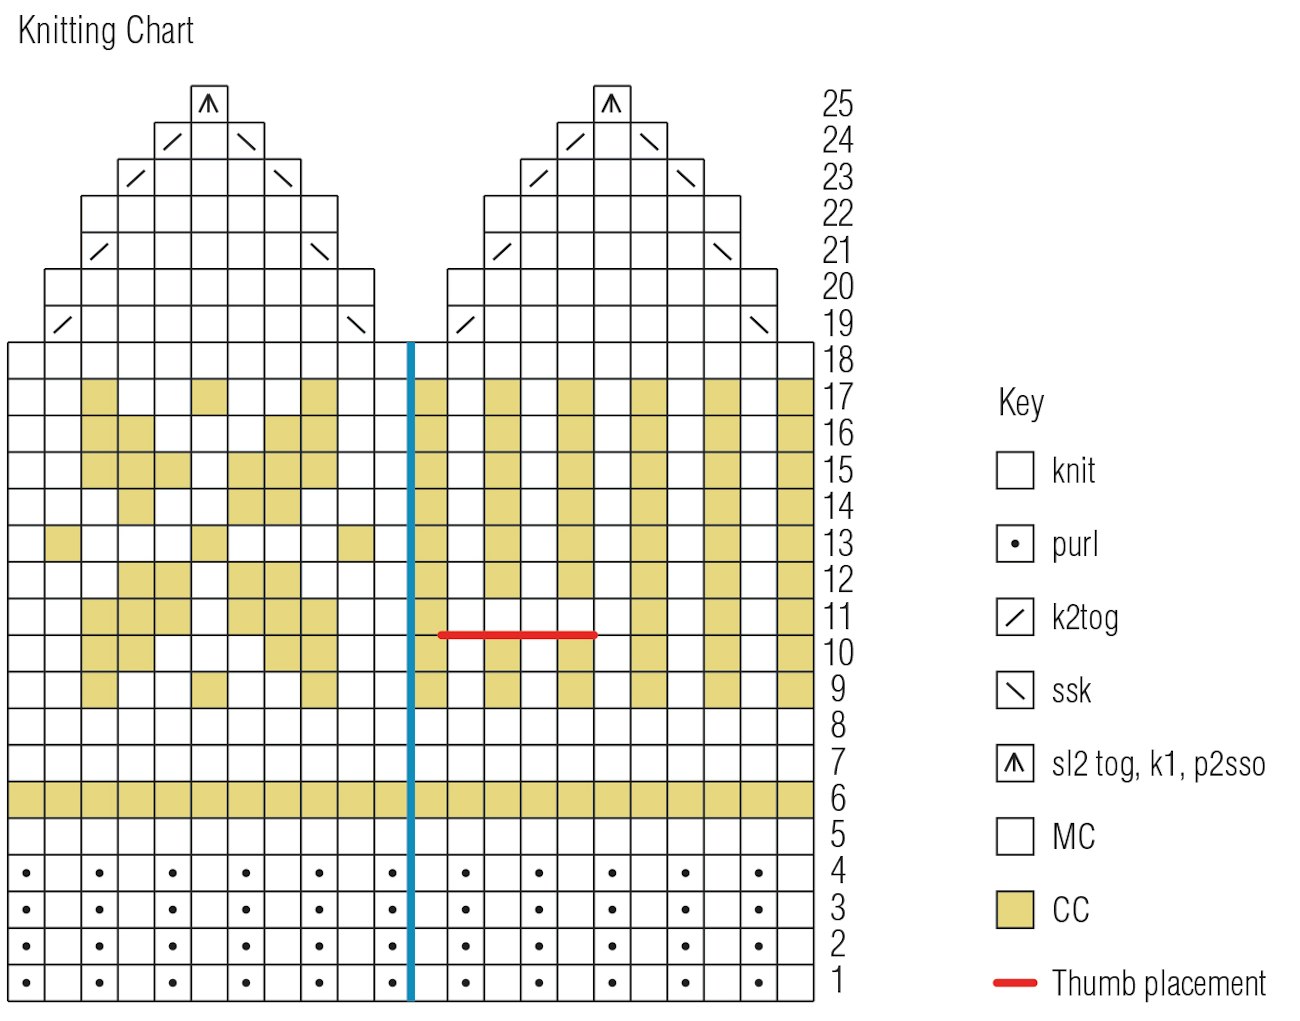
Rnds 1–4: Work in k1, p1 ribbing for 4 rnds.
Rnd 5: Knit 1 rnd.
Join CC.
Rnds 6–10: Continue working, following the chart.
Rnd 11 (thumb set-up rnd): Work the first 6 sts of the rnd following the chart, knit 4 thumb sts using waste yarn, slip waste yarn sts back to right-hand needle, then with mitten yarns, work to end of rnd.
Rnds 12–24: Continue working, following the chart.
Break yarn, leaving a tail. Thread tail onto tapestry needle and run through the remaining live sts. Pull gently to close the hole at the top of the mitten.
Thumb: Carefully remove the waste yarn, exposing 8 sts at the top and bottom of the thumb hole. Place 4 sts from the top and 4 sts from the bottom on 2 needles. Using MC, knit 7 rnds.
Next rnd (dec rnd): K2tog 4 times—4 sts.
Break yarn, leaving a tail. Thread tail onto tapestry needle and run it through the 4 live sts.
Finishing: Weave in ends, using thread end to sew hole at base of thumb.

 The palm and back side of Pat Olski’s Forest Snowflake Mini Mittens each have a different pattern.
Pat Olski is the editor of PieceWork magazine.

