https://pieceworkmagazine.com/cdn-cgi/image/format=auto/https://www.datocms-assets.com/75076/1656658899-fluted-lace-shawl-1.jpg?auto=format&w=900
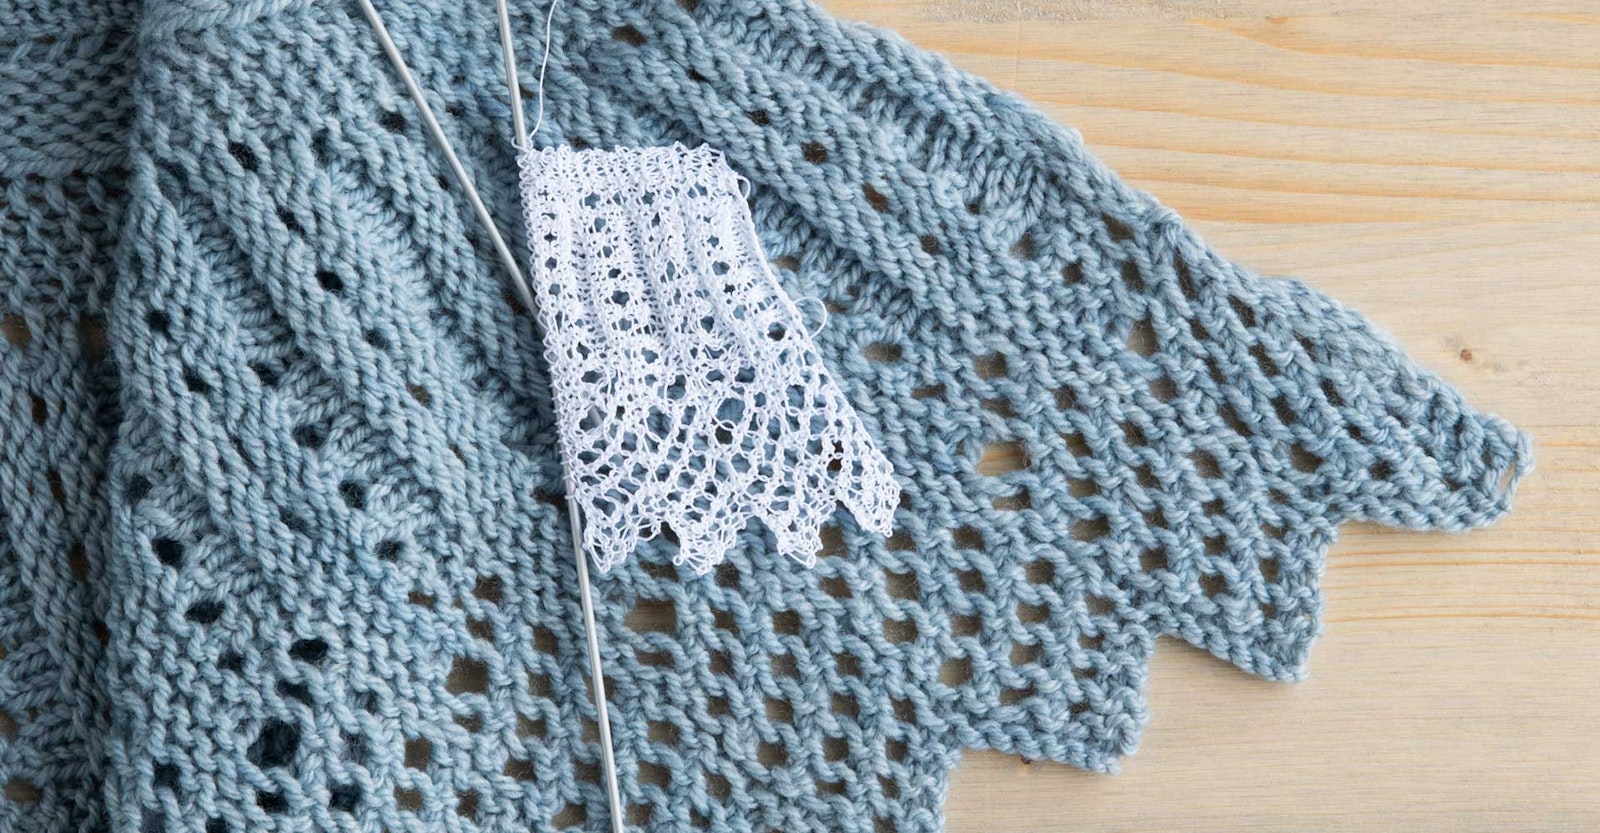
In my ongoing explorations of vintage knitting patterns, I have been investigating how heavier-gauge knitting yarns impact vintage stitch patterns originally shown in very fine, firm yarns. I wanted to try a complicated edging in a heavier, softer yarn to create a dramatic statement.
Knowing that this project would be all about the edging, I needed one that would size up beautifully. When I saw “Knitted Lace, Fluted Design with Eyelets” from the September 1931 issue of Needlecraft Magazine, I knew it would be the perfect candidate for this venture into a DK-weight shawl. This edging is particularly interesting because it incorporates short rows in addition to alternating stockinette and reverse-stockinette sections to produce a more ruffled appearance than the edgings I find in my usual Weldon’s Practical Needlework wanderings.
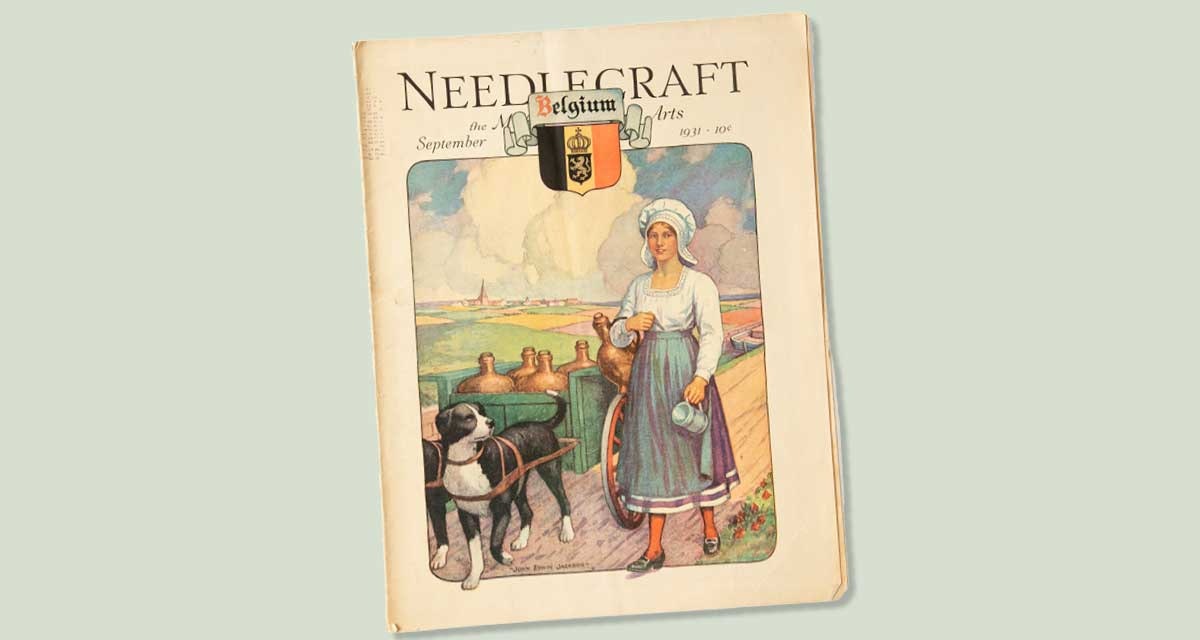
“Knitted Lace, Fluted Design with Eyelets” was published in the September 1931 issue of Needlecraft Magazine.
Lace Edgings & Traditional Shawl Styles
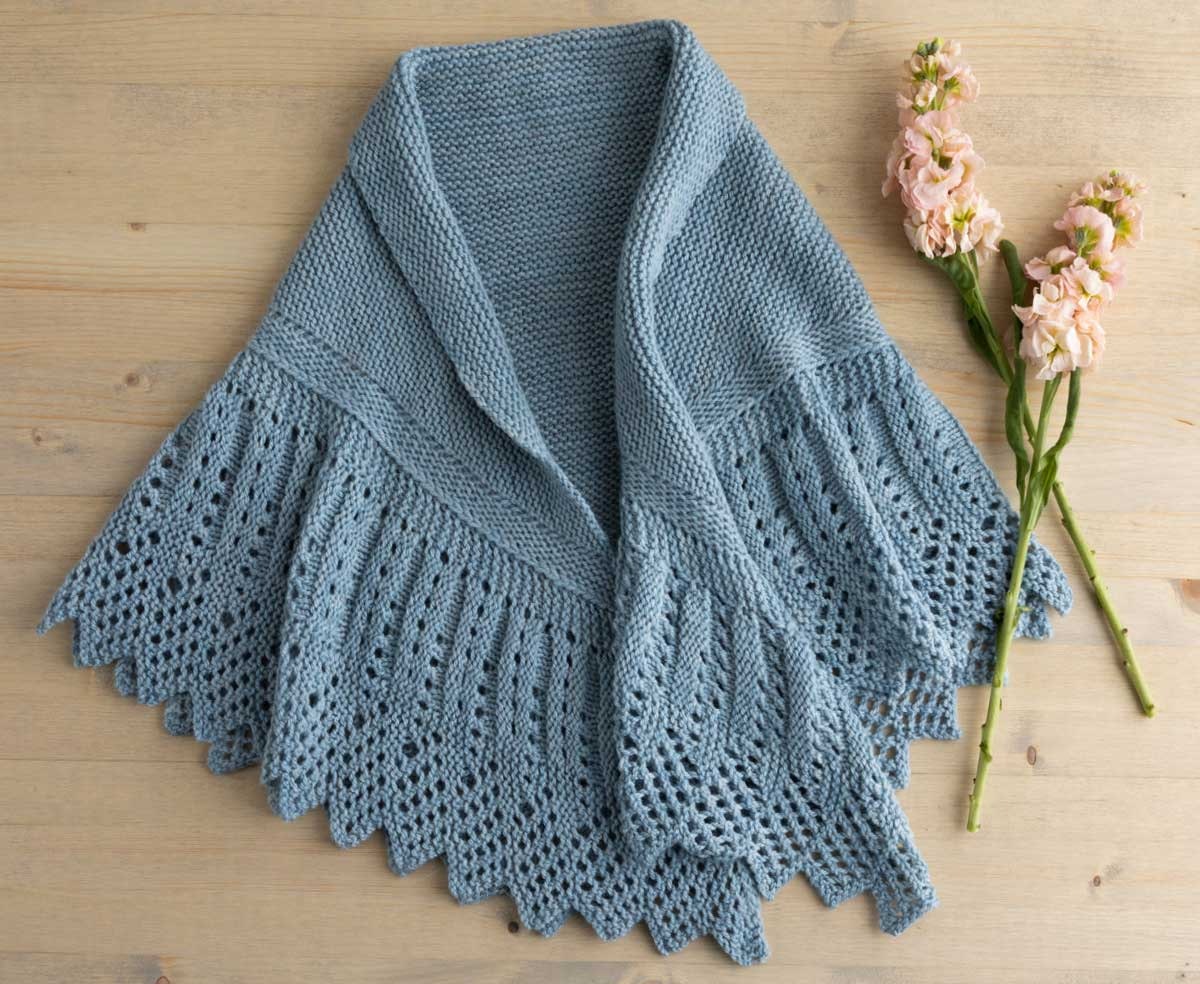
A traditional Shetland shawl commonly has three sections: a central section surrounded by a border and framed by an outer edging. However, knitters have long adjusted this traditional recipe to simplify shawls made for daily use or to accommodate a fancy element as I have here. I skipped the border section for this design but still created a very traditional piece with a garter-stitch center and attached lace edge.
In my previous Shetland-style shawls, I felt that the center garter section could be improved by going down one or two needle sizes to make the garter fabric align better with the border or edging, so this shawl uses a smaller needle for the garter section and a larger one for the edging.
[PAYWALL]
Easing the border design around the point of the center triangle required some additional thought. Typically, a single repeat of the lace-edging pattern is centered on the point of the shawl. In finer-gauge yarns, simply skipping half of the decrease stitches that connect the lace edge to the body provides enough ease to do the trick. However, in an almost-worsted-weight yarn, this method left visible gaps in my prototype, and the edging curved to one side and would not block straight.
To eliminate the gaps, I used three special repeats of the edging centered on the point in a pattern using the German Short Row Double Stitch technique. The main edging pattern uses its short-rows in a surprising and delightful way; without wrapping or any other attempt to close the gaps created by short-rows, the pattern creates intentional eyelets that become part of the lace pattern.
Although this large shawl makes a dramatic visual statement, it is only moderately challenging to knit. Polwarth Silk, a lovely, plump DK-weight yarn from Lisa Souza Dyeworks, is the perfect choice for a cozy, drapey shawl.
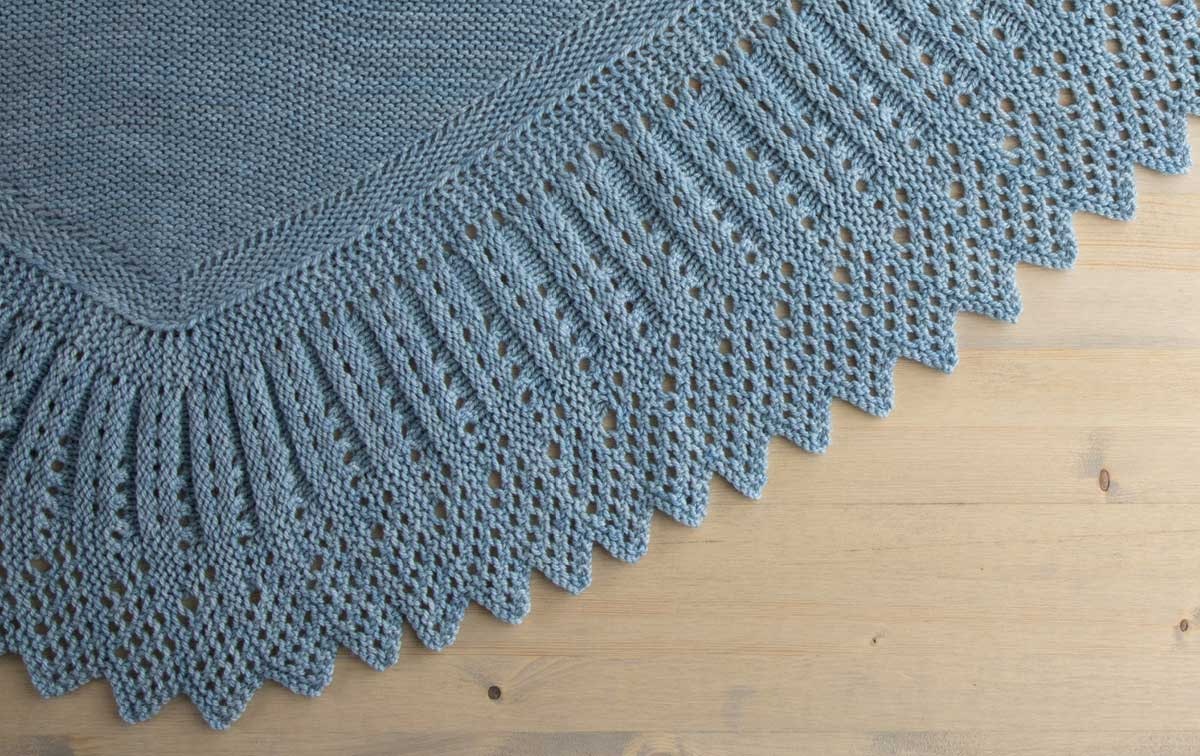
Carolyn’s shawl begins with a traditional garter center and finishes with an applied vintage-lace edging.
Carolyn Wyborny’s family was traditional, in that all the women did needlework, and she’s been crocheting, knitting, and tatting since she was very young. Carolyn works as a software engineer for a large high-tech company but spends most of her free time knitting and coding up knit and crochet designs. She lives west of Portland, Oregon, with her husband, children, and several pets.
This project was published in the Summer 2020 issue of PieceWork.
Materials
- Lisa Souza Dyeworks Polwarth Silk, 85% polwarth wool/15% tussah silk, DK weight, 400 yard (366 m)/4.8 oz (136 gram) skein, 2 skeins of Blue Steel
- Needles, size 7 (4.5 mm) and 9 (5.5 mm) circ 32 inches (80 cm) or longer to accommodate the number of sts
- Spare circ 32 inches (80 cm) in same size or smaller than main needle (if not using interchangeable needles)
- Stitch markers
- Tapestry needle
Finished size: 58 inches (147.3 cm) wide and 25 inches (63.5 cm) high in center, after blocking
Gauge: 18 sts and 38 rows = 4 inches (10.2 cm) in garter st using smaller needle, after blocking. Achieving the exact gauge is not critical for this project, but a different gauge will affect the drape and finished size.
Visit pieceworkmagazine.com/abbreviations/ for terms you don’t know.
Special Stitches and Techniques
German Short Row Double Stitch
You can find several videos and online tutorials for this technique on the internet.
Slip 1 st purlwise with yarn in front, bring the yarn up in front and over the right needle to the back, pulling firmly so that both legs of the slipped st are drawn up onto the top of the right needle, creating a double stitch. Keeping tension on the yarn to preserve the double stitch, continue in pattern. When you encounter the double stitch on the following row, work both its legs together as k2tog.
Icelandic Bind-Off
K1, *return stitch on right needle to left needle; insert right needle purlwise into first stitch on left needle and knitwise into second stitch, draw front loop of second stitch through first stitch and knit it, then drop both first and second sts from left needle. Rep from * until 1 stitch remains, then fasten off last stitch.
Special Notes
I recommend interchangeable circular needles for this project because the center section can be left on the cable portion of the needle until the final bind-off.
In the transition section, the k1f&b increase creates a “pip” at the base of the second stitch. In order for the “pip” stitch to appear as the second stitch in from the edge, the increase at the beginning of a row is worked as k1f&b, and the increase at the end of a row is worked as k1f&b, k1.
Because the body of the shawl is worked with a smaller needle than the edging, the live shawl stitches can become stretched when joined to the edging stitches. The wool/silk blend used here can accommodate the stress, but if you substitute a less firmly spun wool yarn, you may want to work the final row of the body’s transition section using the larger needle to ease the transition and avoid breakage.
You may find it easier to work the final bind-off using the smaller needle.
Instructions
Body
Garter triangle
Make a slipknot and place it on the smaller needle.
Next row: Yo, k to end—1 st inc’d.
Rep the last row until there are 151 sts on the needle—75 yarnover edge loops along each side. Do not break the yarn. Place the sts on the spare circ needle or remove the tips of the interchangeable needle and leave the sts on the cable portion.
Transition
Note: Stitches from the edge of the garter triangle are simply placed on the needle, not picked up and knit.
Using the smaller needle and beginning where the working yarn is still attached, insert the needle tip from front to back into each of the first 75 yarnover edge loops along one side, place marker (pm), pick up 1 st from base of CO st from front to back, pm, then insert needle tip from front to back into each of the last 75 yarnover edge loops—151 sts mounted “backwards,” each with its leading leg behind the needle.
Next row: Slide sts to the end of the needle where the yarn is attached and use the working yarn to k all sts normally through their front loops to twist them—151 sts.
Set-Up Row 1: K1f&b, knit to 1 st before first m, k1f&b, sl m, k1 (center st), sl m, k1f&b, knit to last 2 sts, k1f&b, k1 (see Special Notes)—4 sts inc’d.
Set-Up Row 2: K1f&b, knit to last 2 sts, k1f&b, k1—2 sts inc’d.
Rep the last 2 rows 3 more times, using the larger needle for the last row if desired (see Special Notes)—175 sts.
Hold the piece so the edge with the working yarn is on the right, and move the stitch markers as follows by easing the markers underneath the sts into their new positions: move the first marker 2 sts to the right, and the second marker 3 sts to the left—6 sts between markers; 85 sts before first marker and 84 sts after second marker.
Edging
If you have not already done so, change to the larger needle as the working needle now.
Use the cable or knitted method and working yarn to CO 29 sts onto the left needle.
Next row (WS): K28, p2tog (last new st together with 1 body st after it), turn work—29 edging sts; 174 body sts with 84 sts on each side of 6 marked sts in center.
First side
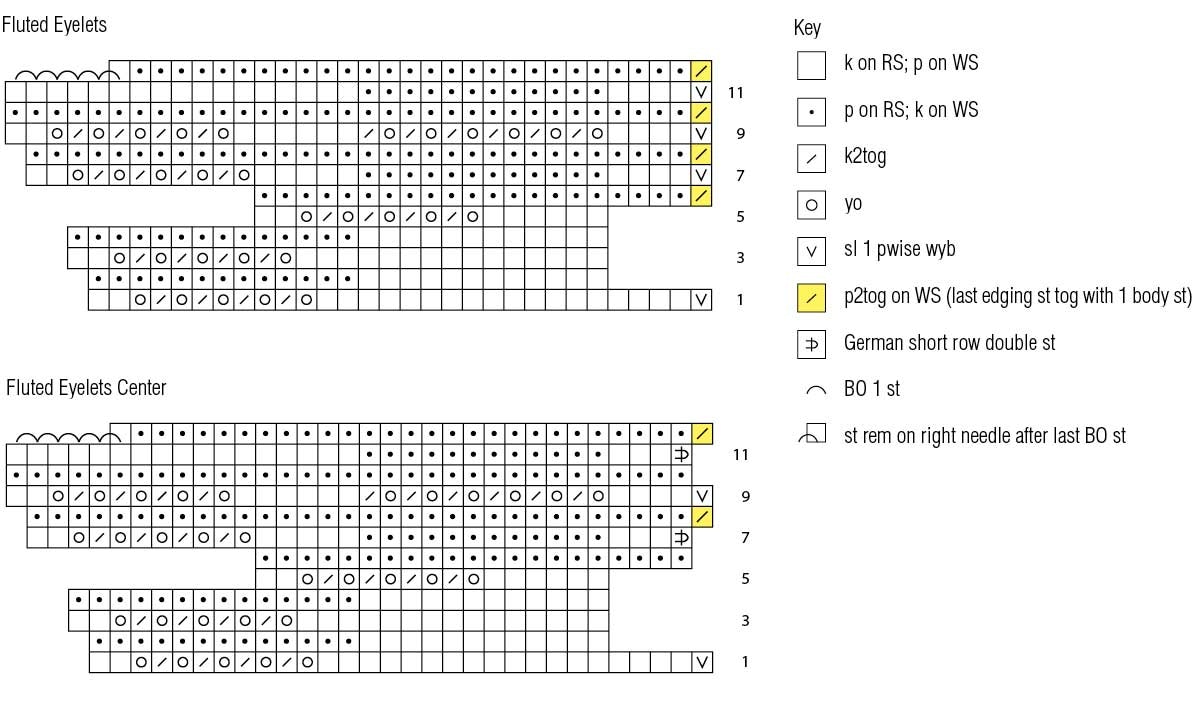
Work Rows 1–12 of Fluted Eyelets chart 21 times, joining 1 edging st to 1 body st at the end of WS Rows 6, 8, 10, and 12 as shown—90 body sts and 29 edging sts rem; all body sts before first marker have been joined.
Center
Work Rows 1–12 of Fluted Eyelets Center chart 3 times (see Special Stitches and Techniques for German Short Row Double Stitch), joining 1 edging st to 1 body st at the end of WS Rows 8 and 12 as shown—84 body sts and 29 edging sts rem; all center section sts have been joined.
Second side
Work Rows 1–12 of Fluted Eyelets chart 21 times as for first side—29 edging sts rem; all body sts have been joined.
With WS still facing, pick up and knit about 1 st for each garter ridge along the edge of the transition section, knit across 151 held sts from spare needle or cable (place a smaller needle tip on the cable before working sts), pick up and knit about 1 st for each garter ridge along edge of transition section, then pick up and knit 28 sts from CO row of edging. Note: This pick-up is to neaten the top edge; it is not critical to have exactly the same number of stitches picked up on each side.
BO all sts using the Icelandic Bind-Off method (see Special Stitches and Techniques).
Finishing
Wet-block gently into a wide triangle shape, pulling out the points of the edging, but without pulling too hard in order to preserve the ruffled effect of the fluting. Weave in ends.


