I find the holidays to be a time of reflection on the year that has passed, and a time to look forward to a fresh start with the turning of the calendar. For many years, my holiday gift from a beloved friend has been a new craft to learn, which is how I picked up tatting. Current subscribers to PieceWork magazine can log in below to access the instructions for this Tatted Wreath, or see PieceWork November/December 2009. As we say farewell to the year that was and hello to the coming year, I hope you enjoy trying something new!
~Katrina
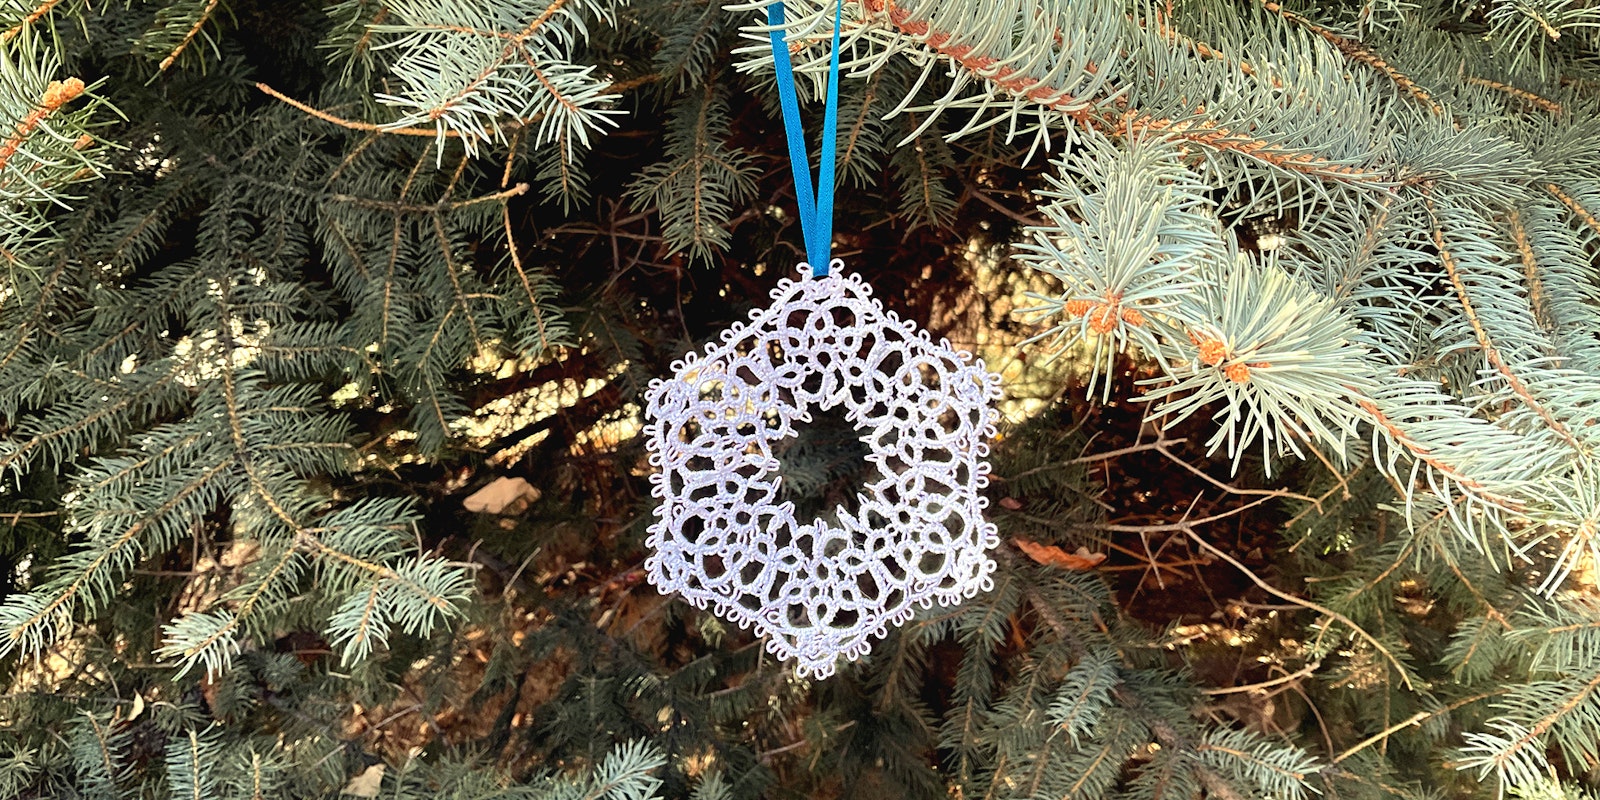
This particular tatting pattern is a part of our “Trimmings” column that features vintage patterns reprinted in their original format. Each of these little patterns that are often no longer available offer a taste of a technique that can act as a doorway into a larger world. This one is slightly different from modern construction as the center round is tatted first, with the inner and outer rounds added to it. For my version, I used Lizbeth 20 thread in white and the finished wreath measures 3" x 4" (7.62 cm x 10.16 cm).
 With just a few items, you can add tatting to your crafting tool box.
Instructions for a Tatted Holiday Wreath
Jane Moody modified the pattern for the “Tatted Lace for Centerpiece” to create this ornament, using size 20 thread in the PieceWork November/December 2009 issue.
Use Clark’s O. N. T. Crochet & Tatting Cotton No. 40.
[PAYWALL]
Knot 2 shuttles together, and start with one for a ring. * tr. 4 d kn, 1 p, (3 d kn, 1 p) twice. End with 4 d kn and close ring. This is the ring used for the whole center design, and the description will not be repeated.
Take up the other shuttle and turn the work, hold it between thumb and forefinger, pass the second shuttle thread over the remaining three fingers, winding it around little finger three or four times to hold it firm. On this thread with first shuttle work a bow of 3 d kn, 1 p, repeat twice and make 3 d kn. Turn work and make a ring. Join the first p with the last p of last ring made. Repeat from *.
This repeated three more times will accomplish the first scallop of the center design. Now start for another bow from first * over again and join the first and second p of next bow with the second and third p of last bow. Then finish first bow as usual, and continue to the desired length of lace.
Inner Edge of the Lace—Work with two shuttles, and fasten them on first p of first ring. Begin with a bow of two shuttles. 5 d kn, 1 p, 5 d kn. This will be the bow for the inner edge and the description will not be repeated.
Turn the work and make a ring. * 3 d kn, join in top of p of next ring. Repeat from * four times and close ring with 3 d kn. Turn the work and make a bow with 2 shuttles. Fasten in p of next ring, make another bow and fasten in first p of next ring. Repeat from first * continuously until end of lace.
Lower Scalloped Edge of Lace—Fasten 2 shuttles in the p left on first bow. * 2 d kn, 1 p, 2 d kn. Join in the second p of next bow. 2 d kn, 1 p, 2 d kn, 1 p, 2 d kn. Turn work and make a ring. 2 d kn, join in last p of next bow of previous row, 2 d kn, 1 p, 2 d kn, 1 p, 2 d kn, turn work and take up second shuttle for a bow of 2 d kn, 1 p, 2 d kn, 1 p, 2 d kn, 1 p, 2 d kn. Turn work for a ring, 2 d kn, join in third p of previously made ring, 2 d kn, join in second p of same ring, 2 d kn, join in first p of next bow of first row, 2 d kn. Close ring.
Turn work and make a bow of 3 times 2 d kn alternately with 2 p. Join in next p of same bow as joined before. 3 d kn, 1 p, 3 d kn. Join in first p of following and last bow of center design. 2 d kn, 1 p, 2 d kn, 1 p, 2 d kn. Join in last p of following bow. Now repeat from * to end of row.
 Happy Holidays!
Katrina King is the editorial assistant for Long Thread Media and a continuing student of craft and life.