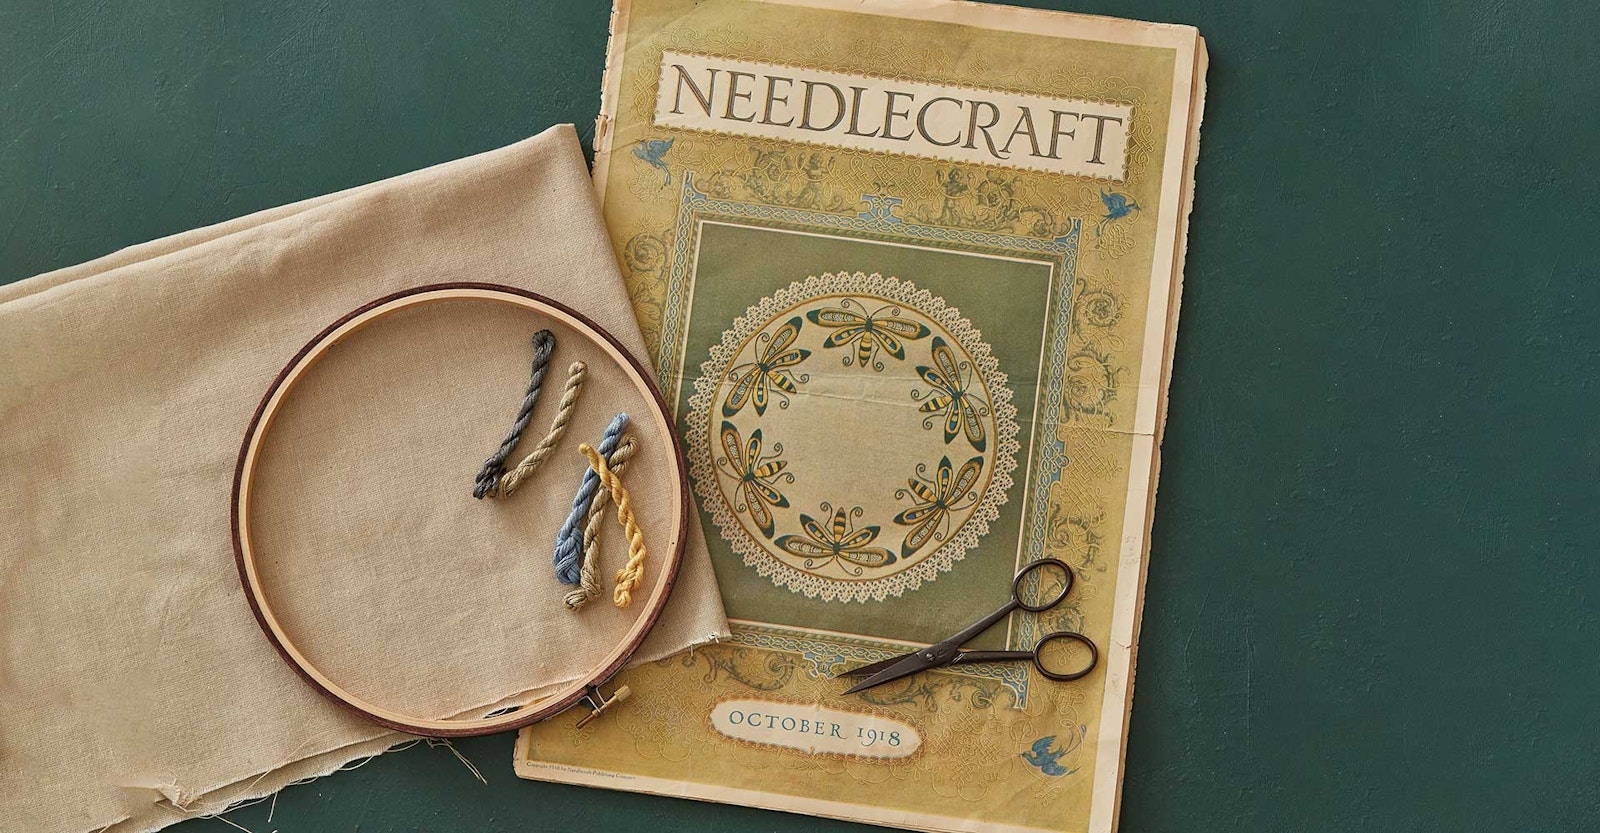
Below are the instructions for the lovely butterfly centerpiece shown on the cover of the October 1918 issue of Needlecraft. They are printed here exactly as they appeared in that issue. In smaller type at the end of the first column are the options for the pattern, fabric, and thread that Needlecraft offered: “Perforated stamping-pattern, 25 cents. Transfer-pattern, 15 cents. Stamped on 24-inch tan linen, 75 cents. Floss to embroider, $1.30. Crochet-thread for edge, 30 cents extra.” —Editor
The butterfly is a popular motif, always; and probably it has never been used to better advantage than in the decoration of the centerpiece illustrated. The colors are well chosen and effectively combined; although rich in appearance there is nothing about the work to hint of gaudiness—it is in the best of taste, and the centerpiece may well find a place in the library, living-room or hall of any attractive home.
The butterfly measures nine and one-half inches from tip to tip of upper wings, and reminds one of the rare specimens sometimes found in collections, but never seen outside them unless in some tropical land.
The legs and antennæ are outlined with black, in close, heavy stitch; body and wings are also outlined with black, but this is not done until the embroidery is completed. The upper part of the body is done solidly with black, as are the tips of the wings. Beginning with the lower part of the body, work the tip in satin-stitch with the darkest shade of golden brown; make the next bar of black, the next with a medium shade of golden brown, the next of black, next of yellow, next with medium brown and finish with the lightest shade of brown. Work the edge of the lower wings, between the lines that are to be outlined with black, with medium brown, taking stitches of this up into the black of the tips; inside the second line fill in the tip with dark blue, leave a space which is filled with scattered French knots of yellow, make a narrow band of blue across the wing—outlined on both sides with black, as are all the bars save those across the body; leave a space to be filled with the knots, as before, and finish with blue. The upper wings have the space between the lines, or the edge, worked with the darkest shade of brown, taking stitches up into the black tip, as before; two narrow bars of yellow, curved, cross the wing at even distances apart, and the spaces between these and the portion joining the body — also of yellow — are filled in with scattered knots of blue. At the base of the antennæ two tiny circles are outlined with yellow and filled in with black. As a whole, the butterfly seems very real indeed, and is certainly a lovely creation of the needle.
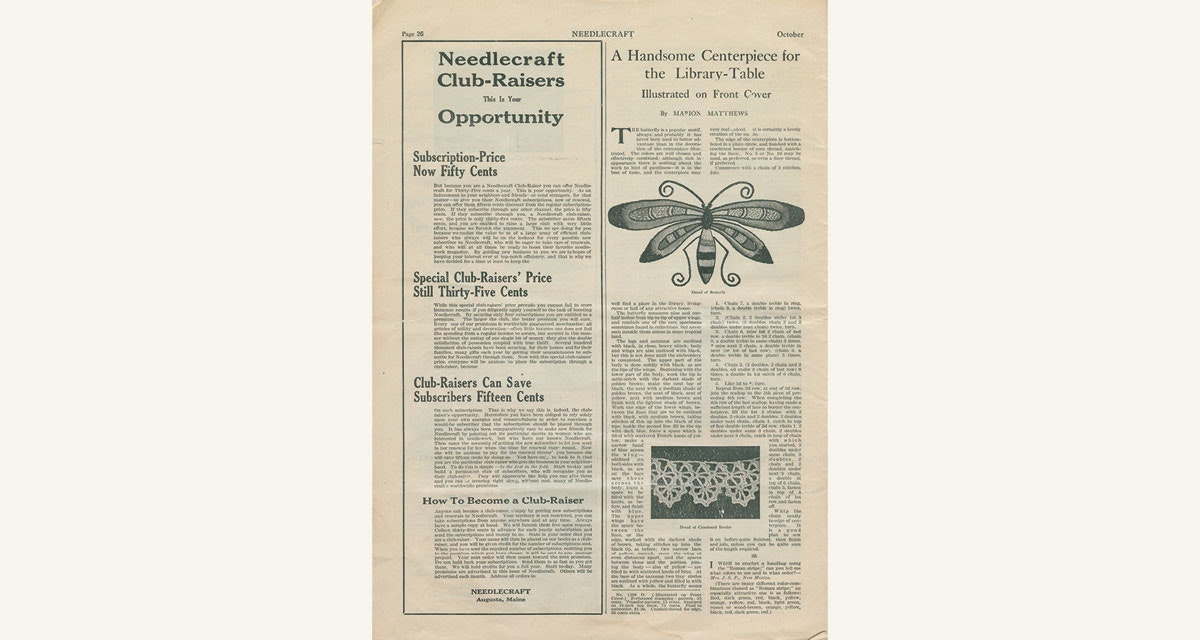
The page from the October 1918 issue of Needlecraft with the instructions for embroidering the butterflies and crocheting the edging for the centerpiece shown on the cover of the issue. The magazine offered the pattern in a variety of ways; they are outlined at the bottom of the first column of instructions. Collection of Susan Strawn.
The edge of the centerpiece is buttonholed in a plain circle, and finished with a crocheted border of ecru thread, matching the linen. No. 5 or No. 10 may be used, as preferred, or even a finer thread, if preferred.
Commence with a chain of 3 stitches, join.
1. Chain 7, a double treble in ring, (chain 3, a double treble in ring) twice, turn.
2. (Chain 2, 2 doubles under lst 3 chain) twice, (2 doubles, chain 2 and 2 doubles under next chain) twice, turn.
3. Chain 6, miss 1st 2 chain of last row, a double treble in 2d 2 chain, (chain 3, a double treble in same chain) 3 times, * miss next 2 chain, a double treble in next (or 1st of last row), (chain 3, a double treble in same place) 5 times, turn.
4. Chain 2, (2 doubles, 2 chain and 2 doubles, all under 3 chain of last row) 8 times, a double in 1st stitch of 6 chain, turn.
5. Like 3d to *; turn.
Repeat from 2d row; at end of 3d row, join the scallop to the 5th picot of preceding 4th row. When completing the 4th row of the last scallop, having made a sufficient length of lace to border the centerpiece, fill the 1st 5 chains with 2 doubles, 2 chain and 2 doubles, 2 doubles under next chain, chain 1, catch in top of last double treble of 3d row, chain 1, 2 doubles under same 3 chain, 2 doubles under next 3 chain, catch in loop of chain with which you started, 2 doubles under same chain, 2 doubles, 2 chain and 2 doubles under next 3 chain, a double in top of 6 chain, chain 5, fasten in top of 4 chain of 1st row, and fasten off. Whip the chain neatly to edge of centerpiece. It is a good plan to sew it on before quite finished, then finish and join, unless you can be quite sure of the length required.
This project was originally published in the Winter 2018 issue of PieceWork.