From 1700 until 1860, East Dorset, England, was the center of the “buttony” trade (the making of handmade buttons), and buttons were sold throughout Europe and the Americas. The earliest buttons used a disk of horn from the Dorset Horn sheep as a base. These High Tops or Clothwork buttons were used for women’s dresses; other styles were Singleton, Honeycomb, Old Dorset, Bird’s Eye, Basket, Carolus, Yarrell, and Crosswheel. With the invention of the Ashton Button Machine, first shown at the Great Exhibition of the Works of Industry of All Nations in 1851, the handmade buttonmaking industry in East Dorset declined rapidly.
Materials
- Presencia Finca Perle Cotton, 100% Egyptian cotton thread, size 8, 77 yards (70 m)/10 g (.35 oz) ball, 1 ball of #3000 Ecru
- John James Needle, tapestry size 20
- Ring, brass or plastic, ¾ inch (1.9 cm) in diameter
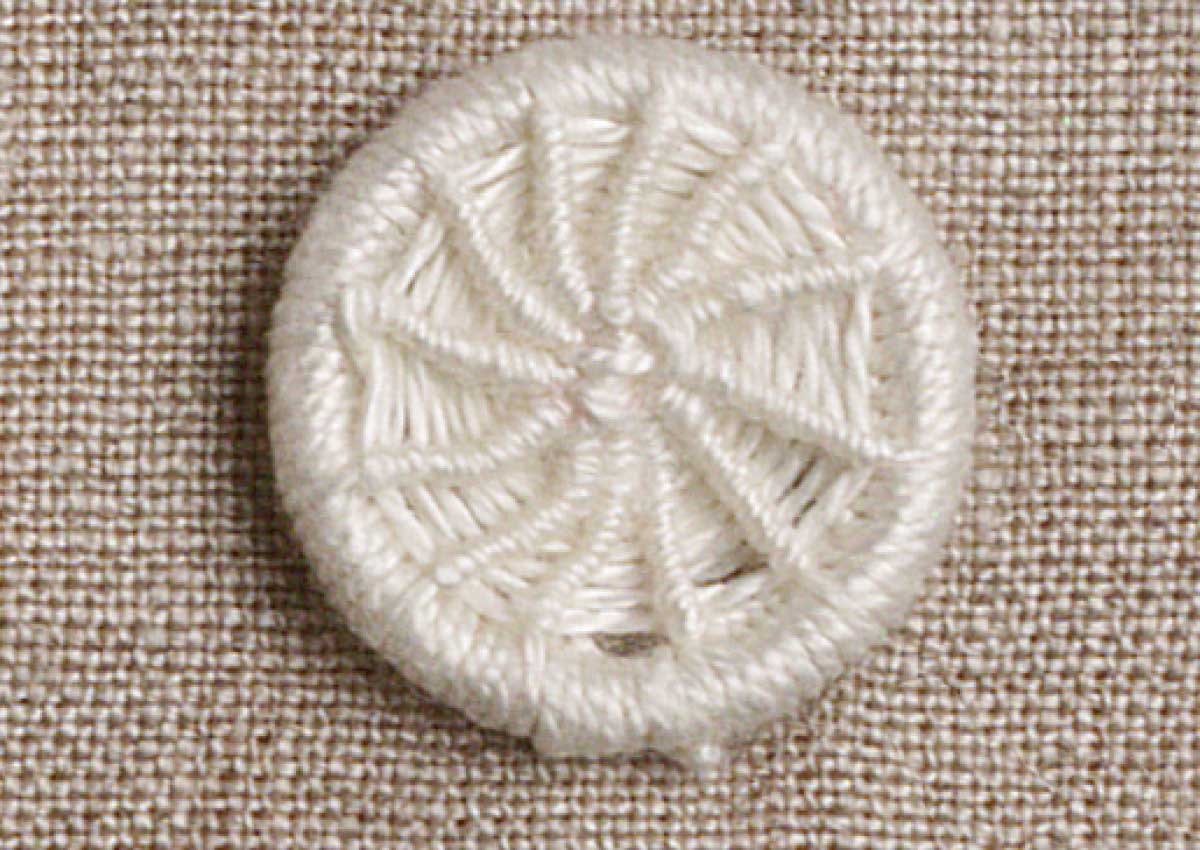
A completed Dorset crosswheel button.
Instructions
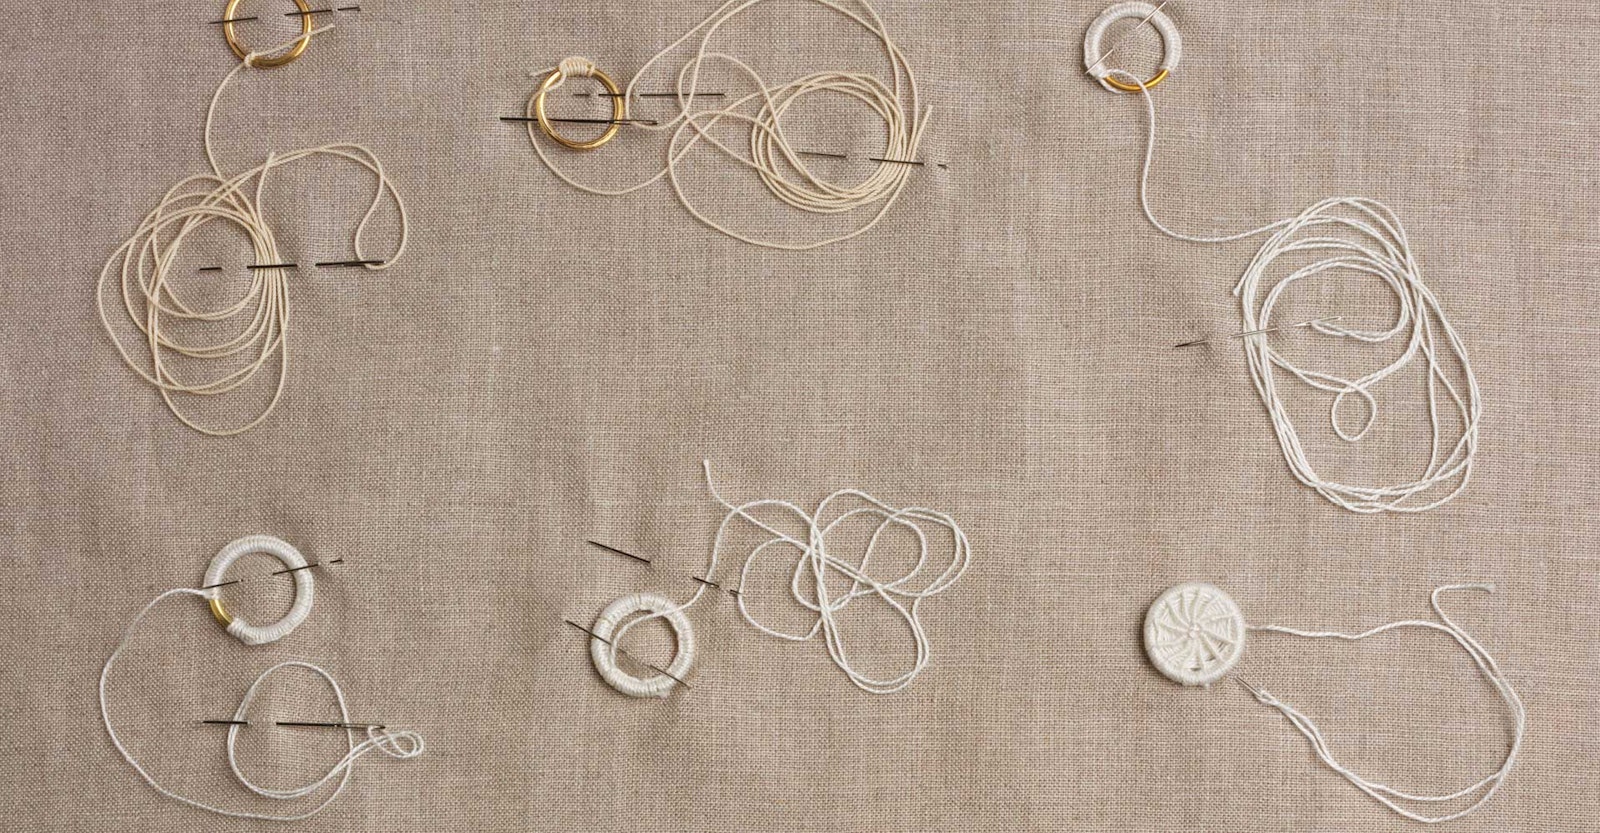
Notes: A Dorset crosswheel button is created in four stages: casting, completely covering the ring with -closely placed buttonhole stitches; slicking, turning all of the ridges of the buttonhole stitches to the ring’s inner edge; laying, evenly laying the thread across and around the outer edge of the ring, resulting in spokes radiating from the central hub; and rounding, weaving the thread around each spoke, creating a spider-web appearance similar to the spider-web stitch in embroidery.
Use 1 strand of thread 52 inches (132.1 cm) long (this may seem like a lot of thread, and it may become cumbersome, but it is difficult to add more thread in the middle of the project). Lay a 1-inch (2.5-cm) tail to the right, make 1 buttonhole stitch and pull taut to secure the thread to the ring.
Casting: Holding the tail against the ring, make buttonhole stitches over it for about ½ inch (1 cm). Continue around the ring until it is covered completely but not overlapping. Clip remaining tail thread close to the buttonhole stitches.
Slicking: In small increments, turn the ridges of the buttonhole stitches to the inside edge of the ring with your index finger and thumb, leaving the outer edge smooth.
Laying: Keep a tight, even pressure on the thread in order to keep the spokes in place. The number of spokes is determined by the size of the ring. For this button, lay 6 spokes, evenly spaced, across and around the outer edge of the ring, resulting in 12 double (front and back) spokes, radiating from the central hub.
Rounding: Make a lock stitch (form a loop, twist it over so it looks backward, and run the long thread through the loop, and pull the thread taut) through the center of the ring, bringing the spokes together evenly. Proceeding counterclockwise, weave around the spokes by bringing the needle up on the left side of a double spoke and down on the right. Advance to the next unit of spokes and repeat the same procedure. Take care to adjust the threads to make them as uniformly spaced as possible. Continue until the button is completely filled.
Take the thread to the center back and make another knot with the reverse loop. Pull it taut but not so taut as to misalign the button threads. Leave the remaining thread tail; use this thread to sew the button to your project.
Allyne Holland authored of several books, including A Treasury of Smocking Designs (Dover, 1985).